User login
Minimally invasive cesarean: Improving an innovative technique
- A simplified abdominal incision makes the traditional extensive dissection associated with the Pfannenstiel incision unnecessary.
- A soft, self-retaining abdominal retractor offers increased exposure, atraumatic retraction, incision protection, and adjustable height while facilitating delivery of the fetal head by creating a rigid border around the abdominal incision.
- Bladder-flap omission has been associated with reduced operative time and incision-delivery interval, decreased blood loss, and less need for postoperative analgesics.
Is the extensive dissection of the Pfannenstiel incision necessary in cesarean delivery? Is bladder dissection essential? Must the visceral and parietal peritoneum be closed?
The success of our minimally invasive cesarean technique suggests the answer is “no.”
The approach described here features a short operative time; minimal instrumentation; reduced surgical dissection; decreased postoperative pain; and reduced risk of blood loss, infection, and wound complications. It is easily learned and cost-effective, with a brief postoperative recovery period.
Among the updates made from the technique’s initial publication in the mid-1990s1,2:
- addition of routine perioperative oxygen (80%), to reduce the risk of surgical wound infection (see “Perioperative considerations”)
- regular use of forced warm air covers applied to the anterior skin surface, to help patients maintain normothermia
- addition of a soft, self-retaining abdominal retractor—which creates an atraumatic circle of exposure up to a calculated 177 cm2 for a 15-cm incision (versus 113 cm2 calculated for traditional retraction)
- vertical, rather than lateral, digital extension of the initial transverse uterine incision
- identification of a subgroup in whom peritoneal closure is strongly recommended
- new data on the procedure’s effectiveness.3
Routinely use prophylactic antibiotics. Several recent studies have concluded that perioperative antibiotics reduce the incidence of endometritis and wound infection following elective and nonelective cesarean section.37 Administer ampicillin or a first-generation cephalosporin at umbilical cord clamping. For patients allergic to penicillin and cephalosporins, choose an alternative, such as clindamycin.
Give antacids 30 minutes before anesthesia (general or regional) to prevent pneumonitis from inhalation of gastric contents.
Clip pubic hair, rather than shave, to reduce the risk of wound infection.
Insert a Foley catheter, empty the bladder, and keep the catheter in place.
Position the patient in a 10°left lateral tilt, to avoid hypotension associated with aortocaval occlusion.
Routinely administer supplemental perioperative oxygen (80%), with either general or regional anesthesia; this activates alveolar immune defenses and halves the risk of surgical wound infections.
Neutrophil oxidative killing and phagocytosis—the most important defenses against surgical pathogens—depend on the partial pressure of oxygen in contaminated tissue. Giving supplemental oxygen during and for the first 2 hours after the procedure (by mask) is a practical, inexpensive way to reduce the incidence of surgical wound infection.38,39
Using 80% oxygen during and, for a short period, after surgery does not cause pulmonary toxicity such as atelectasis or impaired pulmonary function.40
Ensure normal body heat during and after cesarean to reduce the risk of postoperative surgical infection.40,41 Forced warm air covers applied to the anterior skin surface are the most effective way for warming surgical patients.9 IV fluid warming, though appropriate when large volumes are to be administered, is unnecessary for smaller operations.41
Modified abdominal incision reduces dissection
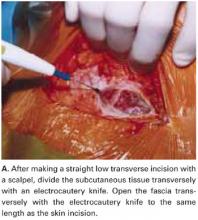
Make a straight low transverse incision with a scalpel, at a point approximately 3 to 4 cm above the symphysis pubis (FIGURE 1A).
The length of the incision is individualized (13 to 15 cm), though difficult fetal extraction is more likely if the abdominal incision is less than 15 cm.4,5
Divide the subcutaneous tissue transversely with an electrocautery knife. In a cutting and coagulation blend mode, the knife divides the fat while achieving hemostasis. To improve hemostasis, coagulate the blood vessels that cross the subcutaneous fat layer in a brushing manner before dividing them. To prevent unnecessary dead space, avoid filleting the fat and separating adherent subcutaneous fat from the anterior rectus fascia beyond what is needed to expose the fascia.
Open the fascia transversely with the electrocautery knife to the same length as the skin incision. Coagulate the blood vessels that cross the fascia before dividing them. Identify the median raphe by pulling up the superior edge of the abdominal incision.
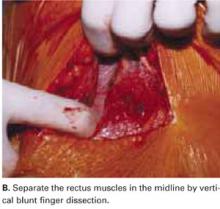
Separate the rectus muscles in the midline by vertical blunt finger dissection (FIGURE 1B). If digital dissection is inefficient due to a dense, thick, or scarred median raphe, use an electrocautery knife, a scalpel, or scissors.
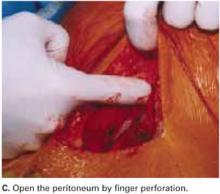
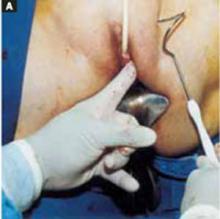
Open the peritoneum. This is facilitated by upward traction and elevation of the superior edge of the abdominal incision that lifts the peritoneum, allowing easy digital perforation using the index or middle finger (FIGURE 1C).
If this maneuver is not feasible, open the peritoneum in the traditional fashion.
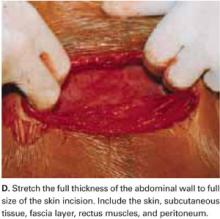
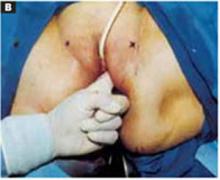
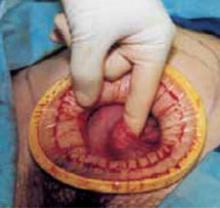
Stretch the full thickness of the abdominal wall to full size of the skin incision, using 1 or 2 fingers of each hand (FIGURE 1D). Incorporate the skin, subcutaneous tissue, fascia layer, rectus muscles, and peritoneum. An assistant’s hands may be required. When needed, extend the peritoneal opening transversely on either side, to the midline and away from the bladder.
Digitally stretching the full-thickness abdominal incision is easily achieved due to the mechanical stretching of the anterior abdominal wall, edema, and increased vascularization that occur during pregnancy.
FIGURE 1A Create a modified abdominal incision
FIGURE 1B Create a modified abdominal incision
FIGURE 1C Create a modified abdominal incision
FIGURE 1D Create a modified abdominal incision
Retractor facilitates exposure
Our positive experience with the soft, self-retaining abdominal retractor for minilaparotomy and laparotomy6-8 compelled us to incorporate its use for cesarean 3 years ago.
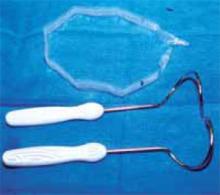
The device consists of a flexible plastic inner ring and a firmer outer ring connected by a soft plastic sleeve. We use the large size of either of the 2 models currently available: the Mobius (Apple Medical Corporation, Marlboro, Miss) and the Protractor (Weck Closure Systems, Research Triangle Park, NC).
Introduce a hand through the laparotomy incision and evaluate the pelvis to ensure that no significant adhesions are present that may interfere with swift placement of the inner ring. If significant adhesions are found, use traditional metal retractors instead.
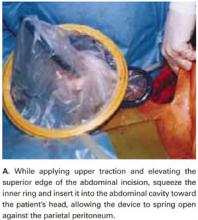
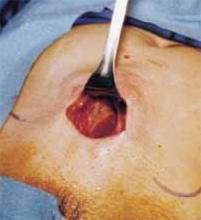
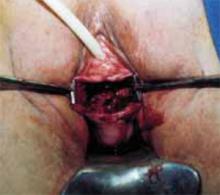
Squeeze the inner ring and insert it into the abdominal cavity toward the patient’s head, allowing the device to spring open against the parietal peritoneum (FIGURE 2A). Apply upper traction and elevate the superior edge of the abdominal incision to facilitate placement. Perform a digital check to ensure no tissue is trapped between the inner ring and the abdominal wall.
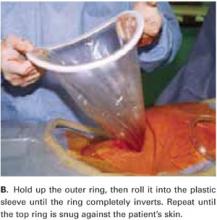
Hold up the outer ring, then roll the plastic sleeve until the ring completely inverts (FIGURE 2B). Repeat the process until the top ring is snug against the patient’s skin.
Advantages of the soft, self-retaining abdominal retractor include atraumatic retraction; incision protection; and adjustable height, making it ideal for obese patients.
FIGURE 2A Place the abdominal retractor
FIGURE 2B Place the abdominal retractor
Transverse hysterotomy in lower uterine segment
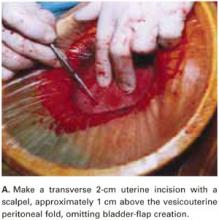
Make a transverse 2-cm uterine incision with a scalpel, approximately 1 cm above the vesicouterine peritoneal fold (identify this using gentle digital pressure to elevate the uterus) (FIGURE 3A).
Traditional bladder dissection is eliminated. We have found that when an adequate transverse hysterotomy is performed, a bladder flap is not required.1-3 In a recent randomized trial, Hohlagschwandtner et al9 confirmed our findings that bladder-flap omission was associated with reduced operative time and incision-delivery interval, decreased blood loss, and less need for postoperative analgesics.
An additional advantage of this omission: We can avoid making the uterine incision too low—especially when the cervix is fully dilated. Further, making the hysterotomy (uterine serosa and myometrium together) slightly above the vesicouterine peritoneal fold without bladder flap dissection frees the loose connective tissue between the uterus and the urinary bladder, allowing the spontaneous descent of the bladder.
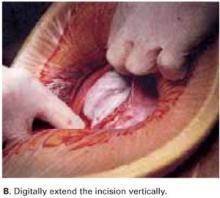
Digitally extend the transverse uterine incision. We extend the initial incision not laterally but, instead, vertically (FIGURE 3B). The vertical digital traction on the initial transverse uterine incision creates a transverse dissociation of the horizontal myometrium fibers; this results in a transverse extension of the original incision.
This modification prevents unintended and uncontrolled lateral extensions of the incision that may lacerate the uterine vessels.10 It also prevents the uterine incision from becoming an inverted “U” and the undesirable accumulation of myometrium fibers at the ends of the incision. Such incisions usually do not reapproximate well during hysterotomy closure and may lead to sacculation-type defects.11
FIGURE 3A Use a standard hysterotomy in the lower uterine segment
FIGURE 3B Use a standard hysterotomy in the lower uterine segment
Delivering the fetus
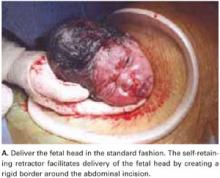
For vertex presentations, place your hand into the uterine cavity between the lower edge of the hysterotomy and fetal head. While applying transabdominal fundal pressure, lift the head with your fingers and deliver it through the incision (FIGURE 4A).
The self-retaining retractor facilitates delivery of the fetal head by creating a rigid border around the abdominal incision. The back of the surgeon’s hand that is in the uterine cavity achieves better leverage, as it now rests on a rigid plane on the inferior part of the incision rather than on the back hand and the softer and pliable wound edge of the standard abdominal incision.
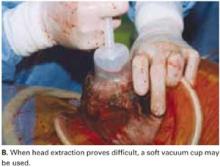
Vacuum-assistance. When delivery of the fetal head proves difficult, we use the soft vacuum cup, which avoids unnecessary intrauterine manipulation that may result in fetal or maternal trauma (FIGURE 4B).12
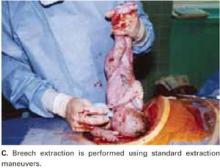
Breech extraction or transverse lie delivery is performed using standard extraction maneuvers (FIGURE 4C).13 We have found no need to perform T or J vertical extensions of the low transverse uterine incision, even in cases of a poorly developed lower uterine segment, abnormal presentation, or prematurity.
FIGURE 4A Deliver the fetal head
FIGURE 4B Deliver the fetal head
FIGURE 4C Deliver the fetal head
Uterine incision: 1-layer, in situ close
Remove the placenta only after it separates spontaneously—this greatly reduces blood loss compared with immediate manual placental delivery or umbilical-cord traction. Manually deliver the placenta only if it has not separated spontaneously after 5 minutes. Avoid routine manual clean-out of the uterine cavity if the placenta is completely delivered.1-3,14
Dilate the cervix to facilitate lochial discharge, when necessary.
Decrease uterine bleeding by massaging the uterus and administering diluted oxytocin.
Close the uterine incision in situ. Disadvantages of routine uterine exteriorization include discomfort and vomiting resulting from traction, exposure of the fallopian tubes to unnecessary trauma, increased risk of infection, possible rupture of the uteroovarian veins, and pulmonary embolism.
Exteriorization may also increase the risk of adhesion formation by exposing the uterine serosa to the abrasive effects of drying or microscopic abrasion if sponges are used to hold the uterus in place.1,14-17
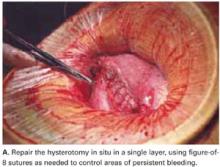
Use a single-layer closure with a running suture of polyglycolic acid to close the uterine incision (FIGURE 5A). If needed, use atraumatic clamps to grasp the edges of the hysterotomy to facilitate visualization and closure.
Begin suturing at a point just beyond one end of the incision, continuing to the opposite side. Be sure to penetrate the full thickness of the myometrium and avoid incorporating the decidua in the suture line. After the uterine closure, use individual figure-of-8 sutures to control areas of persistent bleeding.
Compared with 2-layer closures, single-layer closure of a low transverse incision is associated with reduced operating time, improved hemostasis, and less tissue disruption; introduces less foreign material into the surgical site; reduces the need for postoperative analgesia; and potentially reduces infectious morbidity. A trial of labor after a cesarean section with 1-layer closure appears safe.18-22
We do not close the vesicouterine fold and parietal peritoneum (FIGURE 5B) or reapproximate the rectus muscles. It has been shown that a new peritoneal layer is formed within days of the original incision closure.
Leaving the peritoneum open leads to no increased postoperative complications, nor obvious differences in wound healing, wound dehiscence, or incidence of postoperative adhesions. Compared to women without peritoneal closure, those with peritoneal closure require a longer operative time, greater amounts of post-operative narcotics for postoperative pain, a greater need for bowel stimulants, and a longer postoperative hospitalization.23
In 1995, we performed laparoscopy for gynecologic conditions in 23 patients and repeat cesarean in 10 patients who had undergone our technique (with visceral and parietal peritoneum left open).2 We found no adhesions and a normal peritoneal lining in all cases.
In 1 subgroup, peritoneal closure is strongly recommended: cases in which 1 or both rectus muscles have been transected to increase surgical exposure. Extremely thick fibromuscular adhesions between the low anterior surface of the uterus and the under-surface of the rectus musculature may develop if the parietal peritoneum is not closed.
FIGURE 5A Close the incisions
FIGURE 5B Close the incisions
Abdominal closure
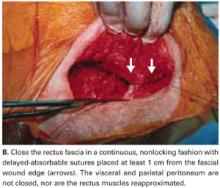
Close the rectus fascia with a continuous nonlocking 0 suture after the rectus muscles fall into place. Place entry and exit sites at 1-cm intervals, 1.5 cm beyond the wound edges—this minimizes the risk of sutures pulling through fascia. Interrupted sutures offer no greater tensile strength than continuous suturing.24 Tight, continuous suturing can lead to tissue ischemia, which may weaken the sutured fascia, and thus should be avoided.
The subcutaneous layer is not closed separately. One exception is obese patients with at least 2 cm of thick subcutaneous tissue. Thickness of subcutaneous tissue appears to be a significant risk factor for wound infection after cesarean section.25
In patients with thick subcutaneous tissue, you can reduce tension on the skin edges and the risk of subcutaneous infection, seroma formation, and wound disruption by placing interrupted 3-0 absorbable synthetic sutures to eliminate dead space.26-28 We have found no need to place Penrose drains or closed drainage systems in the subcutaneous layer.29-31
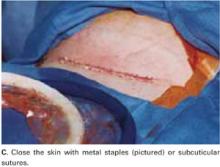
Close the skin using a subcuticular continuous absorbable 4-0 suture or, alternatively, metal staples, which are removed 4 days after surgery (FIGURE 5C).
FIGURE 5C Close the incisions
Prompt postoperative recovery
The patient may drink fluids in the recovery room, can resume a regular solid food diet within 4 hours after surgery, and may resume mobility as soon as anesthesia wears off.
Early breast-feeding is also allowed in the recovery room. In our experience, this has not been associated with complications, has been highly appreciated by the patients, and has led to earlier hospital discharge.
Control pain with meperidine (50–75 mg) or morphine (10 mg) parenterally every 3 to 4 hours. Other options include oxycodone and acetaminophen, oxycodone and aspirin, and ibuprofen.
Patients are usually discharged 48 to 72 hours following surgery.
Our experience: The numbers
Using this updated system, we have successfully completed 300 consecutive cesarean sections (210 primary, 90 repeat).
The average operating time was 19 minutes; average blood loss, 405 mL.
There was no postoperative febrile morbidity, wound infection, wound disruption, or wound hematoma.Only 3 patients developed superficial wound seromas, which were easily resolved. There were no intraoperative or postoperative complications.
We attribute the absence of wound infection to routine prophylactic antibiotics; supplemental perioperative oxygen; maintenance of normothermia; use of an electrocautery knife to create rapid hemostatic division of subcutaneous fat and anterior rectus fascia; a simplified abdominal wall opening; and placement of a self-retaining atraumatic retractor.10,32-36
Additional surgical procedures (tubal sterilization, myomectomy, appendectomy, and adhesiolysis) did not alter the recovery period, and all patients were able to get out of bed, shower, breast-feed, and care for their infants within 8 hours of surgery.
No infant complications related to the cesarean procedure occurred.
Patients were discharged from the hospital within 72 hours.
A prospective comparison study demonstrated that the original Pelosi-type of cesarean delivery was faster to perform, more cost-effective, and resulted in less maternal morbidity than the traditional cesarean technique.3
Dr. Pelosi II is a consultant for Apple Medical Corporation. Dr. Pelosi III reports no financial relationships relevant to this article.
1. Pelosi MA, Ortega I. Cesarean section: Pelosi simplified technique. Rev Chil Obstet Gynecol. 1994;59:372-377.
2. Pelosi MA, II, Pelosi MA, III. Simplified cesarean section. Contemp OB/GYN. 1995;40:89-100.
3. Wood RM, Simon H, Oz AU. Pelosi-type vs traditional cesarean delivery: a prospective comparison. J Reprod Med. 1999;44:788-795.
4. Finan MA, Mastrogiannis DS, Spellacy WN. The “Allis” test for easy cesarean delivery. Am J Obstet Gynecol. 1991;164:772-775.
5. Ayers IW, Morley GW. Surgical incision for cesarean section. Obstet Gynecol. 1987;70:706-712.
6. Pelosi MA, II, Pelosi MA, III. Self-retaining abdominal retractor for minilaparotomy. Obstet Gynecol. 2000;96:775-778.
7. Pelosi MA, II, Pelosi MA, III. Pelosi minilaparotomy hysterectomy: Effective alternative to laparoscopy and laparotomy. OBG Manag. April 2003;16-33.
8. Pelosi MA, II, Pelosi MA, III. A novel minilaparotomy approach for large ovarian cysts. OBG Manag. February 2004:;17-30.
9. Hohlagschwandtner M, Ruecklinger E, Husslein P, et al. Is the formation of a bladder flap at cesarean necessary? A randomized trial. Obstet Gynecol. 2001;98:1089-1092.
10. Ferrari A, Frigerio L, Origoni M, et al. Modified Stark procedure for cesarean section. J Pelv Surg. 1996;2:239-244.
11. Field CS. Surgical techniques for cesarean section. Obstet Gynecol Clin North Amer. 1988;15:657-672.
12. Pelosi MA, Apuzzio J. Use of the soft, silicone obstetric vacuum cup for delivery of the fetal head at cesarean section. J Reprod Med. 1984;29:289-292.
13. Pelosi MA, Apuzzio J, Fricchione D, et al. The intra-abdominal version technique for delivery of transverse lie by low segment cesarean section. Am J Obstet Gynecol. 1979;135:1009-1012.
14. Magann EF, Dodson MK, Albert JR, et al. Blood loss at the time of cesarean section by method of placental removal and exteriorization versus in situ repair of the uterine incision. Surg Gynecol Obstet. 1993;177:389-392.
15. Stock RJ, Shelton H. Fatal pulmonary embolism occurring 2 hours after exteriorization of the uterus for repair following cesareans section. Milit Med. 1985;150:549-550.
16. Hershey DW, Quilligan EJ. Extra-abdominal uterine exteriorization at cesarean section. Obstet Genecol. 1978;52:189-191.
17. Wahab MA, Karantzis P, Eccersley PS, et al. A randomized, controlled study of uterine exteriorization and repair at cesarean section. Br J Obstet Gynecol. 1999;106:913-916.
18. Hauth JC, Owen J, Davis RO. Transverse uterine incision closure: one versus two layers. Am J Obstet Gynecol. 1992;167:1108-1111.
19. Ohel G, Younis JS, Lang N, et al. Double-layer closure of uterine incision with visceral and parietal peritoneal closure: Are they obligatory steps of routine cesarean sections? J Matern Fetal Med. 1996;5:366-369.
20. Tucker JM, Hauth JC, Hodgkins P, et al. Trial of labor after a one- or two-layer closure of a low transverse uterine incision. Am J Obstet Gynecol. 1993;168:545-546.
21. Chapman SJ, Owen J, Hauth JC. One- versus two-layer closure of a low transverse cesarean: the next pregnancy. Obstet Gynecol. 1997;89:16-18.
22. Jelsema RD, Wittinger JA, Vander Kolk KJ. Continuous, nonlocking, single-layer repair of the low transverse uterine incision. J Reprod Med. 1993;38:393-396.
23. Tulandi T, Al-Jaroudi D. Nonclosure of peritoneum: a reappraisal. Am J Obstet Gynecol. 2003;189:609-612.
24. Fagniez PL, Hay JM, Lacaine F. Abdominal midline incision closure. Arch Surg. 1985;120:1351-1355.
25. Vermillion ST, Lamoutte C, Soper DE, et al. Wound infection after cesarean: effect of subcutaneous tissue thickness. Obstet Gynecol. 2000;95:923-926.
26. Naumann RW, Hauth JC, Owen J, et al. Subcutaneous tissue approximation in relation to wound disruption after cesarean delivery in obese women. Obstet Gynecol. 1995;85:412-416.
27. Cetin A, Cetin M. Superficial wound disruption after cesarean delivery: effect of the depth and closure of subcutaneous tissue. Int J Gynaecol Obstet. 1997;57:17-21.
28. Del Valle GO, Combs P, Qualls C, et al. Does closure of Camper fascia reduce the incidence of post-cesarean superficial wound disruption? Obstet Gynecol. 1992;80:1013-1016.
29. Loong RL, Rogers MS, Chang AM. A controlled trial of wound drainage at cesarean section. Aust NZ J Obstet Gynaecol. 1988;28:266-269.
30. Saunders NJ, Barclay C. Closed suction wound drainage and lower-segment cesarean section. Br J Obstet Gynaecol. 1988;95:1060-1062.
31. Magann EF, Chauhan SP, Rodts-Palenik S, Bufkin L, Martin JN, Jr, Morrison JC. Subcutaneous stitch closure versus subcutaneous drain to prevent wound disruption after cesarean delivery: a randomized clinical trial. Am J Obstet Gynecol. 2002;186:1119-1123.
32. Stark M, Finkel AR. Comparison between the Joel-Cohen and Pfannenstiel incisions in cesarean section. Eur J Obstet Gynecol Reprod Biol. 1994;53:121-122.
33. Joel-Cohen S. Abdominal and vaginal hysterectomy. New techniques based on time and motion studies. London, England: William Heinemann Medical Books; 1972.
34. Hemsell DL, Hemsell PG, Nobles B, et al. Abdominal wound problems after hysterectomy with electrocautery versus scalpel subcutaneous incision. Infect Dis Obstet Gynecol. 1993;1:27-30.
35. Johnson CD, Serpell JW. Wound infection after abdominal incision with scalpel or diathermy. Br J Surg. 1990;77:626-629.
36. Hussain SA, Hussain S. Incisions with knife or diathermy and postoperative pain. Br J Surg. 1988;75:1179-1182.
37. American College of Obstetricians and Gynecologist. ACOG Practice Bulletin. Clinical management guidelines for obstetricians-gynecologists. No. 43, May, 2003. Management of preterm labor. Obstet Gynecol. 2003;101:1039-1047.
38. Greif R, Akca O, Hurn E-P, et al. Supplemental perioperative oxygen to reduce the incidence of surgical wound infection. N Engl J Med. 2000;342:161-167.
39. Sorensen LT, Karlsmark T, Gottrup F. Abstinence from smoking reduces incisional wound infection: a randomized controlled trial. Ann Surg. 2003;238:1-5.
40. Sessler DI, Akca O. Preventing surgical site infections without drugs. Contemp OB/GYN. 2004;49:78-87.
41. Kurz A, Sessler DI, Lenhardt R. Perioperative normothermia to reduce the incidence of surgical wound infection and shorten hospitalization. N Engl J Med. 1996;334:1209-1215.
- A simplified abdominal incision makes the traditional extensive dissection associated with the Pfannenstiel incision unnecessary.
- A soft, self-retaining abdominal retractor offers increased exposure, atraumatic retraction, incision protection, and adjustable height while facilitating delivery of the fetal head by creating a rigid border around the abdominal incision.
- Bladder-flap omission has been associated with reduced operative time and incision-delivery interval, decreased blood loss, and less need for postoperative analgesics.
Is the extensive dissection of the Pfannenstiel incision necessary in cesarean delivery? Is bladder dissection essential? Must the visceral and parietal peritoneum be closed?
The success of our minimally invasive cesarean technique suggests the answer is “no.”
The approach described here features a short operative time; minimal instrumentation; reduced surgical dissection; decreased postoperative pain; and reduced risk of blood loss, infection, and wound complications. It is easily learned and cost-effective, with a brief postoperative recovery period.
Among the updates made from the technique’s initial publication in the mid-1990s1,2:
- addition of routine perioperative oxygen (80%), to reduce the risk of surgical wound infection (see “Perioperative considerations”)
- regular use of forced warm air covers applied to the anterior skin surface, to help patients maintain normothermia
- addition of a soft, self-retaining abdominal retractor—which creates an atraumatic circle of exposure up to a calculated 177 cm2 for a 15-cm incision (versus 113 cm2 calculated for traditional retraction)
- vertical, rather than lateral, digital extension of the initial transverse uterine incision
- identification of a subgroup in whom peritoneal closure is strongly recommended
- new data on the procedure’s effectiveness.3
Routinely use prophylactic antibiotics. Several recent studies have concluded that perioperative antibiotics reduce the incidence of endometritis and wound infection following elective and nonelective cesarean section.37 Administer ampicillin or a first-generation cephalosporin at umbilical cord clamping. For patients allergic to penicillin and cephalosporins, choose an alternative, such as clindamycin.
Give antacids 30 minutes before anesthesia (general or regional) to prevent pneumonitis from inhalation of gastric contents.
Clip pubic hair, rather than shave, to reduce the risk of wound infection.
Insert a Foley catheter, empty the bladder, and keep the catheter in place.
Position the patient in a 10°left lateral tilt, to avoid hypotension associated with aortocaval occlusion.
Routinely administer supplemental perioperative oxygen (80%), with either general or regional anesthesia; this activates alveolar immune defenses and halves the risk of surgical wound infections.
Neutrophil oxidative killing and phagocytosis—the most important defenses against surgical pathogens—depend on the partial pressure of oxygen in contaminated tissue. Giving supplemental oxygen during and for the first 2 hours after the procedure (by mask) is a practical, inexpensive way to reduce the incidence of surgical wound infection.38,39
Using 80% oxygen during and, for a short period, after surgery does not cause pulmonary toxicity such as atelectasis or impaired pulmonary function.40
Ensure normal body heat during and after cesarean to reduce the risk of postoperative surgical infection.40,41 Forced warm air covers applied to the anterior skin surface are the most effective way for warming surgical patients.9 IV fluid warming, though appropriate when large volumes are to be administered, is unnecessary for smaller operations.41
Modified abdominal incision reduces dissection
Make a straight low transverse incision with a scalpel, at a point approximately 3 to 4 cm above the symphysis pubis (FIGURE 1A).
The length of the incision is individualized (13 to 15 cm), though difficult fetal extraction is more likely if the abdominal incision is less than 15 cm.4,5
Divide the subcutaneous tissue transversely with an electrocautery knife. In a cutting and coagulation blend mode, the knife divides the fat while achieving hemostasis. To improve hemostasis, coagulate the blood vessels that cross the subcutaneous fat layer in a brushing manner before dividing them. To prevent unnecessary dead space, avoid filleting the fat and separating adherent subcutaneous fat from the anterior rectus fascia beyond what is needed to expose the fascia.
Open the fascia transversely with the electrocautery knife to the same length as the skin incision. Coagulate the blood vessels that cross the fascia before dividing them. Identify the median raphe by pulling up the superior edge of the abdominal incision.
Separate the rectus muscles in the midline by vertical blunt finger dissection (FIGURE 1B). If digital dissection is inefficient due to a dense, thick, or scarred median raphe, use an electrocautery knife, a scalpel, or scissors.
Open the peritoneum. This is facilitated by upward traction and elevation of the superior edge of the abdominal incision that lifts the peritoneum, allowing easy digital perforation using the index or middle finger (FIGURE 1C).
If this maneuver is not feasible, open the peritoneum in the traditional fashion.
Stretch the full thickness of the abdominal wall to full size of the skin incision, using 1 or 2 fingers of each hand (FIGURE 1D). Incorporate the skin, subcutaneous tissue, fascia layer, rectus muscles, and peritoneum. An assistant’s hands may be required. When needed, extend the peritoneal opening transversely on either side, to the midline and away from the bladder.
Digitally stretching the full-thickness abdominal incision is easily achieved due to the mechanical stretching of the anterior abdominal wall, edema, and increased vascularization that occur during pregnancy.
FIGURE 1A Create a modified abdominal incision
FIGURE 1B Create a modified abdominal incision
FIGURE 1C Create a modified abdominal incision
FIGURE 1D Create a modified abdominal incision
Retractor facilitates exposure
Our positive experience with the soft, self-retaining abdominal retractor for minilaparotomy and laparotomy6-8 compelled us to incorporate its use for cesarean 3 years ago.
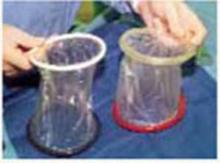
The device consists of a flexible plastic inner ring and a firmer outer ring connected by a soft plastic sleeve. We use the large size of either of the 2 models currently available: the Mobius (Apple Medical Corporation, Marlboro, Miss) and the Protractor (Weck Closure Systems, Research Triangle Park, NC).
Introduce a hand through the laparotomy incision and evaluate the pelvis to ensure that no significant adhesions are present that may interfere with swift placement of the inner ring. If significant adhesions are found, use traditional metal retractors instead.
Squeeze the inner ring and insert it into the abdominal cavity toward the patient’s head, allowing the device to spring open against the parietal peritoneum (FIGURE 2A). Apply upper traction and elevate the superior edge of the abdominal incision to facilitate placement. Perform a digital check to ensure no tissue is trapped between the inner ring and the abdominal wall.
Hold up the outer ring, then roll the plastic sleeve until the ring completely inverts (FIGURE 2B). Repeat the process until the top ring is snug against the patient’s skin.
Advantages of the soft, self-retaining abdominal retractor include atraumatic retraction; incision protection; and adjustable height, making it ideal for obese patients.
FIGURE 2A Place the abdominal retractor
FIGURE 2B Place the abdominal retractor
Transverse hysterotomy in lower uterine segment
Make a transverse 2-cm uterine incision with a scalpel, approximately 1 cm above the vesicouterine peritoneal fold (identify this using gentle digital pressure to elevate the uterus) (FIGURE 3A).
Traditional bladder dissection is eliminated. We have found that when an adequate transverse hysterotomy is performed, a bladder flap is not required.1-3 In a recent randomized trial, Hohlagschwandtner et al9 confirmed our findings that bladder-flap omission was associated with reduced operative time and incision-delivery interval, decreased blood loss, and less need for postoperative analgesics.
An additional advantage of this omission: We can avoid making the uterine incision too low—especially when the cervix is fully dilated. Further, making the hysterotomy (uterine serosa and myometrium together) slightly above the vesicouterine peritoneal fold without bladder flap dissection frees the loose connective tissue between the uterus and the urinary bladder, allowing the spontaneous descent of the bladder.
Digitally extend the transverse uterine incision. We extend the initial incision not laterally but, instead, vertically (FIGURE 3B). The vertical digital traction on the initial transverse uterine incision creates a transverse dissociation of the horizontal myometrium fibers; this results in a transverse extension of the original incision.
This modification prevents unintended and uncontrolled lateral extensions of the incision that may lacerate the uterine vessels.10 It also prevents the uterine incision from becoming an inverted “U” and the undesirable accumulation of myometrium fibers at the ends of the incision. Such incisions usually do not reapproximate well during hysterotomy closure and may lead to sacculation-type defects.11
FIGURE 3A Use a standard hysterotomy in the lower uterine segment
FIGURE 3B Use a standard hysterotomy in the lower uterine segment
Delivering the fetus
For vertex presentations, place your hand into the uterine cavity between the lower edge of the hysterotomy and fetal head. While applying transabdominal fundal pressure, lift the head with your fingers and deliver it through the incision (FIGURE 4A).
The self-retaining retractor facilitates delivery of the fetal head by creating a rigid border around the abdominal incision. The back of the surgeon’s hand that is in the uterine cavity achieves better leverage, as it now rests on a rigid plane on the inferior part of the incision rather than on the back hand and the softer and pliable wound edge of the standard abdominal incision.
Vacuum-assistance. When delivery of the fetal head proves difficult, we use the soft vacuum cup, which avoids unnecessary intrauterine manipulation that may result in fetal or maternal trauma (FIGURE 4B).12
Breech extraction or transverse lie delivery is performed using standard extraction maneuvers (FIGURE 4C).13 We have found no need to perform T or J vertical extensions of the low transverse uterine incision, even in cases of a poorly developed lower uterine segment, abnormal presentation, or prematurity.
FIGURE 4A Deliver the fetal head
FIGURE 4B Deliver the fetal head
FIGURE 4C Deliver the fetal head
Uterine incision: 1-layer, in situ close
Remove the placenta only after it separates spontaneously—this greatly reduces blood loss compared with immediate manual placental delivery or umbilical-cord traction. Manually deliver the placenta only if it has not separated spontaneously after 5 minutes. Avoid routine manual clean-out of the uterine cavity if the placenta is completely delivered.1-3,14
Dilate the cervix to facilitate lochial discharge, when necessary.
Decrease uterine bleeding by massaging the uterus and administering diluted oxytocin.
Close the uterine incision in situ. Disadvantages of routine uterine exteriorization include discomfort and vomiting resulting from traction, exposure of the fallopian tubes to unnecessary trauma, increased risk of infection, possible rupture of the uteroovarian veins, and pulmonary embolism.
Exteriorization may also increase the risk of adhesion formation by exposing the uterine serosa to the abrasive effects of drying or microscopic abrasion if sponges are used to hold the uterus in place.1,14-17
Use a single-layer closure with a running suture of polyglycolic acid to close the uterine incision (FIGURE 5A). If needed, use atraumatic clamps to grasp the edges of the hysterotomy to facilitate visualization and closure.
Begin suturing at a point just beyond one end of the incision, continuing to the opposite side. Be sure to penetrate the full thickness of the myometrium and avoid incorporating the decidua in the suture line. After the uterine closure, use individual figure-of-8 sutures to control areas of persistent bleeding.
Compared with 2-layer closures, single-layer closure of a low transverse incision is associated with reduced operating time, improved hemostasis, and less tissue disruption; introduces less foreign material into the surgical site; reduces the need for postoperative analgesia; and potentially reduces infectious morbidity. A trial of labor after a cesarean section with 1-layer closure appears safe.18-22
We do not close the vesicouterine fold and parietal peritoneum (FIGURE 5B) or reapproximate the rectus muscles. It has been shown that a new peritoneal layer is formed within days of the original incision closure.
Leaving the peritoneum open leads to no increased postoperative complications, nor obvious differences in wound healing, wound dehiscence, or incidence of postoperative adhesions. Compared to women without peritoneal closure, those with peritoneal closure require a longer operative time, greater amounts of post-operative narcotics for postoperative pain, a greater need for bowel stimulants, and a longer postoperative hospitalization.23
In 1995, we performed laparoscopy for gynecologic conditions in 23 patients and repeat cesarean in 10 patients who had undergone our technique (with visceral and parietal peritoneum left open).2 We found no adhesions and a normal peritoneal lining in all cases.
In 1 subgroup, peritoneal closure is strongly recommended: cases in which 1 or both rectus muscles have been transected to increase surgical exposure. Extremely thick fibromuscular adhesions between the low anterior surface of the uterus and the under-surface of the rectus musculature may develop if the parietal peritoneum is not closed.
FIGURE 5A Close the incisions
FIGURE 5B Close the incisions
Abdominal closure
Close the rectus fascia with a continuous nonlocking 0 suture after the rectus muscles fall into place. Place entry and exit sites at 1-cm intervals, 1.5 cm beyond the wound edges—this minimizes the risk of sutures pulling through fascia. Interrupted sutures offer no greater tensile strength than continuous suturing.24 Tight, continuous suturing can lead to tissue ischemia, which may weaken the sutured fascia, and thus should be avoided.
The subcutaneous layer is not closed separately. One exception is obese patients with at least 2 cm of thick subcutaneous tissue. Thickness of subcutaneous tissue appears to be a significant risk factor for wound infection after cesarean section.25
In patients with thick subcutaneous tissue, you can reduce tension on the skin edges and the risk of subcutaneous infection, seroma formation, and wound disruption by placing interrupted 3-0 absorbable synthetic sutures to eliminate dead space.26-28 We have found no need to place Penrose drains or closed drainage systems in the subcutaneous layer.29-31
Close the skin using a subcuticular continuous absorbable 4-0 suture or, alternatively, metal staples, which are removed 4 days after surgery (FIGURE 5C).
FIGURE 5C Close the incisions
Prompt postoperative recovery
The patient may drink fluids in the recovery room, can resume a regular solid food diet within 4 hours after surgery, and may resume mobility as soon as anesthesia wears off.
Early breast-feeding is also allowed in the recovery room. In our experience, this has not been associated with complications, has been highly appreciated by the patients, and has led to earlier hospital discharge.
Control pain with meperidine (50–75 mg) or morphine (10 mg) parenterally every 3 to 4 hours. Other options include oxycodone and acetaminophen, oxycodone and aspirin, and ibuprofen.
Patients are usually discharged 48 to 72 hours following surgery.
Our experience: The numbers
Using this updated system, we have successfully completed 300 consecutive cesarean sections (210 primary, 90 repeat).
The average operating time was 19 minutes; average blood loss, 405 mL.
There was no postoperative febrile morbidity, wound infection, wound disruption, or wound hematoma.Only 3 patients developed superficial wound seromas, which were easily resolved. There were no intraoperative or postoperative complications.
We attribute the absence of wound infection to routine prophylactic antibiotics; supplemental perioperative oxygen; maintenance of normothermia; use of an electrocautery knife to create rapid hemostatic division of subcutaneous fat and anterior rectus fascia; a simplified abdominal wall opening; and placement of a self-retaining atraumatic retractor.10,32-36
Additional surgical procedures (tubal sterilization, myomectomy, appendectomy, and adhesiolysis) did not alter the recovery period, and all patients were able to get out of bed, shower, breast-feed, and care for their infants within 8 hours of surgery.
No infant complications related to the cesarean procedure occurred.
Patients were discharged from the hospital within 72 hours.
A prospective comparison study demonstrated that the original Pelosi-type of cesarean delivery was faster to perform, more cost-effective, and resulted in less maternal morbidity than the traditional cesarean technique.3
Dr. Pelosi II is a consultant for Apple Medical Corporation. Dr. Pelosi III reports no financial relationships relevant to this article.
1. Pelosi MA, Ortega I. Cesarean section: Pelosi simplified technique. Rev Chil Obstet Gynecol. 1994;59:372-377.
2. Pelosi MA, II, Pelosi MA, III. Simplified cesarean section. Contemp OB/GYN. 1995;40:89-100.
3. Wood RM, Simon H, Oz AU. Pelosi-type vs traditional cesarean delivery: a prospective comparison. J Reprod Med. 1999;44:788-795.
4. Finan MA, Mastrogiannis DS, Spellacy WN. The “Allis” test for easy cesarean delivery. Am J Obstet Gynecol. 1991;164:772-775.
5. Ayers IW, Morley GW. Surgical incision for cesarean section. Obstet Gynecol. 1987;70:706-712.
6. Pelosi MA, II, Pelosi MA, III. Self-retaining abdominal retractor for minilaparotomy. Obstet Gynecol. 2000;96:775-778.
7. Pelosi MA, II, Pelosi MA, III. Pelosi minilaparotomy hysterectomy: Effective alternative to laparoscopy and laparotomy. OBG Manag. April 2003;16-33.
8. Pelosi MA, II, Pelosi MA, III. A novel minilaparotomy approach for large ovarian cysts. OBG Manag. February 2004:;17-30.
9. Hohlagschwandtner M, Ruecklinger E, Husslein P, et al. Is the formation of a bladder flap at cesarean necessary? A randomized trial. Obstet Gynecol. 2001;98:1089-1092.
10. Ferrari A, Frigerio L, Origoni M, et al. Modified Stark procedure for cesarean section. J Pelv Surg. 1996;2:239-244.
11. Field CS. Surgical techniques for cesarean section. Obstet Gynecol Clin North Amer. 1988;15:657-672.
12. Pelosi MA, Apuzzio J. Use of the soft, silicone obstetric vacuum cup for delivery of the fetal head at cesarean section. J Reprod Med. 1984;29:289-292.
13. Pelosi MA, Apuzzio J, Fricchione D, et al. The intra-abdominal version technique for delivery of transverse lie by low segment cesarean section. Am J Obstet Gynecol. 1979;135:1009-1012.
14. Magann EF, Dodson MK, Albert JR, et al. Blood loss at the time of cesarean section by method of placental removal and exteriorization versus in situ repair of the uterine incision. Surg Gynecol Obstet. 1993;177:389-392.
15. Stock RJ, Shelton H. Fatal pulmonary embolism occurring 2 hours after exteriorization of the uterus for repair following cesareans section. Milit Med. 1985;150:549-550.
16. Hershey DW, Quilligan EJ. Extra-abdominal uterine exteriorization at cesarean section. Obstet Genecol. 1978;52:189-191.
17. Wahab MA, Karantzis P, Eccersley PS, et al. A randomized, controlled study of uterine exteriorization and repair at cesarean section. Br J Obstet Gynecol. 1999;106:913-916.
18. Hauth JC, Owen J, Davis RO. Transverse uterine incision closure: one versus two layers. Am J Obstet Gynecol. 1992;167:1108-1111.
19. Ohel G, Younis JS, Lang N, et al. Double-layer closure of uterine incision with visceral and parietal peritoneal closure: Are they obligatory steps of routine cesarean sections? J Matern Fetal Med. 1996;5:366-369.
20. Tucker JM, Hauth JC, Hodgkins P, et al. Trial of labor after a one- or two-layer closure of a low transverse uterine incision. Am J Obstet Gynecol. 1993;168:545-546.
21. Chapman SJ, Owen J, Hauth JC. One- versus two-layer closure of a low transverse cesarean: the next pregnancy. Obstet Gynecol. 1997;89:16-18.
22. Jelsema RD, Wittinger JA, Vander Kolk KJ. Continuous, nonlocking, single-layer repair of the low transverse uterine incision. J Reprod Med. 1993;38:393-396.
23. Tulandi T, Al-Jaroudi D. Nonclosure of peritoneum: a reappraisal. Am J Obstet Gynecol. 2003;189:609-612.
24. Fagniez PL, Hay JM, Lacaine F. Abdominal midline incision closure. Arch Surg. 1985;120:1351-1355.
25. Vermillion ST, Lamoutte C, Soper DE, et al. Wound infection after cesarean: effect of subcutaneous tissue thickness. Obstet Gynecol. 2000;95:923-926.
26. Naumann RW, Hauth JC, Owen J, et al. Subcutaneous tissue approximation in relation to wound disruption after cesarean delivery in obese women. Obstet Gynecol. 1995;85:412-416.
27. Cetin A, Cetin M. Superficial wound disruption after cesarean delivery: effect of the depth and closure of subcutaneous tissue. Int J Gynaecol Obstet. 1997;57:17-21.
28. Del Valle GO, Combs P, Qualls C, et al. Does closure of Camper fascia reduce the incidence of post-cesarean superficial wound disruption? Obstet Gynecol. 1992;80:1013-1016.
29. Loong RL, Rogers MS, Chang AM. A controlled trial of wound drainage at cesarean section. Aust NZ J Obstet Gynaecol. 1988;28:266-269.
30. Saunders NJ, Barclay C. Closed suction wound drainage and lower-segment cesarean section. Br J Obstet Gynaecol. 1988;95:1060-1062.
31. Magann EF, Chauhan SP, Rodts-Palenik S, Bufkin L, Martin JN, Jr, Morrison JC. Subcutaneous stitch closure versus subcutaneous drain to prevent wound disruption after cesarean delivery: a randomized clinical trial. Am J Obstet Gynecol. 2002;186:1119-1123.
32. Stark M, Finkel AR. Comparison between the Joel-Cohen and Pfannenstiel incisions in cesarean section. Eur J Obstet Gynecol Reprod Biol. 1994;53:121-122.
33. Joel-Cohen S. Abdominal and vaginal hysterectomy. New techniques based on time and motion studies. London, England: William Heinemann Medical Books; 1972.
34. Hemsell DL, Hemsell PG, Nobles B, et al. Abdominal wound problems after hysterectomy with electrocautery versus scalpel subcutaneous incision. Infect Dis Obstet Gynecol. 1993;1:27-30.
35. Johnson CD, Serpell JW. Wound infection after abdominal incision with scalpel or diathermy. Br J Surg. 1990;77:626-629.
36. Hussain SA, Hussain S. Incisions with knife or diathermy and postoperative pain. Br J Surg. 1988;75:1179-1182.
37. American College of Obstetricians and Gynecologist. ACOG Practice Bulletin. Clinical management guidelines for obstetricians-gynecologists. No. 43, May, 2003. Management of preterm labor. Obstet Gynecol. 2003;101:1039-1047.
38. Greif R, Akca O, Hurn E-P, et al. Supplemental perioperative oxygen to reduce the incidence of surgical wound infection. N Engl J Med. 2000;342:161-167.
39. Sorensen LT, Karlsmark T, Gottrup F. Abstinence from smoking reduces incisional wound infection: a randomized controlled trial. Ann Surg. 2003;238:1-5.
40. Sessler DI, Akca O. Preventing surgical site infections without drugs. Contemp OB/GYN. 2004;49:78-87.
41. Kurz A, Sessler DI, Lenhardt R. Perioperative normothermia to reduce the incidence of surgical wound infection and shorten hospitalization. N Engl J Med. 1996;334:1209-1215.
A novel minilaparotomy approach for large ovarian cysts
- Make a cruciate incision by incising the skin transversely and the anterior rectus fascia vertically.
- Insert a soft, sleeved, self-retaining retractor.
- Using a surgical adhesive, glue a large plastic wound dressing to the surface of the cyst to prevent leakage of contents into the abdominal cavity.
- Aspirate the cyst until it collapses and can be delivered, with the ovary, through the abdominal incision.
- After performing an extracorporeal cystectomy and/or adnexectomy, return the repaired ovary to the abdominal cavity.
Although laparotomy is still considered the standard for ovarian cyst removal, over the past 15 years minimally invasive surgery has gained wider acceptance in cases where preoperative assessment suggests an adnexal mass is benign.
Unfortunately, minimally invasive management of a large ovarian cyst (greater than 10 cm) is particularly challenging for several reasons:
- The cyst can rupture and spill its contents into the peritoneum,
- the cyst’s size limits the surgical field, and
- an unexpected malignancy may be revealed.
An innovative minilaparotomy technique for the removal of benign ovarian cysts offers the advantages of laparoscopic and laparoscopic-assisted procedures while bypassing the major disadvantages: the necessity for specialized and expensive equipment, lengthy operative time, and long learning curves.1 (The minimally invasive procedures currently available for the treatment of ovarian cysts include laparoscopic cystectomy, laparoscopic-assisted minilaparotomy cystectomy, laparoscopic-assisted vaginal cystectomy, combined percutaneous ultrasound cyst aspiration and laparoscopic cystectomy, transvaginal cystectomy, and the traditional minilaparotomy cystectomy.2-10)
The procedure is faster, less expensive, carries fewer potential risks than traditional alternatives, and offers these advantages:
- can be performed under regional anesthesia
- relies on standard open techniques
- uses inexpensive instrumentation
- is easy to learn
- can be used for very large cysts
- eliminates the risk of intraperitoneal spillage of cyst contents
- offers similar postoperative convalescence and mean time to return to work as laparoscopic or laparoscopic-assisted management of large ovarian cysts
General Ob/Gyns—not gynecologic oncologists—perform most surgeries on patients with adnexal masses, since ovarian cancer is relatively uncommon in the absence of preoperative risk factors for malignancy. Our approach offers an appealing option to Ob/Gyns reluctant to abandon routine traditional laparotomy for such ovarian cysts.
Selecting the right patient
Adequate preoperative assessment diminishes the risk of unexpected malignancy in a patient undergoing surgery for an ovarian mass to less than 1%.4 At this time, the combination of menopausal status, cancer antigen (CA) 125 level, physical examination, and ultrasound is the best strategy for evaluating the patient with an ovarian cyst.11
Signs of malignancy. Ultrasound features that suggest malignancy include irregular borders, thick septa, solid areas, internal and external excrescences, matted bowel, and ascites. Benign cysts, on the other hand, are usually unilateral and have regular borders, thin septa, no solid areas, and no internal excrescences.4 The measurement of blood flow within the mass by color Doppler may improve the accuracy of ultrasound in differentiating benign from malignant cysts.4,12
On physical examination, an adnexal mass that is fixed, irregular, or solid also suggests a neoplasm. An elevated CA 125 combined with a complex adnexal mass is likely to be associated with malignancy. The test is even more specific in postmenopausal women with adnexal masses.4,12
However, plasma levels of CA 125 also can be elevated in several benign gynecologic conditions such as endometriosis, simple ovarian cysts, pelvic inflammatory disease, ovarian torsion, fibroids, and in physiologic conditions such as menstruation and pregnancy.13
Anticipate the need to convert to laparotomy. Every patient’s surgical consent should include a possible conversion to laparotomy. To avoid incomplete surgical treatment and significant delays in proper therapy, a gynecologic surgeon experienced in the management of ovarian cancer should be readily available, in the event an unexpected malignancy is encountered. Ideally, the staging surgery and definite treatment should be performed at the time of initial minilaparotomy. Comprehensive surgical staging and treatment include thorough exploration of the pelvis and abdomen, omentectomy, pelvic and paraaortic lymph node sampling, multiple peritoneal biopsies and washings, bilateral salpingo-oophorectomy, hysterectomy, and debulking, when indicated.
Prepare for surgery with position, incision, and retraction
Before beginning, it is crucial to correctly position the patient, make the appropriate incision, and insert the right retractor.1
Position. After administering regional or general anesthesia, place the patient in a modified lithotomy, as for laparoscopic surgery. Tuck the arms alongside the torso and place the legs in boot stirrups. Avoid hip flexion and allow adequate thigh abduction to expose the vagina. Perform a careful pelvic examination to determine the size and mobility of the adnexal mass.
When properly placed, this retractor creates an atraumatic, circular area of self-retraction, enabling superior exposure
Place an indwelling transurethral catheter, and pass a sturdy, hinged uterine manipulator such as the Pelosi Uterine Manipulator (Apple Medical Corp, Marlboro, Mass) transcervically into the uterine cavity (FIGURE 1).
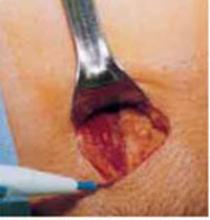
The cruciate incision. With a conventional scalpel make a small suprapubic transverse incision through the skin and subcutaneous tissue (FIGURE 2). After clearing subcutaneous fat from the midline, incise the rectus fascia and the peritoneum in a vertical direction.
A vertical skin incision can be selected if the preoperative workup suggests a later extension of the original minilaparotomy incision may be required, or if there is a prior vertical incision.
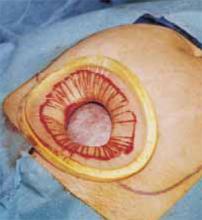
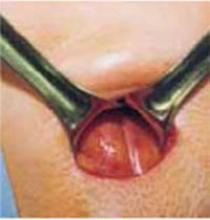
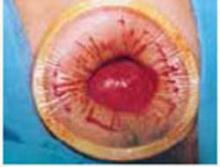
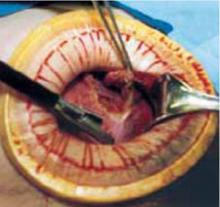
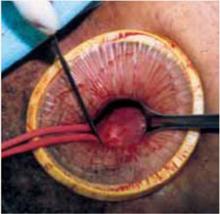
Retraction. Use a soft sleeve-type self-retaining plastic retractor, such as Mobius (Apple Medical Corp) (FIGURE 3 ). When properly placed, this retractor creates an atraumatic, circular area of self-retraction, enabling superior exposure of the pelvis (FIGURE 4).
During surgery it may be necessary to adjust the outer ring if the sleeve loosens. Narrow Deaver or Richardson retractors, if required, provide additional retraction. The bowel may be gently packed, if necessary, but typically it is adequately displaced by the large ovarian cyst.
The atraumatic retraction provided by the soft, self-retaining abdominal retractor minimizes the possibility of tissue trauma, nerve damage, bruising, and postoperative pain. At the same time, the continuous 360° retraction force on the incision maximizes surgical exposure, providing a significantly larger working area than conventional retractors. For example, when applied to a 6-cm incision, the self-retaining retractor creates a 28-cm2 exposed working area, compared with only 18 cm2 provided by a conventional 4-point metal retractor.
The adjustable height of the self-retaining retractor adapts to wounds of varying depth and works on virtually any tissue thickness—a feature that makes the device effective for obese patients. Further, by lining the abdominal incision, the retractor’s plastic sleeve protects the wound’s edges from contamination and potential implantation of malignant cells, making the device ideal for managing ovarian cysts.
FIGURE 1 Hinged uterine manipulator
The manipulator facilitates exposure of the cyst and contralateral adnexa, as well as uterine elevation/rotation.
FIGURE 2 Cruciate incision
Make a 2.5- to 5-cm suprapubic transverse skin incision. Using the Bovie device, incise the subcutaneous fat transversely along the full length of the skin incision down to the level of the anterior rectus fascia. Clear the subcutaneous fat from the midline superiorly and inferiorly to expose 5 to 6 cm of the rectus fascia in the vertical axis. Use blunt digital dissection to assist in mobilizing the subcutaneous fat. Incise the anterior rectus fascia vertically through the full length of the cleared area. Retract the rectus muscles from the midline to expose the underlying transversalis fascia and the peritoneum. Control small bleeding points with the Bovie device. Enter the peritoneum either digitally or with scissors above the bladder dome and extend the peritoneal incision to the full length of the fascial incision.
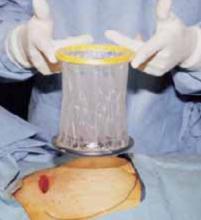
FIGURE 3 Self-retaining retractor
The retractor consists of a flexible plastic inner ring and a firmer outer ring connected by a soft plastic sleeve.
FIGURE 4360° retraction force
Squeeze the inner ring of the soft, sleeve-type, self-retaining retractor into the peritoneal cavity through the cruciate abdominal incision and allow it to spring open against the parietal peritoneum. Make a digital assessment to ensure that viscera is not trapped between the inner ring and the abdominal wall. Place the entire sleeve on traction by lifting the outer ring. Then roll the outer ring onto the sleeve, collecting excess length, until it sits firmly against the skin. The atraumatic retraction provided by the sleeve-type retractor maximizes exposure of the pelvis. Note how a portion of the large cyst is clearly seen through the atraumatic, circular area of retraction.
Cyst assessment
Visually and digitally inspect the cyst and carefully evaluate the uterus, pelvis, and contralateral adnexa. Determine the extent of adhesions and any unexpected pelvic pathology. When needed, use traditional small retractors or gentle packing to gain additional exposure. If the cystic mass appears suspicious (internal and external excrescences on the cyst, ovaries, or peritoneal surfaces, or ascites), obtain pelvic washings with a suction-irrigation cannula, send the fluid for cytologic examination, and convert the minilaparotomy to a standard exploratory laparotomy. Extensive adhesions to the bowel, broad ligament, or pelvic sidewall and unexpected extensive endometriosis may also require a conversion to standard laparotomy.
Reduce cyst size by decompression
Simple aspiration is inadvisable. To remove a large ovarian cyst using the Pelosi minilaparotomy, reduce the size of the cyst to permit safe and effective mobilization and resection through the small abdominal incision. Simple aspiration of the cyst, with its potential for spilling the contents, is not a wise strategy for several reasons. First, many ovarian cysts contain functional epithelium with a high recurrence rate (8% to 67%). Second, studies show that 10% to 66% of ovarian cyst fluid aspirates initially diagnosed as benign actually are malignant. Further, relying on negative cytology from the aspirate of an ovarian cyst without tissue biopsy may delay appropriate surgery, and the puncture of an unexpected malignant cyst may seed the peritoneal cavity and possibly worsen the patient’s prognosis.11,12
This technique, suitable for all ovarian cysts, makes it possible to aspirate a large cyst without leakage.
Whether spillage of cancer cells actually worsens the prognosis of a patient with a neoplastic cyst remains controversial because of conflicting study results. Nonetheless, the possibility of intraperitoneal dissemination of neoplastic cells from a ruptured cyst cannot be considered innocuous, and the potential negative effect on a patient’s prognosis should not be ignored.14 Make every attempt, therefore, to avoid rupturing the cyst and spilling the fluid into the peritoneal cavity.
A shared flaw plagues aspiration devices. Different devices are available for intraoperative cyst aspiration during laparoscopic, transvaginal, or laparotomy approaches.3,4,6 In addition to long needles, drainage trocars, suction cannulas, and suprapubic bladder catheters, special aspiration instruments have been developed.15 They include a metal vacuum system with an aspirator trocar that seals the surface of the cyst, and a catheter system that pinches the punctured cyst wall between double balloons to prevent spillage.16 In addition, several commercial bags are available to prevent intraperitoneal spillage during removal of ovarian cysts.
All these devices have a universal flaw, however: After a thin-walled cyst initially is punctured, none of these products can prevent the spontaneous dehiscence of the cyst and the resulting spillage of its contents into the abdominal cavity. Vacuum systems work well for large cysts with smooth, round surfaces, but in those with irregular surfaces, both application and maintaining the seal are difficult.17 Fortunately, our technique makes it possible to aspirate a large ovarian cyst without leakage, and the method is suitable for all ovarian cysts regardless of surface type or wall thickness.
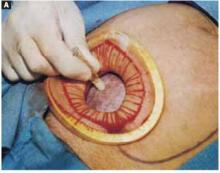
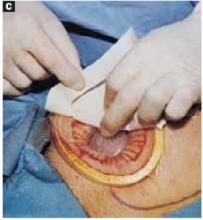
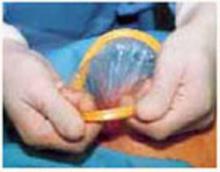
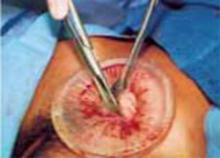
Glue the dressing to the cyst to capture leakage. Using a gauze pad, carefully dry the area of the ovarian cyst that is visible through the self-retaining retractor. Then generously spread sterile surgical glue such as Dermabond (Ethicon, Somerville, NJ) on the cyst wall surface (FIGURE 5A). Dermabond is the commercial name for 2-octyl cyanoacrylate, a sterile skin adhesive used as an alternative to stitches to close the edges of small wounds. It is similar to commercial adhesives such as Super Glue and Krazy Glue.
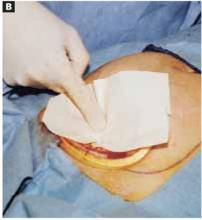
Remove the paper cover of a transparent plastic surgical dressing and place the adhesive side directly onto the glued cyst surface until you are sure the adhesive is completely fixed (FIGURES 5B AND 5C). The 35 cm x 35 cm Steri-Drape or the transparent Tegaderm (both from 3M Health Care, St. Paul, Minn) dressing is effective. A standard nonadhesive plastic dressing or a sterile plastic bag also can be used, as long as the free edges extend beyond the outer rim of the self-retaining retractor.
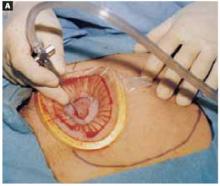
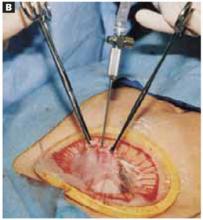
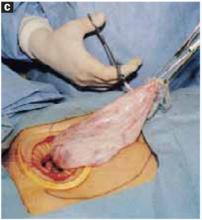
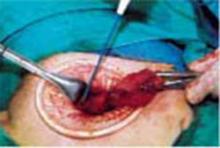
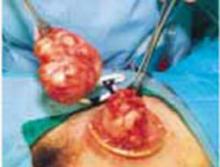
With a needle aspirator, pierce the cyst through the glued plastic dressing and carefully aspirate the fluid (FIGURES 6A AND 6B). Any leakage is trapped inside the plastic dressing rather than the abdominal cavity. Continue the aspiration until the collapsed cyst and ovary can be gradually delivered through the abdominal incision (FIGURE 6C). Note that the selfretaining retractor also protects the abdominal incision from potential contamination and implantation of neoplastic cells.
Once the cyst and ovary are extracted, you can readily perform an extracorporeal cystectomy, after which the repaired ovary is returned to the abdominal cavity. Be careful to avoid letting any fluid flow back into the peritoneal cavity during cyst removal. When indicated, an extracorporeal adnexectomy can readily be performed.
The presence of oily material or hairs in the aspirated fluid and on the needle tip readily identifies a dermoid cyst.
Dermoid cysts require extra care. Preventing intraperitoneal spillage is especially important when removing a large dermoid cyst, to avoid the possibility of chemical peritonitis, dense adhesions, and fistulas. The presence of oily material or hairs in the aspirated fluid and on the needle tip readily identifies a dermoid cyst. Quite frequently, a large-diameter suction cannula is required to remove the waxy contents. If the dermoid cyst is very large, aspiration alone will not empty it entirely. Complete emptying is not necessary, however. The primary goal of aspiration is to reduce the size and tension of the cyst to permit delivery through the abdominal incision.
Closing the cruciate incision is quicker and requires less exposure than a scaled-down Pfannenstiel’s incision.
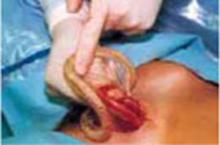
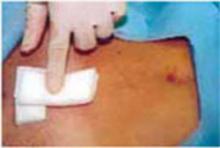
Before concluding the procedure, irrigate the peritoneal cavity to remove any remnants of cyst contents that may have spilled—especially important with a dermoid cyst. Perform any additional indicated procedures through the minilaparotomy incision, such as a contralateral ovarian cystectomy, salpingo-oophorectomy, or hysterectomy. After the surgery is completed, remove the self-retaining retractor by hooking a finger through the bottom ring and pulling it gently out of the incision. Closing the cruciate incision is quicker and requires less exposure to complete than a scaled-down Pfannenstiel’s incision. Apply a vertical pressure dressing over the incision to prevent postoperative wound hematoma or seroma formation. Remove the dressing 24 hours later.
FIGURE 5A ‘Leak-proofing’ the aspiration
After drying the surface of the cyst, apply sterile surgical glue to the cyst wall (2 to 3 ampules are usually required to cover the cyst surface).
FIGURE 5B ‘Leak-proofing’ the aspiration
Apply the adhesive side of a clear plastic wound dressing directly onto the cyst’s surface, making sure that the dressing is large enough to fully cover the self-retaining retractor. Using either a piece of folded gauze or your fingers, press the plastic dressing against the adhesive-coated cyst for about 3 to 5 minutes until the adhesive is completely fixed.
FIGURE 5C ‘Leak-proofing’ the aspiration
Remove the paper cover of the wound dressing.
FIGURE 6A Aspirating the cyst
Pierce the dressing and carefully aspirate the fluid until the cyst is partially collapsed.
FIGURE 6B Aspirating the cyst
Place atraumatic clamps on the cyst wall to further control drainage. Any leakage is trapped inside the plastic dressing rather than draining into the abdominal cavity.
FIGURE 6C Aspirating the cyst
Continue the aspiration until the collapsed cyst and ovary can be delivered gradually through the abdominal incision, after detaching the adhesive plastic dressing from the edges of the self-retaining retractor. The portion of the plastic sleeve that is glued to the cyst surface remains attached to the cyst until the cyst is extracted. Following extraction, perform an extracorporeal cystectomy and return the repaired ovary to the abdominal cavity.
Good results
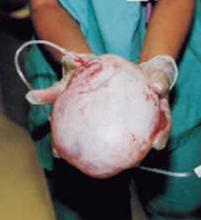
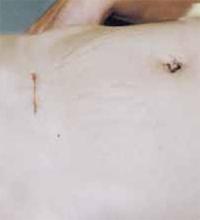
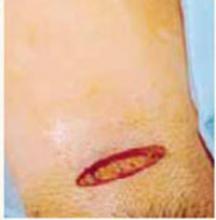
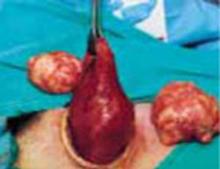
Using our approach, we have treated 38 patients with ovarian cysts of diameters greater than 20 cm thought to be benign by preoperative workup (FIGURE 7). We encountered no malignancies. All surgeries were successfully completed without laparoscopy or conversion to traditional laparotomy and with good cosmesis (FIGURE 8).
Other procedures performed in some of these patients using the same technique included contralateral cystectomy, salpingo-oophorectomy, subtotal and total hysterectomy, adhesiolysis, and appendectomy. We encountered no intraoperative or postoperative complications. Operating times ranged from 18 to 65 minutes. All patients were discharged home within 36 hours and returned to work in a mean of 12 days. Pathology findings of the ovarian cysts included endometrioma, dermoid cyst, serous cystadenoma, and mucinous cystadenoma.
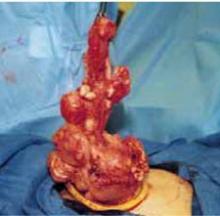
FIGURE 7 Effective for large cysts
Following removal, the collapsed cyst was refilled with 1,300 mL of normal saline to demonstrate its actual size.
FIGURE 8 Good cosmetic results
Cosmetic appearance of the small cruciate abdominal incision 10 days after surgery.Dr. Pelosi II reports that he is a consultant for Apple Medical Corporation. Dr. Pelosi III reports no affiliations or financial arrangements with any companies whose products are mentioned in this article.
1. Pelosi MA, II, Pelosi MA, III. Pelosi minilaparotomy hysterectomy: Effective alternative to laparoscopy and laparotomy. OBG Management. 2003;15(4):16-33.
2. Havrilesky LJ, Peterson BL, Dryden DK, et al. Predictors of clinical outcomes in the laparoscopic management of adnexal masses. Obstet Gynecol. 2003;102:243-251.
3. Pelosi MA, II, Pelosi MA, III. Laparoscopic removal of a 103 pound ovarian tumor. J Am Assoc Gynecol Laparosc. 1996;3:413-417.
4. Eltabbaku GH. Laparoscopic management of ovarian cysts. Contemporary OB/GYN. 2003;48(8):37-50.
5. Ou C, Liu Y, Zabriskie V, et al. Alternate method for laparoscopic management of adnexal masses greater than 10 cm in diameter. J Laparoendosc Adv Surg Tech. 2001;11:125-132.
6. Jeong E, Kim H, Ahn C, et al. Successful laparoscopic removal of huge ovarian cysts. J Am Gynecol Laparosc. 1997;4:609-614.
7. Nagele F, Magos AL. Combined ultrasonographically guided drainage and laparoscopic excision of a large ovarian cyst. Am J Obstet Gynecol. 1996;175:1377-1378.
8. Sheth S. Adnexal pathology. In: Sheth S, Studd J, eds. Vaginal Hysterectomy. London, England: Martin Dunitz; 2002;165-178.
9. Flynn MK, Niloff JM. Outpatient minilaparotomy for ovarian cysts. J Reprod Med. 1999;44:399-404.
10. Benedetti P, Panicci P, Maneschi F, et al. Surgery by minilaparotomy in benign gynecological disease. Obstet Gynecol. 1996;87:456-459.
11. Jansen FW, Tanahotoe S, Veselie M, et al. Laparoscopic aspiration of ovarian cysts: an unreliable technique in primary diagnosis of sonographically benign ovarian lesions. Gynecol Endosc. 1997;6:363-367.
12. Parker WH. Laparoscopic management of the adnexal mass in postmenopausal women. J Gynecol Tech. 1995;1:3-5.
13. Guerriero S, Ajossa S, Mais V, et al. Prelaparoscopic assessment of ovarian cysts in reproductive-age women. Gynecol Endosc. 1997;6:157-167.
14. Fowler JM, Carter JR. Laparoscopic management of the adnexal mass in postmenopausal women. J Gynecol Tech. 1995;1:7-10.
15. McCormick JB, Fitzgibbons JP. Instrument for aspiration of large ovarian cysts. Obstet Gynecol. 1967;29:869-870.
16. Yamada T, Okamoto Y, Kasematsu H. Use of the Sand balloon catheter for the laparoscopic surgery of benign ovarian cysts. Gynecol Endosc. 1999;9:51-54.
17. Shozu M, Segawa T, Sumitani H, et al. Leak-proof puncture of ovarian cysts: instant mounting of plastic bag using cyanoacrylate adhesive. Obstet Gynecol. 2001;97:1007-1010.
- Make a cruciate incision by incising the skin transversely and the anterior rectus fascia vertically.
- Insert a soft, sleeved, self-retaining retractor.
- Using a surgical adhesive, glue a large plastic wound dressing to the surface of the cyst to prevent leakage of contents into the abdominal cavity.
- Aspirate the cyst until it collapses and can be delivered, with the ovary, through the abdominal incision.
- After performing an extracorporeal cystectomy and/or adnexectomy, return the repaired ovary to the abdominal cavity.
Although laparotomy is still considered the standard for ovarian cyst removal, over the past 15 years minimally invasive surgery has gained wider acceptance in cases where preoperative assessment suggests an adnexal mass is benign.
Unfortunately, minimally invasive management of a large ovarian cyst (greater than 10 cm) is particularly challenging for several reasons:
- The cyst can rupture and spill its contents into the peritoneum,
- the cyst’s size limits the surgical field, and
- an unexpected malignancy may be revealed.
An innovative minilaparotomy technique for the removal of benign ovarian cysts offers the advantages of laparoscopic and laparoscopic-assisted procedures while bypassing the major disadvantages: the necessity for specialized and expensive equipment, lengthy operative time, and long learning curves.1 (The minimally invasive procedures currently available for the treatment of ovarian cysts include laparoscopic cystectomy, laparoscopic-assisted minilaparotomy cystectomy, laparoscopic-assisted vaginal cystectomy, combined percutaneous ultrasound cyst aspiration and laparoscopic cystectomy, transvaginal cystectomy, and the traditional minilaparotomy cystectomy.2-10)
The procedure is faster, less expensive, carries fewer potential risks than traditional alternatives, and offers these advantages:
- can be performed under regional anesthesia
- relies on standard open techniques
- uses inexpensive instrumentation
- is easy to learn
- can be used for very large cysts
- eliminates the risk of intraperitoneal spillage of cyst contents
- offers similar postoperative convalescence and mean time to return to work as laparoscopic or laparoscopic-assisted management of large ovarian cysts
General Ob/Gyns—not gynecologic oncologists—perform most surgeries on patients with adnexal masses, since ovarian cancer is relatively uncommon in the absence of preoperative risk factors for malignancy. Our approach offers an appealing option to Ob/Gyns reluctant to abandon routine traditional laparotomy for such ovarian cysts.
Selecting the right patient
Adequate preoperative assessment diminishes the risk of unexpected malignancy in a patient undergoing surgery for an ovarian mass to less than 1%.4 At this time, the combination of menopausal status, cancer antigen (CA) 125 level, physical examination, and ultrasound is the best strategy for evaluating the patient with an ovarian cyst.11
Signs of malignancy. Ultrasound features that suggest malignancy include irregular borders, thick septa, solid areas, internal and external excrescences, matted bowel, and ascites. Benign cysts, on the other hand, are usually unilateral and have regular borders, thin septa, no solid areas, and no internal excrescences.4 The measurement of blood flow within the mass by color Doppler may improve the accuracy of ultrasound in differentiating benign from malignant cysts.4,12
On physical examination, an adnexal mass that is fixed, irregular, or solid also suggests a neoplasm. An elevated CA 125 combined with a complex adnexal mass is likely to be associated with malignancy. The test is even more specific in postmenopausal women with adnexal masses.4,12
However, plasma levels of CA 125 also can be elevated in several benign gynecologic conditions such as endometriosis, simple ovarian cysts, pelvic inflammatory disease, ovarian torsion, fibroids, and in physiologic conditions such as menstruation and pregnancy.13
Anticipate the need to convert to laparotomy. Every patient’s surgical consent should include a possible conversion to laparotomy. To avoid incomplete surgical treatment and significant delays in proper therapy, a gynecologic surgeon experienced in the management of ovarian cancer should be readily available, in the event an unexpected malignancy is encountered. Ideally, the staging surgery and definite treatment should be performed at the time of initial minilaparotomy. Comprehensive surgical staging and treatment include thorough exploration of the pelvis and abdomen, omentectomy, pelvic and paraaortic lymph node sampling, multiple peritoneal biopsies and washings, bilateral salpingo-oophorectomy, hysterectomy, and debulking, when indicated.
Prepare for surgery with position, incision, and retraction
Before beginning, it is crucial to correctly position the patient, make the appropriate incision, and insert the right retractor.1
Position. After administering regional or general anesthesia, place the patient in a modified lithotomy, as for laparoscopic surgery. Tuck the arms alongside the torso and place the legs in boot stirrups. Avoid hip flexion and allow adequate thigh abduction to expose the vagina. Perform a careful pelvic examination to determine the size and mobility of the adnexal mass.
When properly placed, this retractor creates an atraumatic, circular area of self-retraction, enabling superior exposure
Place an indwelling transurethral catheter, and pass a sturdy, hinged uterine manipulator such as the Pelosi Uterine Manipulator (Apple Medical Corp, Marlboro, Mass) transcervically into the uterine cavity (FIGURE 1).
The cruciate incision. With a conventional scalpel make a small suprapubic transverse incision through the skin and subcutaneous tissue (FIGURE 2). After clearing subcutaneous fat from the midline, incise the rectus fascia and the peritoneum in a vertical direction.
A vertical skin incision can be selected if the preoperative workup suggests a later extension of the original minilaparotomy incision may be required, or if there is a prior vertical incision.
Retraction. Use a soft sleeve-type self-retaining plastic retractor, such as Mobius (Apple Medical Corp) (FIGURE 3 ). When properly placed, this retractor creates an atraumatic, circular area of self-retraction, enabling superior exposure of the pelvis (FIGURE 4).
During surgery it may be necessary to adjust the outer ring if the sleeve loosens. Narrow Deaver or Richardson retractors, if required, provide additional retraction. The bowel may be gently packed, if necessary, but typically it is adequately displaced by the large ovarian cyst.
The atraumatic retraction provided by the soft, self-retaining abdominal retractor minimizes the possibility of tissue trauma, nerve damage, bruising, and postoperative pain. At the same time, the continuous 360° retraction force on the incision maximizes surgical exposure, providing a significantly larger working area than conventional retractors. For example, when applied to a 6-cm incision, the self-retaining retractor creates a 28-cm2 exposed working area, compared with only 18 cm2 provided by a conventional 4-point metal retractor.
The adjustable height of the self-retaining retractor adapts to wounds of varying depth and works on virtually any tissue thickness—a feature that makes the device effective for obese patients. Further, by lining the abdominal incision, the retractor’s plastic sleeve protects the wound’s edges from contamination and potential implantation of malignant cells, making the device ideal for managing ovarian cysts.
FIGURE 1 Hinged uterine manipulator
The manipulator facilitates exposure of the cyst and contralateral adnexa, as well as uterine elevation/rotation.
FIGURE 2 Cruciate incision
Make a 2.5- to 5-cm suprapubic transverse skin incision. Using the Bovie device, incise the subcutaneous fat transversely along the full length of the skin incision down to the level of the anterior rectus fascia. Clear the subcutaneous fat from the midline superiorly and inferiorly to expose 5 to 6 cm of the rectus fascia in the vertical axis. Use blunt digital dissection to assist in mobilizing the subcutaneous fat. Incise the anterior rectus fascia vertically through the full length of the cleared area. Retract the rectus muscles from the midline to expose the underlying transversalis fascia and the peritoneum. Control small bleeding points with the Bovie device. Enter the peritoneum either digitally or with scissors above the bladder dome and extend the peritoneal incision to the full length of the fascial incision.
FIGURE 3 Self-retaining retractor
The retractor consists of a flexible plastic inner ring and a firmer outer ring connected by a soft plastic sleeve.
FIGURE 4360° retraction force
Squeeze the inner ring of the soft, sleeve-type, self-retaining retractor into the peritoneal cavity through the cruciate abdominal incision and allow it to spring open against the parietal peritoneum. Make a digital assessment to ensure that viscera is not trapped between the inner ring and the abdominal wall. Place the entire sleeve on traction by lifting the outer ring. Then roll the outer ring onto the sleeve, collecting excess length, until it sits firmly against the skin. The atraumatic retraction provided by the sleeve-type retractor maximizes exposure of the pelvis. Note how a portion of the large cyst is clearly seen through the atraumatic, circular area of retraction.
Cyst assessment
Visually and digitally inspect the cyst and carefully evaluate the uterus, pelvis, and contralateral adnexa. Determine the extent of adhesions and any unexpected pelvic pathology. When needed, use traditional small retractors or gentle packing to gain additional exposure. If the cystic mass appears suspicious (internal and external excrescences on the cyst, ovaries, or peritoneal surfaces, or ascites), obtain pelvic washings with a suction-irrigation cannula, send the fluid for cytologic examination, and convert the minilaparotomy to a standard exploratory laparotomy. Extensive adhesions to the bowel, broad ligament, or pelvic sidewall and unexpected extensive endometriosis may also require a conversion to standard laparotomy.
Reduce cyst size by decompression
Simple aspiration is inadvisable. To remove a large ovarian cyst using the Pelosi minilaparotomy, reduce the size of the cyst to permit safe and effective mobilization and resection through the small abdominal incision. Simple aspiration of the cyst, with its potential for spilling the contents, is not a wise strategy for several reasons. First, many ovarian cysts contain functional epithelium with a high recurrence rate (8% to 67%). Second, studies show that 10% to 66% of ovarian cyst fluid aspirates initially diagnosed as benign actually are malignant. Further, relying on negative cytology from the aspirate of an ovarian cyst without tissue biopsy may delay appropriate surgery, and the puncture of an unexpected malignant cyst may seed the peritoneal cavity and possibly worsen the patient’s prognosis.11,12
This technique, suitable for all ovarian cysts, makes it possible to aspirate a large cyst without leakage.
Whether spillage of cancer cells actually worsens the prognosis of a patient with a neoplastic cyst remains controversial because of conflicting study results. Nonetheless, the possibility of intraperitoneal dissemination of neoplastic cells from a ruptured cyst cannot be considered innocuous, and the potential negative effect on a patient’s prognosis should not be ignored.14 Make every attempt, therefore, to avoid rupturing the cyst and spilling the fluid into the peritoneal cavity.
A shared flaw plagues aspiration devices. Different devices are available for intraoperative cyst aspiration during laparoscopic, transvaginal, or laparotomy approaches.3,4,6 In addition to long needles, drainage trocars, suction cannulas, and suprapubic bladder catheters, special aspiration instruments have been developed.15 They include a metal vacuum system with an aspirator trocar that seals the surface of the cyst, and a catheter system that pinches the punctured cyst wall between double balloons to prevent spillage.16 In addition, several commercial bags are available to prevent intraperitoneal spillage during removal of ovarian cysts.
All these devices have a universal flaw, however: After a thin-walled cyst initially is punctured, none of these products can prevent the spontaneous dehiscence of the cyst and the resulting spillage of its contents into the abdominal cavity. Vacuum systems work well for large cysts with smooth, round surfaces, but in those with irregular surfaces, both application and maintaining the seal are difficult.17 Fortunately, our technique makes it possible to aspirate a large ovarian cyst without leakage, and the method is suitable for all ovarian cysts regardless of surface type or wall thickness.
Glue the dressing to the cyst to capture leakage. Using a gauze pad, carefully dry the area of the ovarian cyst that is visible through the self-retaining retractor. Then generously spread sterile surgical glue such as Dermabond (Ethicon, Somerville, NJ) on the cyst wall surface (FIGURE 5A). Dermabond is the commercial name for 2-octyl cyanoacrylate, a sterile skin adhesive used as an alternative to stitches to close the edges of small wounds. It is similar to commercial adhesives such as Super Glue and Krazy Glue.
Remove the paper cover of a transparent plastic surgical dressing and place the adhesive side directly onto the glued cyst surface until you are sure the adhesive is completely fixed (FIGURES 5B AND 5C). The 35 cm x 35 cm Steri-Drape or the transparent Tegaderm (both from 3M Health Care, St. Paul, Minn) dressing is effective. A standard nonadhesive plastic dressing or a sterile plastic bag also can be used, as long as the free edges extend beyond the outer rim of the self-retaining retractor.
With a needle aspirator, pierce the cyst through the glued plastic dressing and carefully aspirate the fluid (FIGURES 6A AND 6B). Any leakage is trapped inside the plastic dressing rather than the abdominal cavity. Continue the aspiration until the collapsed cyst and ovary can be gradually delivered through the abdominal incision (FIGURE 6C). Note that the selfretaining retractor also protects the abdominal incision from potential contamination and implantation of neoplastic cells.
Once the cyst and ovary are extracted, you can readily perform an extracorporeal cystectomy, after which the repaired ovary is returned to the abdominal cavity. Be careful to avoid letting any fluid flow back into the peritoneal cavity during cyst removal. When indicated, an extracorporeal adnexectomy can readily be performed.
The presence of oily material or hairs in the aspirated fluid and on the needle tip readily identifies a dermoid cyst.
Dermoid cysts require extra care. Preventing intraperitoneal spillage is especially important when removing a large dermoid cyst, to avoid the possibility of chemical peritonitis, dense adhesions, and fistulas. The presence of oily material or hairs in the aspirated fluid and on the needle tip readily identifies a dermoid cyst. Quite frequently, a large-diameter suction cannula is required to remove the waxy contents. If the dermoid cyst is very large, aspiration alone will not empty it entirely. Complete emptying is not necessary, however. The primary goal of aspiration is to reduce the size and tension of the cyst to permit delivery through the abdominal incision.
Closing the cruciate incision is quicker and requires less exposure than a scaled-down Pfannenstiel’s incision.
Before concluding the procedure, irrigate the peritoneal cavity to remove any remnants of cyst contents that may have spilled—especially important with a dermoid cyst. Perform any additional indicated procedures through the minilaparotomy incision, such as a contralateral ovarian cystectomy, salpingo-oophorectomy, or hysterectomy. After the surgery is completed, remove the self-retaining retractor by hooking a finger through the bottom ring and pulling it gently out of the incision. Closing the cruciate incision is quicker and requires less exposure to complete than a scaled-down Pfannenstiel’s incision. Apply a vertical pressure dressing over the incision to prevent postoperative wound hematoma or seroma formation. Remove the dressing 24 hours later.
FIGURE 5A ‘Leak-proofing’ the aspiration
After drying the surface of the cyst, apply sterile surgical glue to the cyst wall (2 to 3 ampules are usually required to cover the cyst surface).
FIGURE 5B ‘Leak-proofing’ the aspiration
Apply the adhesive side of a clear plastic wound dressing directly onto the cyst’s surface, making sure that the dressing is large enough to fully cover the self-retaining retractor. Using either a piece of folded gauze or your fingers, press the plastic dressing against the adhesive-coated cyst for about 3 to 5 minutes until the adhesive is completely fixed.
FIGURE 5C ‘Leak-proofing’ the aspiration
Remove the paper cover of the wound dressing.
FIGURE 6A Aspirating the cyst
Pierce the dressing and carefully aspirate the fluid until the cyst is partially collapsed.
FIGURE 6B Aspirating the cyst
Place atraumatic clamps on the cyst wall to further control drainage. Any leakage is trapped inside the plastic dressing rather than draining into the abdominal cavity.
FIGURE 6C Aspirating the cyst
Continue the aspiration until the collapsed cyst and ovary can be delivered gradually through the abdominal incision, after detaching the adhesive plastic dressing from the edges of the self-retaining retractor. The portion of the plastic sleeve that is glued to the cyst surface remains attached to the cyst until the cyst is extracted. Following extraction, perform an extracorporeal cystectomy and return the repaired ovary to the abdominal cavity.
Good results
Using our approach, we have treated 38 patients with ovarian cysts of diameters greater than 20 cm thought to be benign by preoperative workup (FIGURE 7). We encountered no malignancies. All surgeries were successfully completed without laparoscopy or conversion to traditional laparotomy and with good cosmesis (FIGURE 8).
Other procedures performed in some of these patients using the same technique included contralateral cystectomy, salpingo-oophorectomy, subtotal and total hysterectomy, adhesiolysis, and appendectomy. We encountered no intraoperative or postoperative complications. Operating times ranged from 18 to 65 minutes. All patients were discharged home within 36 hours and returned to work in a mean of 12 days. Pathology findings of the ovarian cysts included endometrioma, dermoid cyst, serous cystadenoma, and mucinous cystadenoma.
FIGURE 7 Effective for large cysts
Following removal, the collapsed cyst was refilled with 1,300 mL of normal saline to demonstrate its actual size.
FIGURE 8 Good cosmetic results
Cosmetic appearance of the small cruciate abdominal incision 10 days after surgery.Dr. Pelosi II reports that he is a consultant for Apple Medical Corporation. Dr. Pelosi III reports no affiliations or financial arrangements with any companies whose products are mentioned in this article.
1. Pelosi MA, II, Pelosi MA, III. Pelosi minilaparotomy hysterectomy: Effective alternative to laparoscopy and laparotomy. OBG Management. 2003;15(4):16-33.
2. Havrilesky LJ, Peterson BL, Dryden DK, et al. Predictors of clinical outcomes in the laparoscopic management of adnexal masses. Obstet Gynecol. 2003;102:243-251.
3. Pelosi MA, II, Pelosi MA, III. Laparoscopic removal of a 103 pound ovarian tumor. J Am Assoc Gynecol Laparosc. 1996;3:413-417.
4. Eltabbaku GH. Laparoscopic management of ovarian cysts. Contemporary OB/GYN. 2003;48(8):37-50.
5. Ou C, Liu Y, Zabriskie V, et al. Alternate method for laparoscopic management of adnexal masses greater than 10 cm in diameter. J Laparoendosc Adv Surg Tech. 2001;11:125-132.
6. Jeong E, Kim H, Ahn C, et al. Successful laparoscopic removal of huge ovarian cysts. J Am Gynecol Laparosc. 1997;4:609-614.
7. Nagele F, Magos AL. Combined ultrasonographically guided drainage and laparoscopic excision of a large ovarian cyst. Am J Obstet Gynecol. 1996;175:1377-1378.
8. Sheth S. Adnexal pathology. In: Sheth S, Studd J, eds. Vaginal Hysterectomy. London, England: Martin Dunitz; 2002;165-178.
9. Flynn MK, Niloff JM. Outpatient minilaparotomy for ovarian cysts. J Reprod Med. 1999;44:399-404.
10. Benedetti P, Panicci P, Maneschi F, et al. Surgery by minilaparotomy in benign gynecological disease. Obstet Gynecol. 1996;87:456-459.
11. Jansen FW, Tanahotoe S, Veselie M, et al. Laparoscopic aspiration of ovarian cysts: an unreliable technique in primary diagnosis of sonographically benign ovarian lesions. Gynecol Endosc. 1997;6:363-367.
12. Parker WH. Laparoscopic management of the adnexal mass in postmenopausal women. J Gynecol Tech. 1995;1:3-5.
13. Guerriero S, Ajossa S, Mais V, et al. Prelaparoscopic assessment of ovarian cysts in reproductive-age women. Gynecol Endosc. 1997;6:157-167.
14. Fowler JM, Carter JR. Laparoscopic management of the adnexal mass in postmenopausal women. J Gynecol Tech. 1995;1:7-10.
15. McCormick JB, Fitzgibbons JP. Instrument for aspiration of large ovarian cysts. Obstet Gynecol. 1967;29:869-870.
16. Yamada T, Okamoto Y, Kasematsu H. Use of the Sand balloon catheter for the laparoscopic surgery of benign ovarian cysts. Gynecol Endosc. 1999;9:51-54.
17. Shozu M, Segawa T, Sumitani H, et al. Leak-proof puncture of ovarian cysts: instant mounting of plastic bag using cyanoacrylate adhesive. Obstet Gynecol. 2001;97:1007-1010.
New transobturator sling reduces risk of injury
- The route of the transobturator sling is strictly perineal, with a very short, blind passage through the crural region. This pathway ensures that the retropubic space is not entered and that the anatomic structures crossed by the needle passer and mesh are either muscle or fascia.
- The transobturator approach eliminates the need for routine cystoscopy in most patients.
- Short-term efficacy of the transobturator sling is similar to that of other suburethral tension-free slings.
- In our experience, the transobturator approach reduces average operating time to 17 minutes.
Potential complications associated with passing needle carriers through the retropubic space are eliminated, and cystoscopy is not routinely required with the use of a transobturator sling.
Although it is effective and easy to perform,1-6 retropubic placement of suburethral tension-free vaginal tape (TVT) for the treatment of stress urinary incontinence has been associated with a number of bowel, vascular, nerve, and bladder injuries (TABLE).7-13
Such complications appear to be related to the unique upward vaginal passage of the metallic sling trocars through the retropubic space. Newer slings eliminate the upward approach, but still require routine cystoscopy to confirm an intact bladder and urethra.
A new tension-free suburethral sling addresses these shortcomings using an innovative transobturator route.14 In the new procedure, the surgeon uses needle passers to run the sling from one obturator foramen to the other. The perineal approach reproduces the natural suspension of the urethral fascia while preserving an intact retropubic space (FIGURE 1).
TABLE
Advantages of the transobturator sling
|
FIGURE 1 Suburethral slings: Retropubic and transobturator pathways
Traditional suburethral tension-free slings require the needle passers and sling to be placed through the retropubic space.
The newer transobturator sling uses a perineal approach. The needle passer and sling are passed from one obturator foramen to the other, preserving an intact retropubic space.
What does ‘tension-free’ mean?
Tension-free slings are used to treat stress urinary incontinence caused by urethral hypermobility and intrinsic sphincter deficiency. In this approach, a synthetic transvaginal suburethral sling is placed through the retropubic space without using suspension sutures. The sling is held in place by the friction between the mesh and the tissue canals created by the metallic needle passers. Scar tissue later fixes the mesh, preventing migration.
Short-term efficacy of the Monarc transobturator sling is similar to that of the SPARC and tension-free vaginal slings.
Because the sling is not anchored to the pubic bone, ligaments, or rectus fascia, it is considered “free of tension.” The result is a midcomplex urethral support that limits urethral descent, improves the stabilization mechanism generated by pubourethral ligaments and levator ani muscles, and reinforces support of the backboard vaginal hammock.
A tension-free sling designed to reduce injury
Since its introduction in the mid 1990s, retropubic placement of suburethral tension-free tape has continued to gain in popularity.15-22 The technique has several advantages: It is simple to perform under local, regional, or general anesthesia, and has proved to be a safe treatment for stress urinary incontinence, with minimal complications in experienced hands. Still, injuries have occurred7-13 —likely due to the blind passing of metal trocars from the vagina upward through the retropubic space.9,23
Downward placement introduced. In an effort to reduce these complications, tension-free sling systems that rely on suprapubic, downward needle-carrier placement through the retropubic space were developed, such as the SPARC Female Sling System (American Medical Systems, Minnetonka, Minn), introduced in 2001.24 The manufacturer of the traditional TVT (Gynecare, a division of Ethicon, Somerville, NJ) also recently introduced suprapubic needle passers. However, because these slings still require passage through the retropubic space, their use may lead to vascular, bowel, and bladder injury. Routine cystoscopy is therefore required.
The transobturator sling. In the Netherlands in 1998, Nickel et al25 reported a successful sling procedure using a polyester ribbon passed through the obturator foramen and around the urethra for treatment of refractory urethral sphincter incompetence in female dogs. In France in 2001, Delorme14 introduced the transobturator sling procedure in humans. Dargent et al26 then performed the operation in 71 patients using a technique inspired by Delorme, and found the shortterm results similar to those of the TVT.
The Monarc transobturator sling (American Medical Systems), introduced in Europe in January 2003, has been used successfully in more than 1,000 procedures ( FIGURE 2). This new system offers significant technical improvements over the original transobturator sling devices.
The Monarc transobturator sling, introduced in Europe in January 2003, has been used successfully in more than 1,000 procedures.
Specifically, the Monarc system simplifies rotation of the needle passer during insertion and extraction around the inferior aspect of the ischiopubic ramus. The 3-mm–diameter passers are specifically designed for right-side or left-side use. They are attached to fixed handles to create a natural wrist rotation. The sling connectors, meanwhile, facilitate rapid, effortless, and secure mesh placement and fixation.
FIGURE 2 Monarc transobturator sling system
The Monarc system consists of 2 stainless steel helical-shaped needle passers and a 1-cm by 35-cm polypropylene sling mesh with a protected sheath, attached connectors, and a reabsorbable tensioning suture.
Easy to learn and perform
Anesthesia may be local, regional, or general, and prophylactic antibiotics are routinely given. FIGURES 3 through 6 offer a detailed description of how to surgically place the Monarc transobturator sling for treatment of stress urinary incontinence. What follows is a brief overview:
After making a small vertical incision along the anterior vaginal mucosa, use a finger to locate the upper-inner corner of the obturator foramen—the safe zone for needle insertion. You will incise the skin at this point and introduce the needle tip perpendicularly. Rotate the needle, with the tip following the posterior surface of the pubic ramus, until the tip exits the vaginal incision. Repeat this process on the other side.
Attach the sling and its plastic sheath, then draw both out through the skin incisions by pulling back on the needle passers. Cut the mesh, adjust the tension, and close the incisions.
A Foley catheter and vaginal packing with metronidazole gel may be used at the surgeon’s discretion.
Route minimizes anatomical hazards. The pathway described ensures that there tropubic space is not entered and that muscle or fascia are the only anatomic structures crossed by the needle passer and mesh. No major vessels or nerves come in contact with the sling (FIGURES 7 and 8).
Our fluoroscopic observations of the transobturator sling in cadavers show that insertion of the needle passer through the obturator foramen with exit through the vaginal incision under the mid-urethra is precise and simple (FIGURE 9).
Our comparative studies in cadavers revealed that, despite the different shape and placement, lengths for the SPARC and Monarc transobturator slings in the same cadaver are almost equivalent—ranging from 12 to 14 cm, depending on the patient’s height and weight (FIGURE 10).
The transobturator sling involves fewer potential anatomical hazards than retropubic placement.
These considerations strongly suggest that the transobturator sling offers a simpler approach with fewer potential anatomic hazards than retropubic tension-free slings.
FIGURE 3 Vaginal incision
Inject a diluted vasoconstrictive solution into the anterior vaginal wall, and make a small vertical incision along the anterior vaginal mucosa 0.5 cm below the urethral meatus. Separate the vaginal epithelium from the underlying periurethral fascia using sharp and digital dissection, advancing bilaterally to the inferior pubic ramus. Insert a finger into the vaginal dissection and palpate the internal edge of the ischiopubic ramus and the upper-inner corner of the obturator foramen.
FIGURE 4 Needle entry: Transobturator sling procedure
The safe zone for needle insertion is the upper-inner corner of the obturator foramen (red line). The red dot indicates the recommended insertion site (upper inner corner).
The insertion area corresponds to the point where a horizontal line at the level of the clitoris crosses a vertical line at the level of the genitofemoral fold. Make a small skin incision at this point.
FIGURE 5 Needle passage: Transobturator sling procedure
Insert your left index finger into the vaginal incision on the patient’s left side. Holding the right-side Monarc needle, introduce the needle tip perpendicularly through the skin incision.
Place the thumb of your left hand onto the outside curve of the needle and gently push until its tip penetrates the obturator membrane and muscle. Use the needle’s tip to locate the pubic ramus, and rotate the needle so that the tip follows the posterior surface of this structure.
Continue this rotation, using your left index finger to guide the needle tip to exit the vaginal incision.
Repeat steps A and B on the contralateral side.
With the needle-passer tips extending out of the vaginal incision, attach the sling and its plastic sheath using the connectors. Make sure the mesh lies flat and is not twisted before attaching the connector to the second needle.
FIGURE 7 Route of transobturator sling minimizes anatomical hazards
The needle travels around the ischiopubic ramus. Transobturator needle passage begins with penetration of the skin and subcutaneous tissue. After traversing the superficial perineal fascia, the needle crosses the adductor muscles of the thigh near their pubic bone origin and below the insertion point of the adductor longus tendon (arrow). It then penetrates the obturator membrane, obturator internus muscle, and periurethral endopelvic fascia. After passing the level of the white line—either over or under the puborectalis section of the levator—the needle exits through the vaginal incision.
FIGURE 8 The obturator foramen
The tough obturator membrane covers the foramen. The obturator canal is 2 to 3 cm long and is located at the anterolateral upper margin of the membrane. The distance between the safe zone for needle insertion and the obturator canal is approximately 3.5 to 4 cm. At the safe entry zone (green area), the anterior branch of the obturator artery is reduced to a capillary diameter and no significant arteries, veins, or nerve pedicles are present.
FIGURE 10 Routes of transobturator and retropubic slings
Graphic depiction of both the transobturator sling and the retropubic tension-free sling in place.
Fluoroscopic image of both slings in a cadaver. The transobturator sling runs horizontally while the retropubic tension-free sling forms a tighter “U.”
Clinical experience yields positive results
Early European series and our initial experience suggest that the short-term efficacy of the Monarc transobturator sling is similar to that of the SPARC and TVT slings. Average operating time is 17 minutes. The technique involves a short learning curve (approximately 4 cases).
Cystoscopy is not routinely required; we perform it only in women with significant prolapse or suspected urethral injury, and have encountered no intraoperative or post-operative complications.
No major vessels or nerves come in contact with the transobturator tension-free sling.
No patients have complained of postoperative pain in the area of the adductor muscles of the thigh, and no sling erosions have occurred. We also have found this approach useful in obese patients and women with retropubic scarring, in whom retropubic needle passage can be a challenge.
In addition to its application in the treatment of female stress urinary incontinence, the transobturator foramen route was recently used to insert the anterior wings of a large mesh in the repair of severe cystocele.27
Although long-term follow-up data are not available for the transobturator approach, short-term results are encouraging. Large comparative studies with other anti-incontinent procedures are needed.
Dr. Pelosi II reports that he is a consultant for American Medical Systems. Dr. Pelosi III reports no affiliations or financial arrangements with any companies whose products are mentioned in this article.
1. Reschers UM, Tunn R, Buczkowski M, et al. Tension-free vaginal tape for the treatment of stress urinary incontinence. Clin Obstet Gynecol. 2000;43:670-675.
2. Tamussino KF, Hanzal E, Kolle D, et al. Tension-free vaginal tape operation: results of the Austrian Registry. Obstet Gynecol. 2001;98:732-736.
3. Haab F, Sananes S, Amarenco G, et al. Results of the tension-free vaginal tape procedure for the treatment of type II stress urinary incontinence at a minimum follow up of one year. J Urol. 2001;165:159-162.
4. Rardin CR, Kohli N, Rosenblatt PL, et al. Tension-free vaginal tape: outcomes among women with primary versus recurrent stress urinary incontinence. Obstet Gynecol. 2002;100:893-897.
5. Vassallo BJ, Kleeman SD, Segal JL, et al. Tension-free vaginal tape: a quality of life assessment. Obstet Gynecol. 2002;100:518-524.
6. Karram MM, Segal JL, Vassallo BJ, et al. Complications and untoward effects of the tension-free vaginal tape procedure. Obstet Gynecol. 2003;101:929-932.
7. MAUDE: Food and Drug Administration Manufacturer and User Facility Device Experience Database. Available at http://www.fda.gov/cdrh/maude.html. Accessed June 7, 2003.
8. Peyrat L, Boutin JM, Bruyere F, et al. Intestinal perforation is a complication of TVT procedure for UI. Eur Urol. 2001;39:603-605.
9. Walters MD, Tulikangas PR, LaSala C, et al. Vascular injury during tension-free vaginal tape procedure for stress urinary incontinence. Obstet Gynecol. 2001;98:957-959.
10. Zilbert AW, Farrell SA. External iliac artery laceration during tension-free vaginal tape procedure. Int Urogynecol J Pelvic Floor Dysfunct. 2001;12:141-143.
11. Vierhout ME. Severe hemorrhage complicating TVT: a case report. Int Urogynecol J Pelvic Floor Dysfunct. 2000;12:139-140.
12. Brink DM. Bowel injury following insertion of TVT. S Afr Med J. 2000;90:450-452.
13. Shobeiri SA, Garely AD, Chesson RR. Recognition of occult bladder injury during the tension-free vaginal tape procedure. Obstet Gynecol. 2002;99:1067-1072.
14. Delorme E. Transobturator urethral suspension: mini-invasive procedure in the treatment of stress urinary incontinence in women. Prog Urol. 2001;11:1306-1313.
15. Ulmstein V, Petros P. Intravaginal slingplasty (IVS): an ambulatory surgical procedure for treatment of female urinary incontinence. Scand J Urol Neprhol. 1995;29:75-82.
16. Chung MK, Chung RP. Comparison of laparoscopic Burch and tension-free vaginal tape in treating stress urinary incontinence in obese patients. JSLS. 2002;6:17-21.
17. Pelosi MA, III, Pelosi MA, II. Pubic bone suburethral stabilization sling: laparoscopic assessment of a transvaginal operation for the treatment of stress urinary incontinence. J Laparoendosc Adv Surg Tech. 1999;9:45-50.
18. Pelosi MA, II, Pelosi MA, III, Pelekanos M. The YAMA uropatch sling for treatment of female stress urinary incontinence: a pilot study. J Laparoendosc Adv Surg Tech. 2002;12:27-33.
19. Pelosi MA, II, Pelosi MA, III. Laparoscopic assessment of transvaginal suture fixation to Cooper’s ligament for suburethral slings. J Am Assoc Gynecol Laparosc. 2001;8:S53.-
20. Cundiff GW, Wright JE. A review of surgical management of genuine stress incontinence in women with a discussion of innovative procedures. J Pelvic Surg. 1998;4:271-278.
21. Sarver R, Govier FE. Pubovaginal slings: past, present, and future. Int Urogynecol J. 1997;8:358-368.
22. Kovac RS, Cruikshank SH. Pubic bone suburethral stabilization sling for recurrent urinary incontinence. Obstet Gynecol. 1997;89:624-627.
23. Muir TW, Tulikangos PK, Paraiso MF, et al. The relationship of tension-free vaginal tape insertion and the vascular anatomy. Obstet Gynecol. 2003;101:933-936.
24. Pelosi MA, II, Pelosi MA, III. Laparoscopic evaluation of a new tension-free vaginal sling (SPARC) for stress urinary incontinence. Proceedings of the 31st annual meeting of the American Association of Gynecologic Laparoscopists. November 2002; Miami, Fla.
25. Nickel RF, Wiegand U, van den Brom WE. Evaluation of a transpelvic sling procedure with and without colposuspension for treatment of female dogs with refractory urethral sphincter mechanism incompetence. Vet Surg. 1998;27:94-104.
26. Dargent D, Bretones S, George P, et al. Insertion of a suburethral sling through the obturator membrane in the treatment of female urinary incontinence. Gynecol Obstet Fertil. 2002;30:576-582.
27. Mouly P, Soulie M, Seguin P, et al. Vaginal reconstruction of a complete vaginal prolapse: the transobturator repair. J Urol. 2003;169:S182.-
- The route of the transobturator sling is strictly perineal, with a very short, blind passage through the crural region. This pathway ensures that the retropubic space is not entered and that the anatomic structures crossed by the needle passer and mesh are either muscle or fascia.
- The transobturator approach eliminates the need for routine cystoscopy in most patients.
- Short-term efficacy of the transobturator sling is similar to that of other suburethral tension-free slings.
- In our experience, the transobturator approach reduces average operating time to 17 minutes.
Potential complications associated with passing needle carriers through the retropubic space are eliminated, and cystoscopy is not routinely required with the use of a transobturator sling.
Although it is effective and easy to perform,1-6 retropubic placement of suburethral tension-free vaginal tape (TVT) for the treatment of stress urinary incontinence has been associated with a number of bowel, vascular, nerve, and bladder injuries (TABLE).7-13
Such complications appear to be related to the unique upward vaginal passage of the metallic sling trocars through the retropubic space. Newer slings eliminate the upward approach, but still require routine cystoscopy to confirm an intact bladder and urethra.
A new tension-free suburethral sling addresses these shortcomings using an innovative transobturator route.14 In the new procedure, the surgeon uses needle passers to run the sling from one obturator foramen to the other. The perineal approach reproduces the natural suspension of the urethral fascia while preserving an intact retropubic space (FIGURE 1).
TABLE
Advantages of the transobturator sling
|
FIGURE 1 Suburethral slings: Retropubic and transobturator pathways
Traditional suburethral tension-free slings require the needle passers and sling to be placed through the retropubic space.
The newer transobturator sling uses a perineal approach. The needle passer and sling are passed from one obturator foramen to the other, preserving an intact retropubic space.
What does ‘tension-free’ mean?
Tension-free slings are used to treat stress urinary incontinence caused by urethral hypermobility and intrinsic sphincter deficiency. In this approach, a synthetic transvaginal suburethral sling is placed through the retropubic space without using suspension sutures. The sling is held in place by the friction between the mesh and the tissue canals created by the metallic needle passers. Scar tissue later fixes the mesh, preventing migration.
Short-term efficacy of the Monarc transobturator sling is similar to that of the SPARC and tension-free vaginal slings.
Because the sling is not anchored to the pubic bone, ligaments, or rectus fascia, it is considered “free of tension.” The result is a midcomplex urethral support that limits urethral descent, improves the stabilization mechanism generated by pubourethral ligaments and levator ani muscles, and reinforces support of the backboard vaginal hammock.
A tension-free sling designed to reduce injury
Since its introduction in the mid 1990s, retropubic placement of suburethral tension-free tape has continued to gain in popularity.15-22 The technique has several advantages: It is simple to perform under local, regional, or general anesthesia, and has proved to be a safe treatment for stress urinary incontinence, with minimal complications in experienced hands. Still, injuries have occurred7-13 —likely due to the blind passing of metal trocars from the vagina upward through the retropubic space.9,23
Downward placement introduced. In an effort to reduce these complications, tension-free sling systems that rely on suprapubic, downward needle-carrier placement through the retropubic space were developed, such as the SPARC Female Sling System (American Medical Systems, Minnetonka, Minn), introduced in 2001.24 The manufacturer of the traditional TVT (Gynecare, a division of Ethicon, Somerville, NJ) also recently introduced suprapubic needle passers. However, because these slings still require passage through the retropubic space, their use may lead to vascular, bowel, and bladder injury. Routine cystoscopy is therefore required.
The transobturator sling. In the Netherlands in 1998, Nickel et al25 reported a successful sling procedure using a polyester ribbon passed through the obturator foramen and around the urethra for treatment of refractory urethral sphincter incompetence in female dogs. In France in 2001, Delorme14 introduced the transobturator sling procedure in humans. Dargent et al26 then performed the operation in 71 patients using a technique inspired by Delorme, and found the shortterm results similar to those of the TVT.
The Monarc transobturator sling (American Medical Systems), introduced in Europe in January 2003, has been used successfully in more than 1,000 procedures ( FIGURE 2). This new system offers significant technical improvements over the original transobturator sling devices.
The Monarc transobturator sling, introduced in Europe in January 2003, has been used successfully in more than 1,000 procedures.
Specifically, the Monarc system simplifies rotation of the needle passer during insertion and extraction around the inferior aspect of the ischiopubic ramus. The 3-mm–diameter passers are specifically designed for right-side or left-side use. They are attached to fixed handles to create a natural wrist rotation. The sling connectors, meanwhile, facilitate rapid, effortless, and secure mesh placement and fixation.
FIGURE 2 Monarc transobturator sling system
The Monarc system consists of 2 stainless steel helical-shaped needle passers and a 1-cm by 35-cm polypropylene sling mesh with a protected sheath, attached connectors, and a reabsorbable tensioning suture.
Easy to learn and perform
Anesthesia may be local, regional, or general, and prophylactic antibiotics are routinely given. FIGURES 3 through 6 offer a detailed description of how to surgically place the Monarc transobturator sling for treatment of stress urinary incontinence. What follows is a brief overview:
After making a small vertical incision along the anterior vaginal mucosa, use a finger to locate the upper-inner corner of the obturator foramen—the safe zone for needle insertion. You will incise the skin at this point and introduce the needle tip perpendicularly. Rotate the needle, with the tip following the posterior surface of the pubic ramus, until the tip exits the vaginal incision. Repeat this process on the other side.
Attach the sling and its plastic sheath, then draw both out through the skin incisions by pulling back on the needle passers. Cut the mesh, adjust the tension, and close the incisions.
A Foley catheter and vaginal packing with metronidazole gel may be used at the surgeon’s discretion.
Route minimizes anatomical hazards. The pathway described ensures that there tropubic space is not entered and that muscle or fascia are the only anatomic structures crossed by the needle passer and mesh. No major vessels or nerves come in contact with the sling (FIGURES 7 and 8).
Our fluoroscopic observations of the transobturator sling in cadavers show that insertion of the needle passer through the obturator foramen with exit through the vaginal incision under the mid-urethra is precise and simple (FIGURE 9).
Our comparative studies in cadavers revealed that, despite the different shape and placement, lengths for the SPARC and Monarc transobturator slings in the same cadaver are almost equivalent—ranging from 12 to 14 cm, depending on the patient’s height and weight (FIGURE 10).
The transobturator sling involves fewer potential anatomical hazards than retropubic placement.
These considerations strongly suggest that the transobturator sling offers a simpler approach with fewer potential anatomic hazards than retropubic tension-free slings.
FIGURE 3 Vaginal incision
Inject a diluted vasoconstrictive solution into the anterior vaginal wall, and make a small vertical incision along the anterior vaginal mucosa 0.5 cm below the urethral meatus. Separate the vaginal epithelium from the underlying periurethral fascia using sharp and digital dissection, advancing bilaterally to the inferior pubic ramus. Insert a finger into the vaginal dissection and palpate the internal edge of the ischiopubic ramus and the upper-inner corner of the obturator foramen.
FIGURE 4 Needle entry: Transobturator sling procedure
The safe zone for needle insertion is the upper-inner corner of the obturator foramen (red line). The red dot indicates the recommended insertion site (upper inner corner).
The insertion area corresponds to the point where a horizontal line at the level of the clitoris crosses a vertical line at the level of the genitofemoral fold. Make a small skin incision at this point.
FIGURE 5 Needle passage: Transobturator sling procedure
Insert your left index finger into the vaginal incision on the patient’s left side. Holding the right-side Monarc needle, introduce the needle tip perpendicularly through the skin incision.
Place the thumb of your left hand onto the outside curve of the needle and gently push until its tip penetrates the obturator membrane and muscle. Use the needle’s tip to locate the pubic ramus, and rotate the needle so that the tip follows the posterior surface of this structure.
Continue this rotation, using your left index finger to guide the needle tip to exit the vaginal incision.
Repeat steps A and B on the contralateral side.
With the needle-passer tips extending out of the vaginal incision, attach the sling and its plastic sheath using the connectors. Make sure the mesh lies flat and is not twisted before attaching the connector to the second needle.
FIGURE 7 Route of transobturator sling minimizes anatomical hazards
The needle travels around the ischiopubic ramus. Transobturator needle passage begins with penetration of the skin and subcutaneous tissue. After traversing the superficial perineal fascia, the needle crosses the adductor muscles of the thigh near their pubic bone origin and below the insertion point of the adductor longus tendon (arrow). It then penetrates the obturator membrane, obturator internus muscle, and periurethral endopelvic fascia. After passing the level of the white line—either over or under the puborectalis section of the levator—the needle exits through the vaginal incision.
FIGURE 8 The obturator foramen
The tough obturator membrane covers the foramen. The obturator canal is 2 to 3 cm long and is located at the anterolateral upper margin of the membrane. The distance between the safe zone for needle insertion and the obturator canal is approximately 3.5 to 4 cm. At the safe entry zone (green area), the anterior branch of the obturator artery is reduced to a capillary diameter and no significant arteries, veins, or nerve pedicles are present.
FIGURE 10 Routes of transobturator and retropubic slings
Graphic depiction of both the transobturator sling and the retropubic tension-free sling in place.
Fluoroscopic image of both slings in a cadaver. The transobturator sling runs horizontally while the retropubic tension-free sling forms a tighter “U.”
Clinical experience yields positive results
Early European series and our initial experience suggest that the short-term efficacy of the Monarc transobturator sling is similar to that of the SPARC and TVT slings. Average operating time is 17 minutes. The technique involves a short learning curve (approximately 4 cases).
Cystoscopy is not routinely required; we perform it only in women with significant prolapse or suspected urethral injury, and have encountered no intraoperative or post-operative complications.
No major vessels or nerves come in contact with the transobturator tension-free sling.
No patients have complained of postoperative pain in the area of the adductor muscles of the thigh, and no sling erosions have occurred. We also have found this approach useful in obese patients and women with retropubic scarring, in whom retropubic needle passage can be a challenge.
In addition to its application in the treatment of female stress urinary incontinence, the transobturator foramen route was recently used to insert the anterior wings of a large mesh in the repair of severe cystocele.27
Although long-term follow-up data are not available for the transobturator approach, short-term results are encouraging. Large comparative studies with other anti-incontinent procedures are needed.
Dr. Pelosi II reports that he is a consultant for American Medical Systems. Dr. Pelosi III reports no affiliations or financial arrangements with any companies whose products are mentioned in this article.
1. Reschers UM, Tunn R, Buczkowski M, et al. Tension-free vaginal tape for the treatment of stress urinary incontinence. Clin Obstet Gynecol. 2000;43:670-675.
2. Tamussino KF, Hanzal E, Kolle D, et al. Tension-free vaginal tape operation: results of the Austrian Registry. Obstet Gynecol. 2001;98:732-736.
3. Haab F, Sananes S, Amarenco G, et al. Results of the tension-free vaginal tape procedure for the treatment of type II stress urinary incontinence at a minimum follow up of one year. J Urol. 2001;165:159-162.
4. Rardin CR, Kohli N, Rosenblatt PL, et al. Tension-free vaginal tape: outcomes among women with primary versus recurrent stress urinary incontinence. Obstet Gynecol. 2002;100:893-897.
5. Vassallo BJ, Kleeman SD, Segal JL, et al. Tension-free vaginal tape: a quality of life assessment. Obstet Gynecol. 2002;100:518-524.
6. Karram MM, Segal JL, Vassallo BJ, et al. Complications and untoward effects of the tension-free vaginal tape procedure. Obstet Gynecol. 2003;101:929-932.
7. MAUDE: Food and Drug Administration Manufacturer and User Facility Device Experience Database. Available at http://www.fda.gov/cdrh/maude.html. Accessed June 7, 2003.
8. Peyrat L, Boutin JM, Bruyere F, et al. Intestinal perforation is a complication of TVT procedure for UI. Eur Urol. 2001;39:603-605.
9. Walters MD, Tulikangas PR, LaSala C, et al. Vascular injury during tension-free vaginal tape procedure for stress urinary incontinence. Obstet Gynecol. 2001;98:957-959.
10. Zilbert AW, Farrell SA. External iliac artery laceration during tension-free vaginal tape procedure. Int Urogynecol J Pelvic Floor Dysfunct. 2001;12:141-143.
11. Vierhout ME. Severe hemorrhage complicating TVT: a case report. Int Urogynecol J Pelvic Floor Dysfunct. 2000;12:139-140.
12. Brink DM. Bowel injury following insertion of TVT. S Afr Med J. 2000;90:450-452.
13. Shobeiri SA, Garely AD, Chesson RR. Recognition of occult bladder injury during the tension-free vaginal tape procedure. Obstet Gynecol. 2002;99:1067-1072.
14. Delorme E. Transobturator urethral suspension: mini-invasive procedure in the treatment of stress urinary incontinence in women. Prog Urol. 2001;11:1306-1313.
15. Ulmstein V, Petros P. Intravaginal slingplasty (IVS): an ambulatory surgical procedure for treatment of female urinary incontinence. Scand J Urol Neprhol. 1995;29:75-82.
16. Chung MK, Chung RP. Comparison of laparoscopic Burch and tension-free vaginal tape in treating stress urinary incontinence in obese patients. JSLS. 2002;6:17-21.
17. Pelosi MA, III, Pelosi MA, II. Pubic bone suburethral stabilization sling: laparoscopic assessment of a transvaginal operation for the treatment of stress urinary incontinence. J Laparoendosc Adv Surg Tech. 1999;9:45-50.
18. Pelosi MA, II, Pelosi MA, III, Pelekanos M. The YAMA uropatch sling for treatment of female stress urinary incontinence: a pilot study. J Laparoendosc Adv Surg Tech. 2002;12:27-33.
19. Pelosi MA, II, Pelosi MA, III. Laparoscopic assessment of transvaginal suture fixation to Cooper’s ligament for suburethral slings. J Am Assoc Gynecol Laparosc. 2001;8:S53.-
20. Cundiff GW, Wright JE. A review of surgical management of genuine stress incontinence in women with a discussion of innovative procedures. J Pelvic Surg. 1998;4:271-278.
21. Sarver R, Govier FE. Pubovaginal slings: past, present, and future. Int Urogynecol J. 1997;8:358-368.
22. Kovac RS, Cruikshank SH. Pubic bone suburethral stabilization sling for recurrent urinary incontinence. Obstet Gynecol. 1997;89:624-627.
23. Muir TW, Tulikangos PK, Paraiso MF, et al. The relationship of tension-free vaginal tape insertion and the vascular anatomy. Obstet Gynecol. 2003;101:933-936.
24. Pelosi MA, II, Pelosi MA, III. Laparoscopic evaluation of a new tension-free vaginal sling (SPARC) for stress urinary incontinence. Proceedings of the 31st annual meeting of the American Association of Gynecologic Laparoscopists. November 2002; Miami, Fla.
25. Nickel RF, Wiegand U, van den Brom WE. Evaluation of a transpelvic sling procedure with and without colposuspension for treatment of female dogs with refractory urethral sphincter mechanism incompetence. Vet Surg. 1998;27:94-104.
26. Dargent D, Bretones S, George P, et al. Insertion of a suburethral sling through the obturator membrane in the treatment of female urinary incontinence. Gynecol Obstet Fertil. 2002;30:576-582.
27. Mouly P, Soulie M, Seguin P, et al. Vaginal reconstruction of a complete vaginal prolapse: the transobturator repair. J Urol. 2003;169:S182.-
Pelosi minilaparotomy hysterectomy: Effective alternative to laparoscopy and laparotomy
Although laparoscopic hysterectomy offers a minimally invasive alternative to laparotomy when vaginal hysterectomy is contraindicated, it has its drawbacks. Among them: the cost of expensive equipment, the long learning curve, and prolonged operating time.
We describe another alternative to open surgery that is comparable to laparoscopic hysterectomy in postoperative pain, cosmetic results, and time to return to normal activities. Our procedure—a redesigned minilaparotomy hysterectomy—relies on traditional open techniques and inexpensive novel instrumentation, making it significantly faster than laparoscopy and easy to perform and teach.
For patients who cannot undergo vaginal hysterectomy, this new modality offers an expeditious, minimal-access option. Gynecologists reluctant to relinquish the routine use of standard laparotomy may find this approach an appealing, less-invasive alternative.
Position, incision, and retraction are crucial to success
Our minilaparotomy hysterectomy is a systemized approach with elements derived from both open and laparoscopic surgery. Three preparatory components are involved:
- position
- incision
- retraction
All are critical to a successful hysterectomy, ensuring that the procedure never becomes a haphazard struggle through an improvised, scaled-down, conventional Pfannenstiel or vertical incision. Our approach also avoids cumbersome traditional laparotomy exposure maneuvers and positioning.
Position: Modified lithotomy. After regional or general anesthesia is given, position the patient in a modified lithotomy with both arms tucked as for laparoscopic surgery. Place the legs in boot-type stirrups, with no hip flexion and sufficient thigh abduction to expose the vagina.
Next, perform a thorough pelvic examination and place an indwelling, transurethral catheter. A sturdy, hinged uterine manipulator is of paramount importance for the hysterectomy, as it facilitates exposure of the adnexa as well as elevation/rotation of the uterus and the uterine attachments. We recommend the Pelosi Uterine Manipulator (Apple Medical Corporation, Marlboro, Mass) or its equivalent (FIGURE 1).
Standard minilaparotomy
The use of standard minilaparotomy—which is nothing more than a conventional laparotomy of limited length (3 cm to 6 cm), performed either transversely or vertically—has been confined to the surgical treatment of benign pelvic pathology of limited extent.
To generate sufficient exposure to work effectively, surgeons using the standard minilaparotomy have relied on the length of the abdominal incision and, secondarily, bowel packing and metal handheld or self-retaining fixed retraction systems. When exposure is difficult to achieve or maintain, however, routine surgical maneuvers become frustrating and time-consuming—unless the clinician uses extensive traction force, extends the incision length, or performs muscle-splitting. These alternatives often result in an uncomfortable, slow recovery typical of most laparotomies, thereby negating the primary goal of minimally invasive surgery.
Use of traditional minilaparotomy for hysterectomy has been reported only rarely. Hoffman et al1 found the procedure safe and effective in nonobese women in whom a vaginal approach was precluded. Benedetti Panicci et al2,3 also have used minilaparotomy successfully in benign gynecologic disease and hysterectomy.
The Kustner incision
Originally reported in 1896,4 this incision is avoided by most surgeons in favor of complete transverse or complete vertical incisions—largely due to difficulties with exposure, troublesome seroma formation, and wound complications secondary to increased fluid accumulation in the large dead space that results from wide dissection of the subcutaneous flap.
In the early 1990s, we realized the potential benefits of a scaled-down Kustner’s incision (2 cm to 5 cm) when assistance was needed via minilaparotomy during such laparoscopic-assisted procedures as uterine morcellation, tubal reanastomosis, and extensive uterine suture and reconstruction following complex laparoscopic myomectomy.5 As a substitute for laparoscopy and laparotomy, we then tried a minilaparotomy Kustner’s incision (3 cm to 5 cm) as the sole means of surgical access, assessment, and treatment for benign pelvic conditions.
Benefits of this incision. When a sturdy uterine manipulator was used to facilitate exposure of the adnexa and uterine elevation/rotation, we found this technique more effective than similar procedures using a scaled-down Pfannenstiel or Maylard incision. In addition, because the incision was small and the extent of subcutaneous dissection required to expose the rectus fascia in a vertical fashion was limited, there was no need for incision drainage. Nor was the procedure associated with seroma formation, as the full-sized Kustner’s incision had been.3 However, the minilaparotomy Kustner’s incision still suffered from limited surgical exposure.
Adding the retractor
It became clear that a soft, self-retaining abdominal retractor that is capable of creating a rapid, effective, nontraumatic, and predictable circular area of abdominal retraction would be helpful, particularly one that could be placed through the minilaparotomy Kustner’s incision.6 Once this retractor system was developed, using technology borrowed from hand-assisted laparoscopy,7-10 the minilaparotomy hysterectomy became a much simpler, more useful surgical option.
REFERENCES
1. Hoffman MS, Lynch CM. Minilaparotomy hysterectomy. Am J Obstet Gynecol. 1998;179:316-320.
2. Benedetti Panicci P, Maneschi F, Cutillo G, et al. Surgery by minilaparotomy in benign gynecologic disease. Obstet Gynecol. 1996;87:456-459.
3. Benedetti Panicci P, Zullo MA, Casalino B, et al. Subcutaneous drainage versus no drainage after minilaparotomy in gynecologic benign conditions. Am J Obstet Gynecol. 2003;188:71-75.
4. Kustner O. Der suprasymphysare kruzschnitt, eine methode der coeliotomie bei wening umfanglichen affektionen der weiblichen beckenorgane. Monatsschr Geburtshilfe Gynakol. 1896;4:197-206.
5. Pelosi MA, II, Pelosi MA, III. The suprapubic cruciate incision for laparoscopic assisted microceliotomy. J Soc Laparoendosc Surg. 1997;1:269-272.
6. Pelosi MA, II, Pelosi MA, III. Self-retaining abdominal retractor for minilaparotomy. Obstet Gynecol. 2000;96:775-778.
7. Pelosi MA, II, Pelosi MA, III. Hand-assisted laparoscopy for complex hysterectomy. J Am Assoc Gynecol Laparosc. 1999;6:183-188.
8. Pelosi MA, II, Pelosi MA, III. Hand-assisted laparoscopic cholecystectomy at cesarean section. J Am Assoc Gynecol Laparosc. 1999;6:491-495.
9. Pelosi MA, II, Pelosi MA, III. Hand-assisted laparoscopy (handoscopy) for megamyomectomy: A case study. J Reprod Med. 2000;45:519-525.
10. Pelosi MA, II, Pelosi MA, III, Eim J. Hand-assisted laparoscopy for pelvic malignancy. J Laparoendosc Adv Surg Tech. 2000;10:143-150.
Incision: Modified Kustner’s. Open the abdomen with a cruciate incision. Using a conventional scalpel and the Bovie device, make a 2.5-cm to 5-cm transverse incision through the skin and subcutaneous fat until you reach the anterior rectus fascia (FIGURE 2A). Clear the fat from the midline superiorly and inferiorly to expose approximately 5 cm to 6 cm of fascia in the vertical axis. Then incise the anterior rectus fascia in a vertical direction through the full length of the cleared area (FIGURE 2B).
Retract the rectus muscles from the midline, exposing the transversalis fascia and the underlying peritoneum. Enter the peritoneum digitally or with scissors above the level of the bladder dome, incising vertically until the entrance extends the full length of the fascial incision (FIGURE 2C).
This modified Kustner’s incision is essentially a vertical midline incision in its deeper layers.1 The rapid surgical dissection of the fascia and rectus muscles and the intraperitoneal entry are relatively bloodless. This approach yields a surgical exposure superior to that of a small Pfannenstiel or Maylard incision.
Note that, in some patients, a vertical incision can be selected if there is a prior vertical incision or if the perioperative workup suggests a malignancy that may require a later extension of the original minilaparotomy incision.
Retraction: Soft, sleeve-type, self-retaining abdominal retractor. This device consists of a flexible plastic inner ring and a firmer outer ring connected by a soft plastic sleeve (FIGURE 3A). Two models are available: the Mobius (Apple Medical Corporation) and the Protractor (Weck Closure Systems, Research Triangle Park, NC).
Squeeze the inner ring into the peritoneal cavity through the minilaparotomy incision, allowing it to spring open against the parietal peritoneum. Conduct a digital assessment to ensure that no viscera are trapped by elevating the outer ring. Next, roll the outer ring onto the sleeve, collecting excess length, until it sits firmly against the skin (FIGURES 3B and 3C). The result, when there is adequate tension within the sleeve, is a circular area of retraction offering excellent exposure of the pelvis. Note that during surgery you may need to adjust the outer ring if the sleeve loosens.
The soft, self-retaining abdominal retractor offers several advantages over traditional abdominal retraction:
- Atraumatic retraction. This device distributes retraction force evenly around the entire incision. Because standard retractors concentrate retraction force at only a few points, they often lead to tissue trauma, nerve damage, bruising, and postoperative pain.
- Incision protection. The retractor’s flexible material lines the incision, protecting the wound’s edges from contamination and potential implantation of malignant cells.
- Improved access. Because the continuous retraction force is delivered more effectively to the incision, exposure is maximized. As a result, the need for intensive surgical assistance is dramatically reduced.
- Adjustable height. The retractor’s design lets it adapt to wounds of varying depth—a feature that makes it ideal for obese patients. The device compresses the patient’s skin and peritoneum between the external and internal rings, keeping the full thickness of the abdominal incision constant throughout the surgery.
- Cost-effectiveness. The device, which costs under $100, is simple and fast to set up. In our experience, placement takes approximately 2 minutes; this compares favorably with table-mounted or self-retaining rigid retraction systems, which may require significant capital expenditures (cost may run in the thousands), repair costs, and complicated set-ups.
FIGURE 1 Hinged uterine manipulator
A sturdy hinged uterine manipulator facilitates exposure of the adnexa as well as elevation/rotation of the uterus.
FIGURE 2 Cruciate incision
A. Make a transverse incision suprapubically through the skin and the subcutaneous fat to reach the anterior rectus fascia.
FIGURE 2 Cruciate incision
B. Clear the fat from the midline to expose the rectus fascia in the vertical axis, then incise the fascia in a vertical direction through the full length of the previously cleared area. The rectus muscles are retracted, thereby exposing the peritoneum.
FIGURE 2 Cruciate incision
C. Incise the peritoneum vertically until it extends the full length of the fascial incision.
FIGURE 3 Soft, sleeve-type, self-retaining abdominal retractor
A. At left, the Protractor (Weck Closure Systems); at right, the Mobius (Apple Medical Corporation).
FIGURE 3 Soft, sleeve-type, self-retaining abdominal retractor
B. After inserting the inner ring into the peritoneal cavity, twist the outer ring downward until it inverts and rests snuggly against the skin.
FIGURE 3 Soft, sleeve-type, self-retaining abdominal retractor
C. An atraumatic, circular, self-retaining area of retraction is created.
Standard technique: Exteriorize the uterus; divide uterine attachments, vessels
Assess the anatomy. Using your index finger and the uterine manipulator to rotate and flex the uterus, carefully assess the uterus, adnexa, and pelvis, noting the location of the ureters. Determine the extent of any unexpected pelvic pathology or adhesions, using traditional small retractors or gentle packing to gain additional exposure. Perform any adhesiolysis that is necessary.
Exteriorize the uterus. Next, bring the uterus and the adnexa above the abdominal wall in order to perform as much of the hysterectomy extracorporeally as possible. Pass the uterus or adnexa through the incision with the upward assistance of the uterine manipulator, then divide the upper uterine attachments (FIGURE 4A).
Increase exposure. You can achieve additional uterine elevation and targeted exposure in several ways. For example, a strong traction suture can be placed in the uterine fundus, left long, and secured with a clamp. To achieve uterine elevation, place long clamps lateral to the corpus. Another effective approach is to place a heavy tenaculum on the uterine fundus.
When lateral exposure is limited, divide the proximal adnexal pedicles and round ligaments to begin the operation, and remove the adnexa separately following the completion of the hysterectomy.
Divide the uterine vessels through the small incision using clamping, division, and ligation. Unless you intend to preserve the cervix, mobilize the bladder to the level of the anterior vaginal fornix. Inward pressure on the uterine manipulator provides additional elevation of the lower uterine vasculature and the cardinal and uterosacral ligaments as these structures are ligated and divided. Amputate the uterine specimen from the vaginal cuff using the uterine manipulator to guide the vaginal circumcision (FIGURE 4B). Close the vaginal cuff using standard closure.
If the cervix is to be preserved, amputate the uterus supracervically following division of the uterine vessels. Then suture the cervical stump in the traditional fashion. Upward elevation of the cervix using the uterine manipulator expedites this step.
Complete the procedure. Once the surgery is completed, remove the retractor, hooking the bottom ring by inserting a finger into it and pulling it up and out of the incision (FIGURE 4C). Closing a cruciate incision is faster and requires less exposure than closing a mini-Pfannenstiel incision. Eliminate the possibility of postoperative wound hematoma or seroma formation by applying a vertical pressure dressing over the incision (FIGURE 4D). Remove the dressing 24 hours later.
FIGURE 4 Hysterectomy for the normal to moderately enlarged uterus
A. Exteriorize the uterus as much as possible with both upward assistance of the manipulator and uterine fundal elevation (using clamps lateral to the uterus, a heavy tenaculum, or a traction suture). Then conduct a standard hysterectomy.
FIGURE 4 Hysterectomy for the normal to moderately enlarged uterus
B. Separate the uterus from the vagina using the manipulator to guide the vaginal circumcision. (If the cervix is to be preserved, a supracervical amputation is performed instead.)
FIGURE 4 Hysterectomy for the normal to moderately enlarged uterus
C. After completing the surgery, remove the retractor from the incision.
FIGURE 4 Hysterectomy for the normal to moderately enlarged uterus
D. Apply a vertical pressure dressing over the incision.
Variations for abnormal uteri
The large fibroid uterus: Begin with the dominant myoma. A large fibroid uterus can be easily removed with our minilaparotomy technique using 3 basic steps:
- Reduce size by selective myomectomy.
- Deliver the debulked uterus through the abdominal incision.
- Perform extracorporeal hysterectomy.
First, you must conduct a thorough assessment of the number, size, and location of the myomas. Begin the myomectomy on the largest tumor of those closest to the minilaparotomy incision. (Minimize bleeding by injecting diluted vasopressin subserosally prior to the procedure.)
Incise the uterine serosa, myometrium, and pseudocapsule of the myoma via scalpel or Bovie electrocautery until the whorly appearance of the myoma is apparent. Next, grasp the myoma with claw-toothed forceps to stabilize it and place it under traction. Then, using a combination of sharp and digital dissection, develop a plane of dissection between the fibroid and the myometrium (FIGURE 5A).
After securing the dominant myoma, deliver it through the abdominal incision. If the myoma is too large to be removed intact from the abdominal cavity, morcellate it using a scalpel or scissors (FIGURE 5B). Then continue systematic removal of the remaining myomas using the same approach. It is not necessary to remove all myomas—the goal of this process is merely to permit delivery of the uterine body for subsequent hysterectomy.
Once the uterus is debulked, deliver it through the abdominal incision. Hysterectomy then is easily completed (FIGURE 5C).
The ‘solid’ uterus: In situ supracervical hysterectomy and uterine morcellation.
Very large uteri are sometimes homogeneous and solid in nature, possessing few or no individual myomas. This so-called cannonball fibroid uterus is the most challenging type of uterus to remove. The selective-myomectomy approach cannot be used because of the potential for massive bleeding and the technical anatomical difficulties that arise when operating through such a small abdominal incision.
Instead, manage this type of uterus by performing a deliberate in situ supracervical hysterectomy through the minilaparotomy incision. At the end of this procedure, morcellate the amputated fibroid uterus.
Begin the surgery by dividing the upper uterine attachments. Regardless of uterine size, the origins of the round and adnexal ligaments will always be lateral to and within easy reach of a transverse minilaparotomy incision. (Access to these areas is the only factor that determines the feasibility of this procedure; uterine size is completely irrelevant.) We have found that these elongated ligaments are quite lax. Thus, in most cases it is relatively simple to navigate your index finger laterally and, using digital traction, elevate these structures into the minilaparotomy incision (FIGURE 6A). You can then clamp, cut, and suture the ligaments in the standard fashion in whatever sequence is most efficient.
Thanks to the retractor, minimal assistance is necessary during the surgery. You can create additional exposure by deflecting the uterus toward the opposite side of the pelvis using external abdominal pressure and the uterine manipulator.
Once both round ligaments and adnexal pedicles are divided, dissect the bladder flap to expose the uterine arteries (inward pressure on the uterine manipulator provides helpful countertraction). Then clamp, divide, and ligate the uterine arteries (FIGURE 6B).
The uterus is now ready for supracervical amputation. Upward traction on the isthmus by means of a rubber tourniquet facilitates uterine division (FIGURE 6C). After the uterus is amputated, push it toward the upper abdomen to increase exposure for suturing of the cervical stump (if the cervix is preserved) or for cervical excision and vaginal cuff closure (when total hysterectomy is chosen).
Next, remove the uterine specimen by morcellation through the minilaparotomy incision. Using the Doyen ladder-shaped uterine morcellation technique (originally described in the early 1920s) grasp an area of the uterus and, alternating right and left, make deep but incomplete incisions on the uterus, creating a ladder shape.2 Because of its elasticity, the retractor can stretch quite significantly without tearing the edges of the abdominal incision (FIGURE 6D). This allows the easy exteriorization of uteri with diameters considerably larger than that of the retractor, mimicking the stretching of the perineum during the crowning of the fetal head.
When the surgery is complete, remove the retractor, close the minilaparotomy incision, and apply a vertical pressure dressing over the incision. Neither vaginal packing nor bladder catheterization is required.
FIGURE 5 Hysterectomy for the fibroid uterus
A. Develop a plane of dissection between the myoma and myometrium.
FIGURE 5 Hysterectomy for the fibroid uterus
B. Deliver the myoma through the incision; if it is too large to remove intact, morcellate it with a scalpel or scissors.
FIGURE 5 Hysterectomy for the fibroid uterus
C. After reducing the uterine size by selective myomectomy, deliver the debulked uterus through the abdominal incision. Then proceed with an extracorporeal total or subtotal hysterectomy.
A short learning curve
Since it uses conventional open techniques and traditional instrumentation, this method can be learned and mastered quickly.
We tend to think of this procedure as a transabdominal “vaginal” hysterectomy, since the average diameter of the minilaparotomy opening is approximately the same as the vaginal canal. Further, as in vaginal hysterectomy, only 1 portion of the uterus, adnexa, or ligaments must be exteriorized at a given time. Thus, this approach requires less general exposure but offers effective targeted exposure.
The technique also removes the need for frequent use of traumatic metal retractors, extensive bowel packing, and extended incision exposure. The benefits: diminished postoperative discomfort and bowel dysfunction.
High success rates. We have performed more than 100 minilaparotomy procedures using this technique in patients in whom vaginal hysterectomy was contraindicated. Uterine weight ranged from 80 g to 2,500 g. Mean operating time was 50 minutes. All patients were discharged within 36 hours. Mean return to work time was 12 days, and there have been no intraoperative or postoperative complications. All surgeries were successfully completed without laparoscopy or conversion to traditional laparotomy.
FIGURE 6 Hysterectomy for the large, solid, fibroid uterus
A. Draw the upper uterine attachments to the surgical field with finger traction.
FIGURE 6 Hysterectomy for the large, solid, fibroid uterus
B. Divide the round ligaments and proximal adnexal pedicles, then carry out division of the uterine vessels bilaterally.
FIGURE 6 Hysterectomy for the large, solid, fibroid uterus
C. After dividing both round ligaments, adnexal pedicles, and uterine vessels, place the uterine isthmus in traction with a rubber tourniquet and perform an in situ supracervical amputation.
FIGURE 6 Hysterectomy for the large, solid, fibroid uterus
D. After trachelectomy, the large uterine specimen is removed by morcellation. Notice that the retractor is able to stretch significantly, allowing the exteriorization of uteri with diameters considerably larger than that of the retractor.
Devices that simplify the procedure
Occasionally, hysterectomy using traditional clamp, division, and suture ligation can be tedious, frustrating, and time-consuming, especially when exposure is limited or difficult. Several devices developed for laparoscopic surgery can ease suture ligation and the division of blood vessels, ligaments, and tissue bundles during minilaparotomy hysterectomy. They include the Hem-o-lok ligating clip (Weck Closure Systems); the LigaSure Atlas, a vessel sealer-divider (Valleylab, Tyco Healthcare, Boulder, Colo); the ETS 45-Flex endoscopic linear cutter (Ethicon Endo-Surgery, Cincinnati, Ohio); and the PK bipolar cutting forceps (Gyrus Medical, Maple Grove, Minn).
Additional concerns
Is the incision too large? Fears that incisions over 5 cm might nullify minimally invasive surgery’s benefits have proven unfounded.
Laparoscopic procedures that use a 7-cm to 8-cm incision to introduce the hand into the abdomen, as well as those performed in conjunction with minilaparotomy, have consistently failed to identify a link between these combinations and morbidity or lengthy recovery. A “large” minilaparotomy incision is still superior to a standard abdominal hysterectomy in terms of convalescence, and it is significantly faster and more cost-effective than a prolonged laparoscopic or laparoscopic-assisted vaginal hysterectomy.3-10
Do any conditions contraindicate minilaparotomy? In patients with documented or strongly suspected severe pelvic conditions (for example, advanced endometriosis, pelvic inflammatory disease, bowel disease, or malignancy), preliminary laparoscopic evaluation to determine the pathologic condition’s severity and extent is strongly recommended.
If during this assessment you detect pathology that is not appropriate for laparoscopic surgery or minilaparotomy, perform a traditional laparotomy. If, however, this evaluation demonstrates that pelvic pathology is amenable to laparoscopic surgery, a laparoscopic hysterectomy or laparoscopic-assisted minilaparotomy hysterectomy is indicated.
Dr. Pelosi II reports that he is a consultant for Apple Medical Corporation. Dr. Pelosi III reports no affiliations or financial arrangements with any of the manufacturers of products mentioned in this article or their competitors.
1. Kustner O. Der suprasymphysare kruzschnitt, eine methode der coeliotomie bei wening umfanglichen affektionen der weiblichen beckenorgane. Monatsschr Geburtshilfe Gynakol. 1896;4:197-206.
2. Doyen E. Surgical Therapeutics and Operative Technique. Vol. III. Spencer-Browne H, translator. London, England: Bailliere, Tindal and Cox; 1920.
3. Benedetti Panicci P, Maneschi F, Cutillo G, et al. Surgery by minilaparotomy in benign gynecologic disease. Obstet Gynecol. 1996;87:456-459.
4. Benedetti Panicci P, Zullo MA, Casalino B, et al. Subcutaneous drainage versus no drainage after minilaparotomy in gynecologic benign conditions. Am J Obstet Gynecol. 2003;188:71-75.
5. Pelosi MA, II, Pelosi MA, III. The suprapubic cruciate incision for laparoscopic assisted microceliotomy. J Soc Laparoendosc Surg. 1997;1:269-272.
6. Pelosi MA, II, Pelosi MA, III. Self-retaining abdominal retractor for minilaparotomy. Obstet Gynecol. 2000;96:775-778.
7. Pelosi MA, II, Pelosi MA, III. Hand-assisted laparoscopy for complex hysterectomy. J Am Assoc Gynecol Laparosc. 1999;6:183-188.
8. Pelosi MA, II, Pelosi MA, III. Hand-assisted laparoscopic cholecystectomy at cesarean section. J Am Assoc Gynecol Laparosc. 1999;6:491-495.
9. Pelosi MA, II, Pelosi MA, III. Hand-assisted laparoscopy (handoscopy) for megamyomectomy: A case study. J Reprod Med. 2000;45:519-525.
10. Pelosi MA, II, Pelosi MA, III, Eim J. Hand-assisted laparoscopy for pelvic malignancy. J Laparoendosc Adv Surg Tech. 2000;10:143-150.
Although laparoscopic hysterectomy offers a minimally invasive alternative to laparotomy when vaginal hysterectomy is contraindicated, it has its drawbacks. Among them: the cost of expensive equipment, the long learning curve, and prolonged operating time.
We describe another alternative to open surgery that is comparable to laparoscopic hysterectomy in postoperative pain, cosmetic results, and time to return to normal activities. Our procedure—a redesigned minilaparotomy hysterectomy—relies on traditional open techniques and inexpensive novel instrumentation, making it significantly faster than laparoscopy and easy to perform and teach.
For patients who cannot undergo vaginal hysterectomy, this new modality offers an expeditious, minimal-access option. Gynecologists reluctant to relinquish the routine use of standard laparotomy may find this approach an appealing, less-invasive alternative.
Position, incision, and retraction are crucial to success
Our minilaparotomy hysterectomy is a systemized approach with elements derived from both open and laparoscopic surgery. Three preparatory components are involved:
- position
- incision
- retraction
All are critical to a successful hysterectomy, ensuring that the procedure never becomes a haphazard struggle through an improvised, scaled-down, conventional Pfannenstiel or vertical incision. Our approach also avoids cumbersome traditional laparotomy exposure maneuvers and positioning.
Position: Modified lithotomy. After regional or general anesthesia is given, position the patient in a modified lithotomy with both arms tucked as for laparoscopic surgery. Place the legs in boot-type stirrups, with no hip flexion and sufficient thigh abduction to expose the vagina.
Next, perform a thorough pelvic examination and place an indwelling, transurethral catheter. A sturdy, hinged uterine manipulator is of paramount importance for the hysterectomy, as it facilitates exposure of the adnexa as well as elevation/rotation of the uterus and the uterine attachments. We recommend the Pelosi Uterine Manipulator (Apple Medical Corporation, Marlboro, Mass) or its equivalent (FIGURE 1).
Standard minilaparotomy
The use of standard minilaparotomy—which is nothing more than a conventional laparotomy of limited length (3 cm to 6 cm), performed either transversely or vertically—has been confined to the surgical treatment of benign pelvic pathology of limited extent.
To generate sufficient exposure to work effectively, surgeons using the standard minilaparotomy have relied on the length of the abdominal incision and, secondarily, bowel packing and metal handheld or self-retaining fixed retraction systems. When exposure is difficult to achieve or maintain, however, routine surgical maneuvers become frustrating and time-consuming—unless the clinician uses extensive traction force, extends the incision length, or performs muscle-splitting. These alternatives often result in an uncomfortable, slow recovery typical of most laparotomies, thereby negating the primary goal of minimally invasive surgery.
Use of traditional minilaparotomy for hysterectomy has been reported only rarely. Hoffman et al1 found the procedure safe and effective in nonobese women in whom a vaginal approach was precluded. Benedetti Panicci et al2,3 also have used minilaparotomy successfully in benign gynecologic disease and hysterectomy.
The Kustner incision
Originally reported in 1896,4 this incision is avoided by most surgeons in favor of complete transverse or complete vertical incisions—largely due to difficulties with exposure, troublesome seroma formation, and wound complications secondary to increased fluid accumulation in the large dead space that results from wide dissection of the subcutaneous flap.
In the early 1990s, we realized the potential benefits of a scaled-down Kustner’s incision (2 cm to 5 cm) when assistance was needed via minilaparotomy during such laparoscopic-assisted procedures as uterine morcellation, tubal reanastomosis, and extensive uterine suture and reconstruction following complex laparoscopic myomectomy.5 As a substitute for laparoscopy and laparotomy, we then tried a minilaparotomy Kustner’s incision (3 cm to 5 cm) as the sole means of surgical access, assessment, and treatment for benign pelvic conditions.
Benefits of this incision. When a sturdy uterine manipulator was used to facilitate exposure of the adnexa and uterine elevation/rotation, we found this technique more effective than similar procedures using a scaled-down Pfannenstiel or Maylard incision. In addition, because the incision was small and the extent of subcutaneous dissection required to expose the rectus fascia in a vertical fashion was limited, there was no need for incision drainage. Nor was the procedure associated with seroma formation, as the full-sized Kustner’s incision had been.3 However, the minilaparotomy Kustner’s incision still suffered from limited surgical exposure.
Adding the retractor
It became clear that a soft, self-retaining abdominal retractor that is capable of creating a rapid, effective, nontraumatic, and predictable circular area of abdominal retraction would be helpful, particularly one that could be placed through the minilaparotomy Kustner’s incision.6 Once this retractor system was developed, using technology borrowed from hand-assisted laparoscopy,7-10 the minilaparotomy hysterectomy became a much simpler, more useful surgical option.
REFERENCES
1. Hoffman MS, Lynch CM. Minilaparotomy hysterectomy. Am J Obstet Gynecol. 1998;179:316-320.
2. Benedetti Panicci P, Maneschi F, Cutillo G, et al. Surgery by minilaparotomy in benign gynecologic disease. Obstet Gynecol. 1996;87:456-459.
3. Benedetti Panicci P, Zullo MA, Casalino B, et al. Subcutaneous drainage versus no drainage after minilaparotomy in gynecologic benign conditions. Am J Obstet Gynecol. 2003;188:71-75.
4. Kustner O. Der suprasymphysare kruzschnitt, eine methode der coeliotomie bei wening umfanglichen affektionen der weiblichen beckenorgane. Monatsschr Geburtshilfe Gynakol. 1896;4:197-206.
5. Pelosi MA, II, Pelosi MA, III. The suprapubic cruciate incision for laparoscopic assisted microceliotomy. J Soc Laparoendosc Surg. 1997;1:269-272.
6. Pelosi MA, II, Pelosi MA, III. Self-retaining abdominal retractor for minilaparotomy. Obstet Gynecol. 2000;96:775-778.
7. Pelosi MA, II, Pelosi MA, III. Hand-assisted laparoscopy for complex hysterectomy. J Am Assoc Gynecol Laparosc. 1999;6:183-188.
8. Pelosi MA, II, Pelosi MA, III. Hand-assisted laparoscopic cholecystectomy at cesarean section. J Am Assoc Gynecol Laparosc. 1999;6:491-495.
9. Pelosi MA, II, Pelosi MA, III. Hand-assisted laparoscopy (handoscopy) for megamyomectomy: A case study. J Reprod Med. 2000;45:519-525.
10. Pelosi MA, II, Pelosi MA, III, Eim J. Hand-assisted laparoscopy for pelvic malignancy. J Laparoendosc Adv Surg Tech. 2000;10:143-150.
Incision: Modified Kustner’s. Open the abdomen with a cruciate incision. Using a conventional scalpel and the Bovie device, make a 2.5-cm to 5-cm transverse incision through the skin and subcutaneous fat until you reach the anterior rectus fascia (FIGURE 2A). Clear the fat from the midline superiorly and inferiorly to expose approximately 5 cm to 6 cm of fascia in the vertical axis. Then incise the anterior rectus fascia in a vertical direction through the full length of the cleared area (FIGURE 2B).
Retract the rectus muscles from the midline, exposing the transversalis fascia and the underlying peritoneum. Enter the peritoneum digitally or with scissors above the level of the bladder dome, incising vertically until the entrance extends the full length of the fascial incision (FIGURE 2C).
This modified Kustner’s incision is essentially a vertical midline incision in its deeper layers.1 The rapid surgical dissection of the fascia and rectus muscles and the intraperitoneal entry are relatively bloodless. This approach yields a surgical exposure superior to that of a small Pfannenstiel or Maylard incision.
Note that, in some patients, a vertical incision can be selected if there is a prior vertical incision or if the perioperative workup suggests a malignancy that may require a later extension of the original minilaparotomy incision.
Retraction: Soft, sleeve-type, self-retaining abdominal retractor. This device consists of a flexible plastic inner ring and a firmer outer ring connected by a soft plastic sleeve (FIGURE 3A). Two models are available: the Mobius (Apple Medical Corporation) and the Protractor (Weck Closure Systems, Research Triangle Park, NC).
Squeeze the inner ring into the peritoneal cavity through the minilaparotomy incision, allowing it to spring open against the parietal peritoneum. Conduct a digital assessment to ensure that no viscera are trapped by elevating the outer ring. Next, roll the outer ring onto the sleeve, collecting excess length, until it sits firmly against the skin (FIGURES 3B and 3C). The result, when there is adequate tension within the sleeve, is a circular area of retraction offering excellent exposure of the pelvis. Note that during surgery you may need to adjust the outer ring if the sleeve loosens.
The soft, self-retaining abdominal retractor offers several advantages over traditional abdominal retraction:
- Atraumatic retraction. This device distributes retraction force evenly around the entire incision. Because standard retractors concentrate retraction force at only a few points, they often lead to tissue trauma, nerve damage, bruising, and postoperative pain.
- Incision protection. The retractor’s flexible material lines the incision, protecting the wound’s edges from contamination and potential implantation of malignant cells.
- Improved access. Because the continuous retraction force is delivered more effectively to the incision, exposure is maximized. As a result, the need for intensive surgical assistance is dramatically reduced.
- Adjustable height. The retractor’s design lets it adapt to wounds of varying depth—a feature that makes it ideal for obese patients. The device compresses the patient’s skin and peritoneum between the external and internal rings, keeping the full thickness of the abdominal incision constant throughout the surgery.
- Cost-effectiveness. The device, which costs under $100, is simple and fast to set up. In our experience, placement takes approximately 2 minutes; this compares favorably with table-mounted or self-retaining rigid retraction systems, which may require significant capital expenditures (cost may run in the thousands), repair costs, and complicated set-ups.
FIGURE 1 Hinged uterine manipulator
A sturdy hinged uterine manipulator facilitates exposure of the adnexa as well as elevation/rotation of the uterus.
FIGURE 2 Cruciate incision
A. Make a transverse incision suprapubically through the skin and the subcutaneous fat to reach the anterior rectus fascia.
FIGURE 2 Cruciate incision
B. Clear the fat from the midline to expose the rectus fascia in the vertical axis, then incise the fascia in a vertical direction through the full length of the previously cleared area. The rectus muscles are retracted, thereby exposing the peritoneum.
FIGURE 2 Cruciate incision
C. Incise the peritoneum vertically until it extends the full length of the fascial incision.
FIGURE 3 Soft, sleeve-type, self-retaining abdominal retractor
A. At left, the Protractor (Weck Closure Systems); at right, the Mobius (Apple Medical Corporation).
FIGURE 3 Soft, sleeve-type, self-retaining abdominal retractor
B. After inserting the inner ring into the peritoneal cavity, twist the outer ring downward until it inverts and rests snuggly against the skin.
FIGURE 3 Soft, sleeve-type, self-retaining abdominal retractor
C. An atraumatic, circular, self-retaining area of retraction is created.
Standard technique: Exteriorize the uterus; divide uterine attachments, vessels
Assess the anatomy. Using your index finger and the uterine manipulator to rotate and flex the uterus, carefully assess the uterus, adnexa, and pelvis, noting the location of the ureters. Determine the extent of any unexpected pelvic pathology or adhesions, using traditional small retractors or gentle packing to gain additional exposure. Perform any adhesiolysis that is necessary.
Exteriorize the uterus. Next, bring the uterus and the adnexa above the abdominal wall in order to perform as much of the hysterectomy extracorporeally as possible. Pass the uterus or adnexa through the incision with the upward assistance of the uterine manipulator, then divide the upper uterine attachments (FIGURE 4A).
Increase exposure. You can achieve additional uterine elevation and targeted exposure in several ways. For example, a strong traction suture can be placed in the uterine fundus, left long, and secured with a clamp. To achieve uterine elevation, place long clamps lateral to the corpus. Another effective approach is to place a heavy tenaculum on the uterine fundus.
When lateral exposure is limited, divide the proximal adnexal pedicles and round ligaments to begin the operation, and remove the adnexa separately following the completion of the hysterectomy.
Divide the uterine vessels through the small incision using clamping, division, and ligation. Unless you intend to preserve the cervix, mobilize the bladder to the level of the anterior vaginal fornix. Inward pressure on the uterine manipulator provides additional elevation of the lower uterine vasculature and the cardinal and uterosacral ligaments as these structures are ligated and divided. Amputate the uterine specimen from the vaginal cuff using the uterine manipulator to guide the vaginal circumcision (FIGURE 4B). Close the vaginal cuff using standard closure.
If the cervix is to be preserved, amputate the uterus supracervically following division of the uterine vessels. Then suture the cervical stump in the traditional fashion. Upward elevation of the cervix using the uterine manipulator expedites this step.
Complete the procedure. Once the surgery is completed, remove the retractor, hooking the bottom ring by inserting a finger into it and pulling it up and out of the incision (FIGURE 4C). Closing a cruciate incision is faster and requires less exposure than closing a mini-Pfannenstiel incision. Eliminate the possibility of postoperative wound hematoma or seroma formation by applying a vertical pressure dressing over the incision (FIGURE 4D). Remove the dressing 24 hours later.
FIGURE 4 Hysterectomy for the normal to moderately enlarged uterus
A. Exteriorize the uterus as much as possible with both upward assistance of the manipulator and uterine fundal elevation (using clamps lateral to the uterus, a heavy tenaculum, or a traction suture). Then conduct a standard hysterectomy.
FIGURE 4 Hysterectomy for the normal to moderately enlarged uterus
B. Separate the uterus from the vagina using the manipulator to guide the vaginal circumcision. (If the cervix is to be preserved, a supracervical amputation is performed instead.)
FIGURE 4 Hysterectomy for the normal to moderately enlarged uterus
C. After completing the surgery, remove the retractor from the incision.
FIGURE 4 Hysterectomy for the normal to moderately enlarged uterus
D. Apply a vertical pressure dressing over the incision.
Variations for abnormal uteri
The large fibroid uterus: Begin with the dominant myoma. A large fibroid uterus can be easily removed with our minilaparotomy technique using 3 basic steps:
- Reduce size by selective myomectomy.
- Deliver the debulked uterus through the abdominal incision.
- Perform extracorporeal hysterectomy.
First, you must conduct a thorough assessment of the number, size, and location of the myomas. Begin the myomectomy on the largest tumor of those closest to the minilaparotomy incision. (Minimize bleeding by injecting diluted vasopressin subserosally prior to the procedure.)
Incise the uterine serosa, myometrium, and pseudocapsule of the myoma via scalpel or Bovie electrocautery until the whorly appearance of the myoma is apparent. Next, grasp the myoma with claw-toothed forceps to stabilize it and place it under traction. Then, using a combination of sharp and digital dissection, develop a plane of dissection between the fibroid and the myometrium (FIGURE 5A).
After securing the dominant myoma, deliver it through the abdominal incision. If the myoma is too large to be removed intact from the abdominal cavity, morcellate it using a scalpel or scissors (FIGURE 5B). Then continue systematic removal of the remaining myomas using the same approach. It is not necessary to remove all myomas—the goal of this process is merely to permit delivery of the uterine body for subsequent hysterectomy.
Once the uterus is debulked, deliver it through the abdominal incision. Hysterectomy then is easily completed (FIGURE 5C).
The ‘solid’ uterus: In situ supracervical hysterectomy and uterine morcellation.
Very large uteri are sometimes homogeneous and solid in nature, possessing few or no individual myomas. This so-called cannonball fibroid uterus is the most challenging type of uterus to remove. The selective-myomectomy approach cannot be used because of the potential for massive bleeding and the technical anatomical difficulties that arise when operating through such a small abdominal incision.
Instead, manage this type of uterus by performing a deliberate in situ supracervical hysterectomy through the minilaparotomy incision. At the end of this procedure, morcellate the amputated fibroid uterus.
Begin the surgery by dividing the upper uterine attachments. Regardless of uterine size, the origins of the round and adnexal ligaments will always be lateral to and within easy reach of a transverse minilaparotomy incision. (Access to these areas is the only factor that determines the feasibility of this procedure; uterine size is completely irrelevant.) We have found that these elongated ligaments are quite lax. Thus, in most cases it is relatively simple to navigate your index finger laterally and, using digital traction, elevate these structures into the minilaparotomy incision (FIGURE 6A). You can then clamp, cut, and suture the ligaments in the standard fashion in whatever sequence is most efficient.
Thanks to the retractor, minimal assistance is necessary during the surgery. You can create additional exposure by deflecting the uterus toward the opposite side of the pelvis using external abdominal pressure and the uterine manipulator.
Once both round ligaments and adnexal pedicles are divided, dissect the bladder flap to expose the uterine arteries (inward pressure on the uterine manipulator provides helpful countertraction). Then clamp, divide, and ligate the uterine arteries (FIGURE 6B).
The uterus is now ready for supracervical amputation. Upward traction on the isthmus by means of a rubber tourniquet facilitates uterine division (FIGURE 6C). After the uterus is amputated, push it toward the upper abdomen to increase exposure for suturing of the cervical stump (if the cervix is preserved) or for cervical excision and vaginal cuff closure (when total hysterectomy is chosen).
Next, remove the uterine specimen by morcellation through the minilaparotomy incision. Using the Doyen ladder-shaped uterine morcellation technique (originally described in the early 1920s) grasp an area of the uterus and, alternating right and left, make deep but incomplete incisions on the uterus, creating a ladder shape.2 Because of its elasticity, the retractor can stretch quite significantly without tearing the edges of the abdominal incision (FIGURE 6D). This allows the easy exteriorization of uteri with diameters considerably larger than that of the retractor, mimicking the stretching of the perineum during the crowning of the fetal head.
When the surgery is complete, remove the retractor, close the minilaparotomy incision, and apply a vertical pressure dressing over the incision. Neither vaginal packing nor bladder catheterization is required.
FIGURE 5 Hysterectomy for the fibroid uterus
A. Develop a plane of dissection between the myoma and myometrium.
FIGURE 5 Hysterectomy for the fibroid uterus
B. Deliver the myoma through the incision; if it is too large to remove intact, morcellate it with a scalpel or scissors.
FIGURE 5 Hysterectomy for the fibroid uterus
C. After reducing the uterine size by selective myomectomy, deliver the debulked uterus through the abdominal incision. Then proceed with an extracorporeal total or subtotal hysterectomy.
A short learning curve
Since it uses conventional open techniques and traditional instrumentation, this method can be learned and mastered quickly.
We tend to think of this procedure as a transabdominal “vaginal” hysterectomy, since the average diameter of the minilaparotomy opening is approximately the same as the vaginal canal. Further, as in vaginal hysterectomy, only 1 portion of the uterus, adnexa, or ligaments must be exteriorized at a given time. Thus, this approach requires less general exposure but offers effective targeted exposure.
The technique also removes the need for frequent use of traumatic metal retractors, extensive bowel packing, and extended incision exposure. The benefits: diminished postoperative discomfort and bowel dysfunction.
High success rates. We have performed more than 100 minilaparotomy procedures using this technique in patients in whom vaginal hysterectomy was contraindicated. Uterine weight ranged from 80 g to 2,500 g. Mean operating time was 50 minutes. All patients were discharged within 36 hours. Mean return to work time was 12 days, and there have been no intraoperative or postoperative complications. All surgeries were successfully completed without laparoscopy or conversion to traditional laparotomy.
FIGURE 6 Hysterectomy for the large, solid, fibroid uterus
A. Draw the upper uterine attachments to the surgical field with finger traction.
FIGURE 6 Hysterectomy for the large, solid, fibroid uterus
B. Divide the round ligaments and proximal adnexal pedicles, then carry out division of the uterine vessels bilaterally.
FIGURE 6 Hysterectomy for the large, solid, fibroid uterus
C. After dividing both round ligaments, adnexal pedicles, and uterine vessels, place the uterine isthmus in traction with a rubber tourniquet and perform an in situ supracervical amputation.
FIGURE 6 Hysterectomy for the large, solid, fibroid uterus
D. After trachelectomy, the large uterine specimen is removed by morcellation. Notice that the retractor is able to stretch significantly, allowing the exteriorization of uteri with diameters considerably larger than that of the retractor.
Devices that simplify the procedure
Occasionally, hysterectomy using traditional clamp, division, and suture ligation can be tedious, frustrating, and time-consuming, especially when exposure is limited or difficult. Several devices developed for laparoscopic surgery can ease suture ligation and the division of blood vessels, ligaments, and tissue bundles during minilaparotomy hysterectomy. They include the Hem-o-lok ligating clip (Weck Closure Systems); the LigaSure Atlas, a vessel sealer-divider (Valleylab, Tyco Healthcare, Boulder, Colo); the ETS 45-Flex endoscopic linear cutter (Ethicon Endo-Surgery, Cincinnati, Ohio); and the PK bipolar cutting forceps (Gyrus Medical, Maple Grove, Minn).
Additional concerns
Is the incision too large? Fears that incisions over 5 cm might nullify minimally invasive surgery’s benefits have proven unfounded.
Laparoscopic procedures that use a 7-cm to 8-cm incision to introduce the hand into the abdomen, as well as those performed in conjunction with minilaparotomy, have consistently failed to identify a link between these combinations and morbidity or lengthy recovery. A “large” minilaparotomy incision is still superior to a standard abdominal hysterectomy in terms of convalescence, and it is significantly faster and more cost-effective than a prolonged laparoscopic or laparoscopic-assisted vaginal hysterectomy.3-10
Do any conditions contraindicate minilaparotomy? In patients with documented or strongly suspected severe pelvic conditions (for example, advanced endometriosis, pelvic inflammatory disease, bowel disease, or malignancy), preliminary laparoscopic evaluation to determine the pathologic condition’s severity and extent is strongly recommended.
If during this assessment you detect pathology that is not appropriate for laparoscopic surgery or minilaparotomy, perform a traditional laparotomy. If, however, this evaluation demonstrates that pelvic pathology is amenable to laparoscopic surgery, a laparoscopic hysterectomy or laparoscopic-assisted minilaparotomy hysterectomy is indicated.
Dr. Pelosi II reports that he is a consultant for Apple Medical Corporation. Dr. Pelosi III reports no affiliations or financial arrangements with any of the manufacturers of products mentioned in this article or their competitors.
1. Kustner O. Der suprasymphysare kruzschnitt, eine methode der coeliotomie bei wening umfanglichen affektionen der weiblichen beckenorgane. Monatsschr Geburtshilfe Gynakol. 1896;4:197-206.
2. Doyen E. Surgical Therapeutics and Operative Technique. Vol. III. Spencer-Browne H, translator. London, England: Bailliere, Tindal and Cox; 1920.
3. Benedetti Panicci P, Maneschi F, Cutillo G, et al. Surgery by minilaparotomy in benign gynecologic disease. Obstet Gynecol. 1996;87:456-459.
4. Benedetti Panicci P, Zullo MA, Casalino B, et al. Subcutaneous drainage versus no drainage after minilaparotomy in gynecologic benign conditions. Am J Obstet Gynecol. 2003;188:71-75.
5. Pelosi MA, II, Pelosi MA, III. The suprapubic cruciate incision for laparoscopic assisted microceliotomy. J Soc Laparoendosc Surg. 1997;1:269-272.
6. Pelosi MA, II, Pelosi MA, III. Self-retaining abdominal retractor for minilaparotomy. Obstet Gynecol. 2000;96:775-778.
7. Pelosi MA, II, Pelosi MA, III. Hand-assisted laparoscopy for complex hysterectomy. J Am Assoc Gynecol Laparosc. 1999;6:183-188.
8. Pelosi MA, II, Pelosi MA, III. Hand-assisted laparoscopic cholecystectomy at cesarean section. J Am Assoc Gynecol Laparosc. 1999;6:491-495.
9. Pelosi MA, II, Pelosi MA, III. Hand-assisted laparoscopy (handoscopy) for megamyomectomy: A case study. J Reprod Med. 2000;45:519-525.
10. Pelosi MA, II, Pelosi MA, III, Eim J. Hand-assisted laparoscopy for pelvic malignancy. J Laparoendosc Adv Surg Tech. 2000;10:143-150.
