User login
Although laparoscopic hysterectomy offers a minimally invasive alternative to laparotomy when vaginal hysterectomy is contraindicated, it has its drawbacks. Among them: the cost of expensive equipment, the long learning curve, and prolonged operating time.
We describe another alternative to open surgery that is comparable to laparoscopic hysterectomy in postoperative pain, cosmetic results, and time to return to normal activities. Our procedure—a redesigned minilaparotomy hysterectomy—relies on traditional open techniques and inexpensive novel instrumentation, making it significantly faster than laparoscopy and easy to perform and teach.
For patients who cannot undergo vaginal hysterectomy, this new modality offers an expeditious, minimal-access option. Gynecologists reluctant to relinquish the routine use of standard laparotomy may find this approach an appealing, less-invasive alternative.
Position, incision, and retraction are crucial to success
Our minilaparotomy hysterectomy is a systemized approach with elements derived from both open and laparoscopic surgery. Three preparatory components are involved:
- position
- incision
- retraction
All are critical to a successful hysterectomy, ensuring that the procedure never becomes a haphazard struggle through an improvised, scaled-down, conventional Pfannenstiel or vertical incision. Our approach also avoids cumbersome traditional laparotomy exposure maneuvers and positioning.
Position: Modified lithotomy. After regional or general anesthesia is given, position the patient in a modified lithotomy with both arms tucked as for laparoscopic surgery. Place the legs in boot-type stirrups, with no hip flexion and sufficient thigh abduction to expose the vagina.
Next, perform a thorough pelvic examination and place an indwelling, transurethral catheter. A sturdy, hinged uterine manipulator is of paramount importance for the hysterectomy, as it facilitates exposure of the adnexa as well as elevation/rotation of the uterus and the uterine attachments. We recommend the Pelosi Uterine Manipulator (Apple Medical Corporation, Marlboro, Mass) or its equivalent (FIGURE 1).
Standard minilaparotomy
The use of standard minilaparotomy—which is nothing more than a conventional laparotomy of limited length (3 cm to 6 cm), performed either transversely or vertically—has been confined to the surgical treatment of benign pelvic pathology of limited extent.
To generate sufficient exposure to work effectively, surgeons using the standard minilaparotomy have relied on the length of the abdominal incision and, secondarily, bowel packing and metal handheld or self-retaining fixed retraction systems. When exposure is difficult to achieve or maintain, however, routine surgical maneuvers become frustrating and time-consuming—unless the clinician uses extensive traction force, extends the incision length, or performs muscle-splitting. These alternatives often result in an uncomfortable, slow recovery typical of most laparotomies, thereby negating the primary goal of minimally invasive surgery.
Use of traditional minilaparotomy for hysterectomy has been reported only rarely. Hoffman et al1 found the procedure safe and effective in nonobese women in whom a vaginal approach was precluded. Benedetti Panicci et al2,3 also have used minilaparotomy successfully in benign gynecologic disease and hysterectomy.
The Kustner incision
Originally reported in 1896,4 this incision is avoided by most surgeons in favor of complete transverse or complete vertical incisions—largely due to difficulties with exposure, troublesome seroma formation, and wound complications secondary to increased fluid accumulation in the large dead space that results from wide dissection of the subcutaneous flap.
In the early 1990s, we realized the potential benefits of a scaled-down Kustner’s incision (2 cm to 5 cm) when assistance was needed via minilaparotomy during such laparoscopic-assisted procedures as uterine morcellation, tubal reanastomosis, and extensive uterine suture and reconstruction following complex laparoscopic myomectomy.5 As a substitute for laparoscopy and laparotomy, we then tried a minilaparotomy Kustner’s incision (3 cm to 5 cm) as the sole means of surgical access, assessment, and treatment for benign pelvic conditions.
Benefits of this incision. When a sturdy uterine manipulator was used to facilitate exposure of the adnexa and uterine elevation/rotation, we found this technique more effective than similar procedures using a scaled-down Pfannenstiel or Maylard incision. In addition, because the incision was small and the extent of subcutaneous dissection required to expose the rectus fascia in a vertical fashion was limited, there was no need for incision drainage. Nor was the procedure associated with seroma formation, as the full-sized Kustner’s incision had been.3 However, the minilaparotomy Kustner’s incision still suffered from limited surgical exposure.
Adding the retractor
It became clear that a soft, self-retaining abdominal retractor that is capable of creating a rapid, effective, nontraumatic, and predictable circular area of abdominal retraction would be helpful, particularly one that could be placed through the minilaparotomy Kustner’s incision.6 Once this retractor system was developed, using technology borrowed from hand-assisted laparoscopy,7-10 the minilaparotomy hysterectomy became a much simpler, more useful surgical option.
REFERENCES
1. Hoffman MS, Lynch CM. Minilaparotomy hysterectomy. Am J Obstet Gynecol. 1998;179:316-320.
2. Benedetti Panicci P, Maneschi F, Cutillo G, et al. Surgery by minilaparotomy in benign gynecologic disease. Obstet Gynecol. 1996;87:456-459.
3. Benedetti Panicci P, Zullo MA, Casalino B, et al. Subcutaneous drainage versus no drainage after minilaparotomy in gynecologic benign conditions. Am J Obstet Gynecol. 2003;188:71-75.
4. Kustner O. Der suprasymphysare kruzschnitt, eine methode der coeliotomie bei wening umfanglichen affektionen der weiblichen beckenorgane. Monatsschr Geburtshilfe Gynakol. 1896;4:197-206.
5. Pelosi MA, II, Pelosi MA, III. The suprapubic cruciate incision for laparoscopic assisted microceliotomy. J Soc Laparoendosc Surg. 1997;1:269-272.
6. Pelosi MA, II, Pelosi MA, III. Self-retaining abdominal retractor for minilaparotomy. Obstet Gynecol. 2000;96:775-778.
7. Pelosi MA, II, Pelosi MA, III. Hand-assisted laparoscopy for complex hysterectomy. J Am Assoc Gynecol Laparosc. 1999;6:183-188.
8. Pelosi MA, II, Pelosi MA, III. Hand-assisted laparoscopic cholecystectomy at cesarean section. J Am Assoc Gynecol Laparosc. 1999;6:491-495.
9. Pelosi MA, II, Pelosi MA, III. Hand-assisted laparoscopy (handoscopy) for megamyomectomy: A case study. J Reprod Med. 2000;45:519-525.
10. Pelosi MA, II, Pelosi MA, III, Eim J. Hand-assisted laparoscopy for pelvic malignancy. J Laparoendosc Adv Surg Tech. 2000;10:143-150.
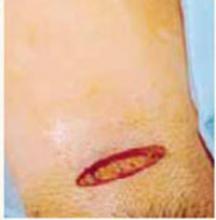
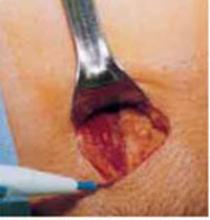
Incision: Modified Kustner’s. Open the abdomen with a cruciate incision. Using a conventional scalpel and the Bovie device, make a 2.5-cm to 5-cm transverse incision through the skin and subcutaneous fat until you reach the anterior rectus fascia (FIGURE 2A). Clear the fat from the midline superiorly and inferiorly to expose approximately 5 cm to 6 cm of fascia in the vertical axis. Then incise the anterior rectus fascia in a vertical direction through the full length of the cleared area (FIGURE 2B).
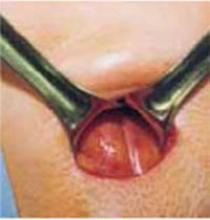
Retract the rectus muscles from the midline, exposing the transversalis fascia and the underlying peritoneum. Enter the peritoneum digitally or with scissors above the level of the bladder dome, incising vertically until the entrance extends the full length of the fascial incision (FIGURE 2C).
This modified Kustner’s incision is essentially a vertical midline incision in its deeper layers.1 The rapid surgical dissection of the fascia and rectus muscles and the intraperitoneal entry are relatively bloodless. This approach yields a surgical exposure superior to that of a small Pfannenstiel or Maylard incision.
Note that, in some patients, a vertical incision can be selected if there is a prior vertical incision or if the perioperative workup suggests a malignancy that may require a later extension of the original minilaparotomy incision.
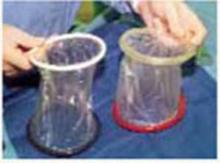
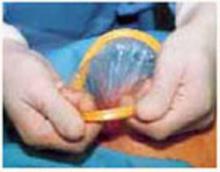
Retraction: Soft, sleeve-type, self-retaining abdominal retractor. This device consists of a flexible plastic inner ring and a firmer outer ring connected by a soft plastic sleeve (FIGURE 3A). Two models are available: the Mobius (Apple Medical Corporation) and the Protractor (Weck Closure Systems, Research Triangle Park, NC).
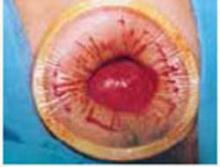
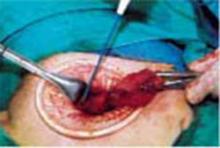
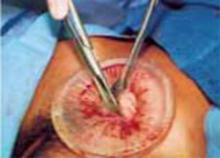
Squeeze the inner ring into the peritoneal cavity through the minilaparotomy incision, allowing it to spring open against the parietal peritoneum. Conduct a digital assessment to ensure that no viscera are trapped by elevating the outer ring. Next, roll the outer ring onto the sleeve, collecting excess length, until it sits firmly against the skin (FIGURES 3B and 3C). The result, when there is adequate tension within the sleeve, is a circular area of retraction offering excellent exposure of the pelvis. Note that during surgery you may need to adjust the outer ring if the sleeve loosens.
The soft, self-retaining abdominal retractor offers several advantages over traditional abdominal retraction:
- Atraumatic retraction. This device distributes retraction force evenly around the entire incision. Because standard retractors concentrate retraction force at only a few points, they often lead to tissue trauma, nerve damage, bruising, and postoperative pain.
- Incision protection. The retractor’s flexible material lines the incision, protecting the wound’s edges from contamination and potential implantation of malignant cells.
- Improved access. Because the continuous retraction force is delivered more effectively to the incision, exposure is maximized. As a result, the need for intensive surgical assistance is dramatically reduced.
- Adjustable height. The retractor’s design lets it adapt to wounds of varying depth—a feature that makes it ideal for obese patients. The device compresses the patient’s skin and peritoneum between the external and internal rings, keeping the full thickness of the abdominal incision constant throughout the surgery.
- Cost-effectiveness. The device, which costs under $100, is simple and fast to set up. In our experience, placement takes approximately 2 minutes; this compares favorably with table-mounted or self-retaining rigid retraction systems, which may require significant capital expenditures (cost may run in the thousands), repair costs, and complicated set-ups.
FIGURE 1 Hinged uterine manipulator
A sturdy hinged uterine manipulator facilitates exposure of the adnexa as well as elevation/rotation of the uterus.
FIGURE 2 Cruciate incision
A. Make a transverse incision suprapubically through the skin and the subcutaneous fat to reach the anterior rectus fascia.
FIGURE 2 Cruciate incision
B. Clear the fat from the midline to expose the rectus fascia in the vertical axis, then incise the fascia in a vertical direction through the full length of the previously cleared area. The rectus muscles are retracted, thereby exposing the peritoneum.
FIGURE 2 Cruciate incision
C. Incise the peritoneum vertically until it extends the full length of the fascial incision.
FIGURE 3 Soft, sleeve-type, self-retaining abdominal retractor
A. At left, the Protractor (Weck Closure Systems); at right, the Mobius (Apple Medical Corporation).
FIGURE 3 Soft, sleeve-type, self-retaining abdominal retractor
B. After inserting the inner ring into the peritoneal cavity, twist the outer ring downward until it inverts and rests snuggly against the skin.
FIGURE 3 Soft, sleeve-type, self-retaining abdominal retractor
C. An atraumatic, circular, self-retaining area of retraction is created.
Standard technique: Exteriorize the uterus; divide uterine attachments, vessels
Assess the anatomy. Using your index finger and the uterine manipulator to rotate and flex the uterus, carefully assess the uterus, adnexa, and pelvis, noting the location of the ureters. Determine the extent of any unexpected pelvic pathology or adhesions, using traditional small retractors or gentle packing to gain additional exposure. Perform any adhesiolysis that is necessary.
Exteriorize the uterus. Next, bring the uterus and the adnexa above the abdominal wall in order to perform as much of the hysterectomy extracorporeally as possible. Pass the uterus or adnexa through the incision with the upward assistance of the uterine manipulator, then divide the upper uterine attachments (FIGURE 4A).
Increase exposure. You can achieve additional uterine elevation and targeted exposure in several ways. For example, a strong traction suture can be placed in the uterine fundus, left long, and secured with a clamp. To achieve uterine elevation, place long clamps lateral to the corpus. Another effective approach is to place a heavy tenaculum on the uterine fundus.
When lateral exposure is limited, divide the proximal adnexal pedicles and round ligaments to begin the operation, and remove the adnexa separately following the completion of the hysterectomy.
Divide the uterine vessels through the small incision using clamping, division, and ligation. Unless you intend to preserve the cervix, mobilize the bladder to the level of the anterior vaginal fornix. Inward pressure on the uterine manipulator provides additional elevation of the lower uterine vasculature and the cardinal and uterosacral ligaments as these structures are ligated and divided. Amputate the uterine specimen from the vaginal cuff using the uterine manipulator to guide the vaginal circumcision (FIGURE 4B). Close the vaginal cuff using standard closure.
If the cervix is to be preserved, amputate the uterus supracervically following division of the uterine vessels. Then suture the cervical stump in the traditional fashion. Upward elevation of the cervix using the uterine manipulator expedites this step.
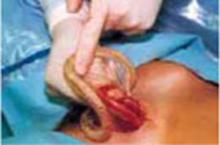
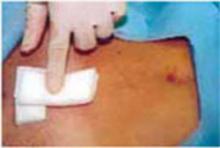
Complete the procedure. Once the surgery is completed, remove the retractor, hooking the bottom ring by inserting a finger into it and pulling it up and out of the incision (FIGURE 4C). Closing a cruciate incision is faster and requires less exposure than closing a mini-Pfannenstiel incision. Eliminate the possibility of postoperative wound hematoma or seroma formation by applying a vertical pressure dressing over the incision (FIGURE 4D). Remove the dressing 24 hours later.
FIGURE 4 Hysterectomy for the normal to moderately enlarged uterus
A. Exteriorize the uterus as much as possible with both upward assistance of the manipulator and uterine fundal elevation (using clamps lateral to the uterus, a heavy tenaculum, or a traction suture). Then conduct a standard hysterectomy.
FIGURE 4 Hysterectomy for the normal to moderately enlarged uterus
B. Separate the uterus from the vagina using the manipulator to guide the vaginal circumcision. (If the cervix is to be preserved, a supracervical amputation is performed instead.)
FIGURE 4 Hysterectomy for the normal to moderately enlarged uterus
C. After completing the surgery, remove the retractor from the incision.
FIGURE 4 Hysterectomy for the normal to moderately enlarged uterus
D. Apply a vertical pressure dressing over the incision.
Variations for abnormal uteri
The large fibroid uterus: Begin with the dominant myoma. A large fibroid uterus can be easily removed with our minilaparotomy technique using 3 basic steps:
- Reduce size by selective myomectomy.
- Deliver the debulked uterus through the abdominal incision.
- Perform extracorporeal hysterectomy.
First, you must conduct a thorough assessment of the number, size, and location of the myomas. Begin the myomectomy on the largest tumor of those closest to the minilaparotomy incision. (Minimize bleeding by injecting diluted vasopressin subserosally prior to the procedure.)
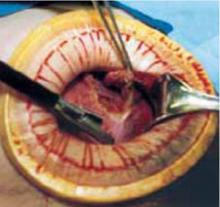
Incise the uterine serosa, myometrium, and pseudocapsule of the myoma via scalpel or Bovie electrocautery until the whorly appearance of the myoma is apparent. Next, grasp the myoma with claw-toothed forceps to stabilize it and place it under traction. Then, using a combination of sharp and digital dissection, develop a plane of dissection between the fibroid and the myometrium (FIGURE 5A).
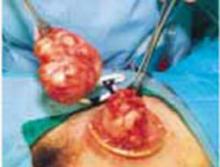
After securing the dominant myoma, deliver it through the abdominal incision. If the myoma is too large to be removed intact from the abdominal cavity, morcellate it using a scalpel or scissors (FIGURE 5B). Then continue systematic removal of the remaining myomas using the same approach. It is not necessary to remove all myomas—the goal of this process is merely to permit delivery of the uterine body for subsequent hysterectomy.
Once the uterus is debulked, deliver it through the abdominal incision. Hysterectomy then is easily completed (FIGURE 5C).
The ‘solid’ uterus: In situ supracervical hysterectomy and uterine morcellation.
Very large uteri are sometimes homogeneous and solid in nature, possessing few or no individual myomas. This so-called cannonball fibroid uterus is the most challenging type of uterus to remove. The selective-myomectomy approach cannot be used because of the potential for massive bleeding and the technical anatomical difficulties that arise when operating through such a small abdominal incision.
Instead, manage this type of uterus by performing a deliberate in situ supracervical hysterectomy through the minilaparotomy incision. At the end of this procedure, morcellate the amputated fibroid uterus.
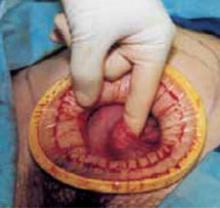
Begin the surgery by dividing the upper uterine attachments. Regardless of uterine size, the origins of the round and adnexal ligaments will always be lateral to and within easy reach of a transverse minilaparotomy incision. (Access to these areas is the only factor that determines the feasibility of this procedure; uterine size is completely irrelevant.) We have found that these elongated ligaments are quite lax. Thus, in most cases it is relatively simple to navigate your index finger laterally and, using digital traction, elevate these structures into the minilaparotomy incision (FIGURE 6A). You can then clamp, cut, and suture the ligaments in the standard fashion in whatever sequence is most efficient.
Thanks to the retractor, minimal assistance is necessary during the surgery. You can create additional exposure by deflecting the uterus toward the opposite side of the pelvis using external abdominal pressure and the uterine manipulator.
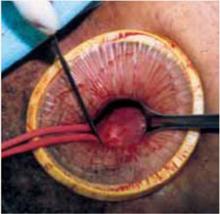
Once both round ligaments and adnexal pedicles are divided, dissect the bladder flap to expose the uterine arteries (inward pressure on the uterine manipulator provides helpful countertraction). Then clamp, divide, and ligate the uterine arteries (FIGURE 6B).
The uterus is now ready for supracervical amputation. Upward traction on the isthmus by means of a rubber tourniquet facilitates uterine division (FIGURE 6C). After the uterus is amputated, push it toward the upper abdomen to increase exposure for suturing of the cervical stump (if the cervix is preserved) or for cervical excision and vaginal cuff closure (when total hysterectomy is chosen).
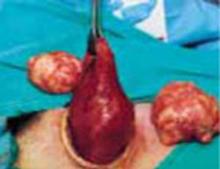
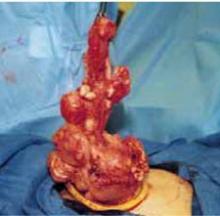
Next, remove the uterine specimen by morcellation through the minilaparotomy incision. Using the Doyen ladder-shaped uterine morcellation technique (originally described in the early 1920s) grasp an area of the uterus and, alternating right and left, make deep but incomplete incisions on the uterus, creating a ladder shape.2 Because of its elasticity, the retractor can stretch quite significantly without tearing the edges of the abdominal incision (FIGURE 6D). This allows the easy exteriorization of uteri with diameters considerably larger than that of the retractor, mimicking the stretching of the perineum during the crowning of the fetal head.
When the surgery is complete, remove the retractor, close the minilaparotomy incision, and apply a vertical pressure dressing over the incision. Neither vaginal packing nor bladder catheterization is required.
FIGURE 5 Hysterectomy for the fibroid uterus
A. Develop a plane of dissection between the myoma and myometrium.
FIGURE 5 Hysterectomy for the fibroid uterus
B. Deliver the myoma through the incision; if it is too large to remove intact, morcellate it with a scalpel or scissors.
FIGURE 5 Hysterectomy for the fibroid uterus
C. After reducing the uterine size by selective myomectomy, deliver the debulked uterus through the abdominal incision. Then proceed with an extracorporeal total or subtotal hysterectomy.
A short learning curve
Since it uses conventional open techniques and traditional instrumentation, this method can be learned and mastered quickly.
We tend to think of this procedure as a transabdominal “vaginal” hysterectomy, since the average diameter of the minilaparotomy opening is approximately the same as the vaginal canal. Further, as in vaginal hysterectomy, only 1 portion of the uterus, adnexa, or ligaments must be exteriorized at a given time. Thus, this approach requires less general exposure but offers effective targeted exposure.
The technique also removes the need for frequent use of traumatic metal retractors, extensive bowel packing, and extended incision exposure. The benefits: diminished postoperative discomfort and bowel dysfunction.
High success rates. We have performed more than 100 minilaparotomy procedures using this technique in patients in whom vaginal hysterectomy was contraindicated. Uterine weight ranged from 80 g to 2,500 g. Mean operating time was 50 minutes. All patients were discharged within 36 hours. Mean return to work time was 12 days, and there have been no intraoperative or postoperative complications. All surgeries were successfully completed without laparoscopy or conversion to traditional laparotomy.
FIGURE 6 Hysterectomy for the large, solid, fibroid uterus
A. Draw the upper uterine attachments to the surgical field with finger traction.
FIGURE 6 Hysterectomy for the large, solid, fibroid uterus
B. Divide the round ligaments and proximal adnexal pedicles, then carry out division of the uterine vessels bilaterally.
FIGURE 6 Hysterectomy for the large, solid, fibroid uterus
C. After dividing both round ligaments, adnexal pedicles, and uterine vessels, place the uterine isthmus in traction with a rubber tourniquet and perform an in situ supracervical amputation.
FIGURE 6 Hysterectomy for the large, solid, fibroid uterus
D. After trachelectomy, the large uterine specimen is removed by morcellation. Notice that the retractor is able to stretch significantly, allowing the exteriorization of uteri with diameters considerably larger than that of the retractor.
Devices that simplify the procedure
Occasionally, hysterectomy using traditional clamp, division, and suture ligation can be tedious, frustrating, and time-consuming, especially when exposure is limited or difficult. Several devices developed for laparoscopic surgery can ease suture ligation and the division of blood vessels, ligaments, and tissue bundles during minilaparotomy hysterectomy. They include the Hem-o-lok ligating clip (Weck Closure Systems); the LigaSure Atlas, a vessel sealer-divider (Valleylab, Tyco Healthcare, Boulder, Colo); the ETS 45-Flex endoscopic linear cutter (Ethicon Endo-Surgery, Cincinnati, Ohio); and the PK bipolar cutting forceps (Gyrus Medical, Maple Grove, Minn).
Additional concerns
Is the incision too large? Fears that incisions over 5 cm might nullify minimally invasive surgery’s benefits have proven unfounded.
Laparoscopic procedures that use a 7-cm to 8-cm incision to introduce the hand into the abdomen, as well as those performed in conjunction with minilaparotomy, have consistently failed to identify a link between these combinations and morbidity or lengthy recovery. A “large” minilaparotomy incision is still superior to a standard abdominal hysterectomy in terms of convalescence, and it is significantly faster and more cost-effective than a prolonged laparoscopic or laparoscopic-assisted vaginal hysterectomy.3-10
Do any conditions contraindicate minilaparotomy? In patients with documented or strongly suspected severe pelvic conditions (for example, advanced endometriosis, pelvic inflammatory disease, bowel disease, or malignancy), preliminary laparoscopic evaluation to determine the pathologic condition’s severity and extent is strongly recommended.
If during this assessment you detect pathology that is not appropriate for laparoscopic surgery or minilaparotomy, perform a traditional laparotomy. If, however, this evaluation demonstrates that pelvic pathology is amenable to laparoscopic surgery, a laparoscopic hysterectomy or laparoscopic-assisted minilaparotomy hysterectomy is indicated.
Dr. Pelosi II reports that he is a consultant for Apple Medical Corporation. Dr. Pelosi III reports no affiliations or financial arrangements with any of the manufacturers of products mentioned in this article or their competitors.
1. Kustner O. Der suprasymphysare kruzschnitt, eine methode der coeliotomie bei wening umfanglichen affektionen der weiblichen beckenorgane. Monatsschr Geburtshilfe Gynakol. 1896;4:197-206.
2. Doyen E. Surgical Therapeutics and Operative Technique. Vol. III. Spencer-Browne H, translator. London, England: Bailliere, Tindal and Cox; 1920.
3. Benedetti Panicci P, Maneschi F, Cutillo G, et al. Surgery by minilaparotomy in benign gynecologic disease. Obstet Gynecol. 1996;87:456-459.
4. Benedetti Panicci P, Zullo MA, Casalino B, et al. Subcutaneous drainage versus no drainage after minilaparotomy in gynecologic benign conditions. Am J Obstet Gynecol. 2003;188:71-75.
5. Pelosi MA, II, Pelosi MA, III. The suprapubic cruciate incision for laparoscopic assisted microceliotomy. J Soc Laparoendosc Surg. 1997;1:269-272.
6. Pelosi MA, II, Pelosi MA, III. Self-retaining abdominal retractor for minilaparotomy. Obstet Gynecol. 2000;96:775-778.
7. Pelosi MA, II, Pelosi MA, III. Hand-assisted laparoscopy for complex hysterectomy. J Am Assoc Gynecol Laparosc. 1999;6:183-188.
8. Pelosi MA, II, Pelosi MA, III. Hand-assisted laparoscopic cholecystectomy at cesarean section. J Am Assoc Gynecol Laparosc. 1999;6:491-495.
9. Pelosi MA, II, Pelosi MA, III. Hand-assisted laparoscopy (handoscopy) for megamyomectomy: A case study. J Reprod Med. 2000;45:519-525.
10. Pelosi MA, II, Pelosi MA, III, Eim J. Hand-assisted laparoscopy for pelvic malignancy. J Laparoendosc Adv Surg Tech. 2000;10:143-150.
Although laparoscopic hysterectomy offers a minimally invasive alternative to laparotomy when vaginal hysterectomy is contraindicated, it has its drawbacks. Among them: the cost of expensive equipment, the long learning curve, and prolonged operating time.
We describe another alternative to open surgery that is comparable to laparoscopic hysterectomy in postoperative pain, cosmetic results, and time to return to normal activities. Our procedure—a redesigned minilaparotomy hysterectomy—relies on traditional open techniques and inexpensive novel instrumentation, making it significantly faster than laparoscopy and easy to perform and teach.
For patients who cannot undergo vaginal hysterectomy, this new modality offers an expeditious, minimal-access option. Gynecologists reluctant to relinquish the routine use of standard laparotomy may find this approach an appealing, less-invasive alternative.
Position, incision, and retraction are crucial to success
Our minilaparotomy hysterectomy is a systemized approach with elements derived from both open and laparoscopic surgery. Three preparatory components are involved:
- position
- incision
- retraction
All are critical to a successful hysterectomy, ensuring that the procedure never becomes a haphazard struggle through an improvised, scaled-down, conventional Pfannenstiel or vertical incision. Our approach also avoids cumbersome traditional laparotomy exposure maneuvers and positioning.
Position: Modified lithotomy. After regional or general anesthesia is given, position the patient in a modified lithotomy with both arms tucked as for laparoscopic surgery. Place the legs in boot-type stirrups, with no hip flexion and sufficient thigh abduction to expose the vagina.
Next, perform a thorough pelvic examination and place an indwelling, transurethral catheter. A sturdy, hinged uterine manipulator is of paramount importance for the hysterectomy, as it facilitates exposure of the adnexa as well as elevation/rotation of the uterus and the uterine attachments. We recommend the Pelosi Uterine Manipulator (Apple Medical Corporation, Marlboro, Mass) or its equivalent (FIGURE 1).
Standard minilaparotomy
The use of standard minilaparotomy—which is nothing more than a conventional laparotomy of limited length (3 cm to 6 cm), performed either transversely or vertically—has been confined to the surgical treatment of benign pelvic pathology of limited extent.
To generate sufficient exposure to work effectively, surgeons using the standard minilaparotomy have relied on the length of the abdominal incision and, secondarily, bowel packing and metal handheld or self-retaining fixed retraction systems. When exposure is difficult to achieve or maintain, however, routine surgical maneuvers become frustrating and time-consuming—unless the clinician uses extensive traction force, extends the incision length, or performs muscle-splitting. These alternatives often result in an uncomfortable, slow recovery typical of most laparotomies, thereby negating the primary goal of minimally invasive surgery.
Use of traditional minilaparotomy for hysterectomy has been reported only rarely. Hoffman et al1 found the procedure safe and effective in nonobese women in whom a vaginal approach was precluded. Benedetti Panicci et al2,3 also have used minilaparotomy successfully in benign gynecologic disease and hysterectomy.
The Kustner incision
Originally reported in 1896,4 this incision is avoided by most surgeons in favor of complete transverse or complete vertical incisions—largely due to difficulties with exposure, troublesome seroma formation, and wound complications secondary to increased fluid accumulation in the large dead space that results from wide dissection of the subcutaneous flap.
In the early 1990s, we realized the potential benefits of a scaled-down Kustner’s incision (2 cm to 5 cm) when assistance was needed via minilaparotomy during such laparoscopic-assisted procedures as uterine morcellation, tubal reanastomosis, and extensive uterine suture and reconstruction following complex laparoscopic myomectomy.5 As a substitute for laparoscopy and laparotomy, we then tried a minilaparotomy Kustner’s incision (3 cm to 5 cm) as the sole means of surgical access, assessment, and treatment for benign pelvic conditions.
Benefits of this incision. When a sturdy uterine manipulator was used to facilitate exposure of the adnexa and uterine elevation/rotation, we found this technique more effective than similar procedures using a scaled-down Pfannenstiel or Maylard incision. In addition, because the incision was small and the extent of subcutaneous dissection required to expose the rectus fascia in a vertical fashion was limited, there was no need for incision drainage. Nor was the procedure associated with seroma formation, as the full-sized Kustner’s incision had been.3 However, the minilaparotomy Kustner’s incision still suffered from limited surgical exposure.
Adding the retractor
It became clear that a soft, self-retaining abdominal retractor that is capable of creating a rapid, effective, nontraumatic, and predictable circular area of abdominal retraction would be helpful, particularly one that could be placed through the minilaparotomy Kustner’s incision.6 Once this retractor system was developed, using technology borrowed from hand-assisted laparoscopy,7-10 the minilaparotomy hysterectomy became a much simpler, more useful surgical option.
REFERENCES
1. Hoffman MS, Lynch CM. Minilaparotomy hysterectomy. Am J Obstet Gynecol. 1998;179:316-320.
2. Benedetti Panicci P, Maneschi F, Cutillo G, et al. Surgery by minilaparotomy in benign gynecologic disease. Obstet Gynecol. 1996;87:456-459.
3. Benedetti Panicci P, Zullo MA, Casalino B, et al. Subcutaneous drainage versus no drainage after minilaparotomy in gynecologic benign conditions. Am J Obstet Gynecol. 2003;188:71-75.
4. Kustner O. Der suprasymphysare kruzschnitt, eine methode der coeliotomie bei wening umfanglichen affektionen der weiblichen beckenorgane. Monatsschr Geburtshilfe Gynakol. 1896;4:197-206.
5. Pelosi MA, II, Pelosi MA, III. The suprapubic cruciate incision for laparoscopic assisted microceliotomy. J Soc Laparoendosc Surg. 1997;1:269-272.
6. Pelosi MA, II, Pelosi MA, III. Self-retaining abdominal retractor for minilaparotomy. Obstet Gynecol. 2000;96:775-778.
7. Pelosi MA, II, Pelosi MA, III. Hand-assisted laparoscopy for complex hysterectomy. J Am Assoc Gynecol Laparosc. 1999;6:183-188.
8. Pelosi MA, II, Pelosi MA, III. Hand-assisted laparoscopic cholecystectomy at cesarean section. J Am Assoc Gynecol Laparosc. 1999;6:491-495.
9. Pelosi MA, II, Pelosi MA, III. Hand-assisted laparoscopy (handoscopy) for megamyomectomy: A case study. J Reprod Med. 2000;45:519-525.
10. Pelosi MA, II, Pelosi MA, III, Eim J. Hand-assisted laparoscopy for pelvic malignancy. J Laparoendosc Adv Surg Tech. 2000;10:143-150.
Incision: Modified Kustner’s. Open the abdomen with a cruciate incision. Using a conventional scalpel and the Bovie device, make a 2.5-cm to 5-cm transverse incision through the skin and subcutaneous fat until you reach the anterior rectus fascia (FIGURE 2A). Clear the fat from the midline superiorly and inferiorly to expose approximately 5 cm to 6 cm of fascia in the vertical axis. Then incise the anterior rectus fascia in a vertical direction through the full length of the cleared area (FIGURE 2B).
Retract the rectus muscles from the midline, exposing the transversalis fascia and the underlying peritoneum. Enter the peritoneum digitally or with scissors above the level of the bladder dome, incising vertically until the entrance extends the full length of the fascial incision (FIGURE 2C).
This modified Kustner’s incision is essentially a vertical midline incision in its deeper layers.1 The rapid surgical dissection of the fascia and rectus muscles and the intraperitoneal entry are relatively bloodless. This approach yields a surgical exposure superior to that of a small Pfannenstiel or Maylard incision.
Note that, in some patients, a vertical incision can be selected if there is a prior vertical incision or if the perioperative workup suggests a malignancy that may require a later extension of the original minilaparotomy incision.
Retraction: Soft, sleeve-type, self-retaining abdominal retractor. This device consists of a flexible plastic inner ring and a firmer outer ring connected by a soft plastic sleeve (FIGURE 3A). Two models are available: the Mobius (Apple Medical Corporation) and the Protractor (Weck Closure Systems, Research Triangle Park, NC).
Squeeze the inner ring into the peritoneal cavity through the minilaparotomy incision, allowing it to spring open against the parietal peritoneum. Conduct a digital assessment to ensure that no viscera are trapped by elevating the outer ring. Next, roll the outer ring onto the sleeve, collecting excess length, until it sits firmly against the skin (FIGURES 3B and 3C). The result, when there is adequate tension within the sleeve, is a circular area of retraction offering excellent exposure of the pelvis. Note that during surgery you may need to adjust the outer ring if the sleeve loosens.
The soft, self-retaining abdominal retractor offers several advantages over traditional abdominal retraction:
- Atraumatic retraction. This device distributes retraction force evenly around the entire incision. Because standard retractors concentrate retraction force at only a few points, they often lead to tissue trauma, nerve damage, bruising, and postoperative pain.
- Incision protection. The retractor’s flexible material lines the incision, protecting the wound’s edges from contamination and potential implantation of malignant cells.
- Improved access. Because the continuous retraction force is delivered more effectively to the incision, exposure is maximized. As a result, the need for intensive surgical assistance is dramatically reduced.
- Adjustable height. The retractor’s design lets it adapt to wounds of varying depth—a feature that makes it ideal for obese patients. The device compresses the patient’s skin and peritoneum between the external and internal rings, keeping the full thickness of the abdominal incision constant throughout the surgery.
- Cost-effectiveness. The device, which costs under $100, is simple and fast to set up. In our experience, placement takes approximately 2 minutes; this compares favorably with table-mounted or self-retaining rigid retraction systems, which may require significant capital expenditures (cost may run in the thousands), repair costs, and complicated set-ups.
FIGURE 1 Hinged uterine manipulator
A sturdy hinged uterine manipulator facilitates exposure of the adnexa as well as elevation/rotation of the uterus.
FIGURE 2 Cruciate incision
A. Make a transverse incision suprapubically through the skin and the subcutaneous fat to reach the anterior rectus fascia.
FIGURE 2 Cruciate incision
B. Clear the fat from the midline to expose the rectus fascia in the vertical axis, then incise the fascia in a vertical direction through the full length of the previously cleared area. The rectus muscles are retracted, thereby exposing the peritoneum.
FIGURE 2 Cruciate incision
C. Incise the peritoneum vertically until it extends the full length of the fascial incision.
FIGURE 3 Soft, sleeve-type, self-retaining abdominal retractor
A. At left, the Protractor (Weck Closure Systems); at right, the Mobius (Apple Medical Corporation).
FIGURE 3 Soft, sleeve-type, self-retaining abdominal retractor
B. After inserting the inner ring into the peritoneal cavity, twist the outer ring downward until it inverts and rests snuggly against the skin.
FIGURE 3 Soft, sleeve-type, self-retaining abdominal retractor
C. An atraumatic, circular, self-retaining area of retraction is created.
Standard technique: Exteriorize the uterus; divide uterine attachments, vessels
Assess the anatomy. Using your index finger and the uterine manipulator to rotate and flex the uterus, carefully assess the uterus, adnexa, and pelvis, noting the location of the ureters. Determine the extent of any unexpected pelvic pathology or adhesions, using traditional small retractors or gentle packing to gain additional exposure. Perform any adhesiolysis that is necessary.
Exteriorize the uterus. Next, bring the uterus and the adnexa above the abdominal wall in order to perform as much of the hysterectomy extracorporeally as possible. Pass the uterus or adnexa through the incision with the upward assistance of the uterine manipulator, then divide the upper uterine attachments (FIGURE 4A).
Increase exposure. You can achieve additional uterine elevation and targeted exposure in several ways. For example, a strong traction suture can be placed in the uterine fundus, left long, and secured with a clamp. To achieve uterine elevation, place long clamps lateral to the corpus. Another effective approach is to place a heavy tenaculum on the uterine fundus.
When lateral exposure is limited, divide the proximal adnexal pedicles and round ligaments to begin the operation, and remove the adnexa separately following the completion of the hysterectomy.
Divide the uterine vessels through the small incision using clamping, division, and ligation. Unless you intend to preserve the cervix, mobilize the bladder to the level of the anterior vaginal fornix. Inward pressure on the uterine manipulator provides additional elevation of the lower uterine vasculature and the cardinal and uterosacral ligaments as these structures are ligated and divided. Amputate the uterine specimen from the vaginal cuff using the uterine manipulator to guide the vaginal circumcision (FIGURE 4B). Close the vaginal cuff using standard closure.
If the cervix is to be preserved, amputate the uterus supracervically following division of the uterine vessels. Then suture the cervical stump in the traditional fashion. Upward elevation of the cervix using the uterine manipulator expedites this step.
Complete the procedure. Once the surgery is completed, remove the retractor, hooking the bottom ring by inserting a finger into it and pulling it up and out of the incision (FIGURE 4C). Closing a cruciate incision is faster and requires less exposure than closing a mini-Pfannenstiel incision. Eliminate the possibility of postoperative wound hematoma or seroma formation by applying a vertical pressure dressing over the incision (FIGURE 4D). Remove the dressing 24 hours later.
FIGURE 4 Hysterectomy for the normal to moderately enlarged uterus
A. Exteriorize the uterus as much as possible with both upward assistance of the manipulator and uterine fundal elevation (using clamps lateral to the uterus, a heavy tenaculum, or a traction suture). Then conduct a standard hysterectomy.
FIGURE 4 Hysterectomy for the normal to moderately enlarged uterus
B. Separate the uterus from the vagina using the manipulator to guide the vaginal circumcision. (If the cervix is to be preserved, a supracervical amputation is performed instead.)
FIGURE 4 Hysterectomy for the normal to moderately enlarged uterus
C. After completing the surgery, remove the retractor from the incision.
FIGURE 4 Hysterectomy for the normal to moderately enlarged uterus
D. Apply a vertical pressure dressing over the incision.
Variations for abnormal uteri
The large fibroid uterus: Begin with the dominant myoma. A large fibroid uterus can be easily removed with our minilaparotomy technique using 3 basic steps:
- Reduce size by selective myomectomy.
- Deliver the debulked uterus through the abdominal incision.
- Perform extracorporeal hysterectomy.
First, you must conduct a thorough assessment of the number, size, and location of the myomas. Begin the myomectomy on the largest tumor of those closest to the minilaparotomy incision. (Minimize bleeding by injecting diluted vasopressin subserosally prior to the procedure.)
Incise the uterine serosa, myometrium, and pseudocapsule of the myoma via scalpel or Bovie electrocautery until the whorly appearance of the myoma is apparent. Next, grasp the myoma with claw-toothed forceps to stabilize it and place it under traction. Then, using a combination of sharp and digital dissection, develop a plane of dissection between the fibroid and the myometrium (FIGURE 5A).
After securing the dominant myoma, deliver it through the abdominal incision. If the myoma is too large to be removed intact from the abdominal cavity, morcellate it using a scalpel or scissors (FIGURE 5B). Then continue systematic removal of the remaining myomas using the same approach. It is not necessary to remove all myomas—the goal of this process is merely to permit delivery of the uterine body for subsequent hysterectomy.
Once the uterus is debulked, deliver it through the abdominal incision. Hysterectomy then is easily completed (FIGURE 5C).
The ‘solid’ uterus: In situ supracervical hysterectomy and uterine morcellation.
Very large uteri are sometimes homogeneous and solid in nature, possessing few or no individual myomas. This so-called cannonball fibroid uterus is the most challenging type of uterus to remove. The selective-myomectomy approach cannot be used because of the potential for massive bleeding and the technical anatomical difficulties that arise when operating through such a small abdominal incision.
Instead, manage this type of uterus by performing a deliberate in situ supracervical hysterectomy through the minilaparotomy incision. At the end of this procedure, morcellate the amputated fibroid uterus.
Begin the surgery by dividing the upper uterine attachments. Regardless of uterine size, the origins of the round and adnexal ligaments will always be lateral to and within easy reach of a transverse minilaparotomy incision. (Access to these areas is the only factor that determines the feasibility of this procedure; uterine size is completely irrelevant.) We have found that these elongated ligaments are quite lax. Thus, in most cases it is relatively simple to navigate your index finger laterally and, using digital traction, elevate these structures into the minilaparotomy incision (FIGURE 6A). You can then clamp, cut, and suture the ligaments in the standard fashion in whatever sequence is most efficient.
Thanks to the retractor, minimal assistance is necessary during the surgery. You can create additional exposure by deflecting the uterus toward the opposite side of the pelvis using external abdominal pressure and the uterine manipulator.
Once both round ligaments and adnexal pedicles are divided, dissect the bladder flap to expose the uterine arteries (inward pressure on the uterine manipulator provides helpful countertraction). Then clamp, divide, and ligate the uterine arteries (FIGURE 6B).
The uterus is now ready for supracervical amputation. Upward traction on the isthmus by means of a rubber tourniquet facilitates uterine division (FIGURE 6C). After the uterus is amputated, push it toward the upper abdomen to increase exposure for suturing of the cervical stump (if the cervix is preserved) or for cervical excision and vaginal cuff closure (when total hysterectomy is chosen).
Next, remove the uterine specimen by morcellation through the minilaparotomy incision. Using the Doyen ladder-shaped uterine morcellation technique (originally described in the early 1920s) grasp an area of the uterus and, alternating right and left, make deep but incomplete incisions on the uterus, creating a ladder shape.2 Because of its elasticity, the retractor can stretch quite significantly without tearing the edges of the abdominal incision (FIGURE 6D). This allows the easy exteriorization of uteri with diameters considerably larger than that of the retractor, mimicking the stretching of the perineum during the crowning of the fetal head.
When the surgery is complete, remove the retractor, close the minilaparotomy incision, and apply a vertical pressure dressing over the incision. Neither vaginal packing nor bladder catheterization is required.
FIGURE 5 Hysterectomy for the fibroid uterus
A. Develop a plane of dissection between the myoma and myometrium.
FIGURE 5 Hysterectomy for the fibroid uterus
B. Deliver the myoma through the incision; if it is too large to remove intact, morcellate it with a scalpel or scissors.
FIGURE 5 Hysterectomy for the fibroid uterus
C. After reducing the uterine size by selective myomectomy, deliver the debulked uterus through the abdominal incision. Then proceed with an extracorporeal total or subtotal hysterectomy.
A short learning curve
Since it uses conventional open techniques and traditional instrumentation, this method can be learned and mastered quickly.
We tend to think of this procedure as a transabdominal “vaginal” hysterectomy, since the average diameter of the minilaparotomy opening is approximately the same as the vaginal canal. Further, as in vaginal hysterectomy, only 1 portion of the uterus, adnexa, or ligaments must be exteriorized at a given time. Thus, this approach requires less general exposure but offers effective targeted exposure.
The technique also removes the need for frequent use of traumatic metal retractors, extensive bowel packing, and extended incision exposure. The benefits: diminished postoperative discomfort and bowel dysfunction.
High success rates. We have performed more than 100 minilaparotomy procedures using this technique in patients in whom vaginal hysterectomy was contraindicated. Uterine weight ranged from 80 g to 2,500 g. Mean operating time was 50 minutes. All patients were discharged within 36 hours. Mean return to work time was 12 days, and there have been no intraoperative or postoperative complications. All surgeries were successfully completed without laparoscopy or conversion to traditional laparotomy.
FIGURE 6 Hysterectomy for the large, solid, fibroid uterus
A. Draw the upper uterine attachments to the surgical field with finger traction.
FIGURE 6 Hysterectomy for the large, solid, fibroid uterus
B. Divide the round ligaments and proximal adnexal pedicles, then carry out division of the uterine vessels bilaterally.
FIGURE 6 Hysterectomy for the large, solid, fibroid uterus
C. After dividing both round ligaments, adnexal pedicles, and uterine vessels, place the uterine isthmus in traction with a rubber tourniquet and perform an in situ supracervical amputation.
FIGURE 6 Hysterectomy for the large, solid, fibroid uterus
D. After trachelectomy, the large uterine specimen is removed by morcellation. Notice that the retractor is able to stretch significantly, allowing the exteriorization of uteri with diameters considerably larger than that of the retractor.
Devices that simplify the procedure
Occasionally, hysterectomy using traditional clamp, division, and suture ligation can be tedious, frustrating, and time-consuming, especially when exposure is limited or difficult. Several devices developed for laparoscopic surgery can ease suture ligation and the division of blood vessels, ligaments, and tissue bundles during minilaparotomy hysterectomy. They include the Hem-o-lok ligating clip (Weck Closure Systems); the LigaSure Atlas, a vessel sealer-divider (Valleylab, Tyco Healthcare, Boulder, Colo); the ETS 45-Flex endoscopic linear cutter (Ethicon Endo-Surgery, Cincinnati, Ohio); and the PK bipolar cutting forceps (Gyrus Medical, Maple Grove, Minn).
Additional concerns
Is the incision too large? Fears that incisions over 5 cm might nullify minimally invasive surgery’s benefits have proven unfounded.
Laparoscopic procedures that use a 7-cm to 8-cm incision to introduce the hand into the abdomen, as well as those performed in conjunction with minilaparotomy, have consistently failed to identify a link between these combinations and morbidity or lengthy recovery. A “large” minilaparotomy incision is still superior to a standard abdominal hysterectomy in terms of convalescence, and it is significantly faster and more cost-effective than a prolonged laparoscopic or laparoscopic-assisted vaginal hysterectomy.3-10
Do any conditions contraindicate minilaparotomy? In patients with documented or strongly suspected severe pelvic conditions (for example, advanced endometriosis, pelvic inflammatory disease, bowel disease, or malignancy), preliminary laparoscopic evaluation to determine the pathologic condition’s severity and extent is strongly recommended.
If during this assessment you detect pathology that is not appropriate for laparoscopic surgery or minilaparotomy, perform a traditional laparotomy. If, however, this evaluation demonstrates that pelvic pathology is amenable to laparoscopic surgery, a laparoscopic hysterectomy or laparoscopic-assisted minilaparotomy hysterectomy is indicated.
Dr. Pelosi II reports that he is a consultant for Apple Medical Corporation. Dr. Pelosi III reports no affiliations or financial arrangements with any of the manufacturers of products mentioned in this article or their competitors.
1. Kustner O. Der suprasymphysare kruzschnitt, eine methode der coeliotomie bei wening umfanglichen affektionen der weiblichen beckenorgane. Monatsschr Geburtshilfe Gynakol. 1896;4:197-206.
2. Doyen E. Surgical Therapeutics and Operative Technique. Vol. III. Spencer-Browne H, translator. London, England: Bailliere, Tindal and Cox; 1920.
3. Benedetti Panicci P, Maneschi F, Cutillo G, et al. Surgery by minilaparotomy in benign gynecologic disease. Obstet Gynecol. 1996;87:456-459.
4. Benedetti Panicci P, Zullo MA, Casalino B, et al. Subcutaneous drainage versus no drainage after minilaparotomy in gynecologic benign conditions. Am J Obstet Gynecol. 2003;188:71-75.
5. Pelosi MA, II, Pelosi MA, III. The suprapubic cruciate incision for laparoscopic assisted microceliotomy. J Soc Laparoendosc Surg. 1997;1:269-272.
6. Pelosi MA, II, Pelosi MA, III. Self-retaining abdominal retractor for minilaparotomy. Obstet Gynecol. 2000;96:775-778.
7. Pelosi MA, II, Pelosi MA, III. Hand-assisted laparoscopy for complex hysterectomy. J Am Assoc Gynecol Laparosc. 1999;6:183-188.
8. Pelosi MA, II, Pelosi MA, III. Hand-assisted laparoscopic cholecystectomy at cesarean section. J Am Assoc Gynecol Laparosc. 1999;6:491-495.
9. Pelosi MA, II, Pelosi MA, III. Hand-assisted laparoscopy (handoscopy) for megamyomectomy: A case study. J Reprod Med. 2000;45:519-525.
10. Pelosi MA, II, Pelosi MA, III, Eim J. Hand-assisted laparoscopy for pelvic malignancy. J Laparoendosc Adv Surg Tech. 2000;10:143-150.

